> ## Documentation Index
> Fetch the complete documentation index at: https://guide.crypto-now.io/llms.txt
> Use this file to discover all available pages before exploring further.
# Embed payments on your site
> Put a CryptoNow checkout on your own website — a 'Pay with Crypto' button or an inline iframe. No backend, no card networks in between.
You can drop a checkout onto your site two ways: a **button** that opens the CryptoNow payment widget, or an **iframe** that shows it inline. Both are copy-paste — no API keys, no server code. The customer pays on CryptoNow's hosted widget, and the payment settles to your account wallet carrying your order's `clickId` for reconciliation.
The widget is CryptoNow's hosted page (the footer reads "Payments processed by Crypto Now"). A **custom domain** can white-label that URL — see the Tip at the bottom.
Open the checkout in **Payments → Checkouts**, then **Product information**. You'll see three tabs:
* **Link** — a plain URL (opens the widget in a new tab; good for emails/QR).
* **Embed** — a ready-made **button** snippet.
* **iFrame** — an inline embed snippet.
Tick **amount and fiatCurrency** if it's a Cart checkout (so the snippet carries the basket total), and **clickId** to attribute the payment to a specific order or customer.
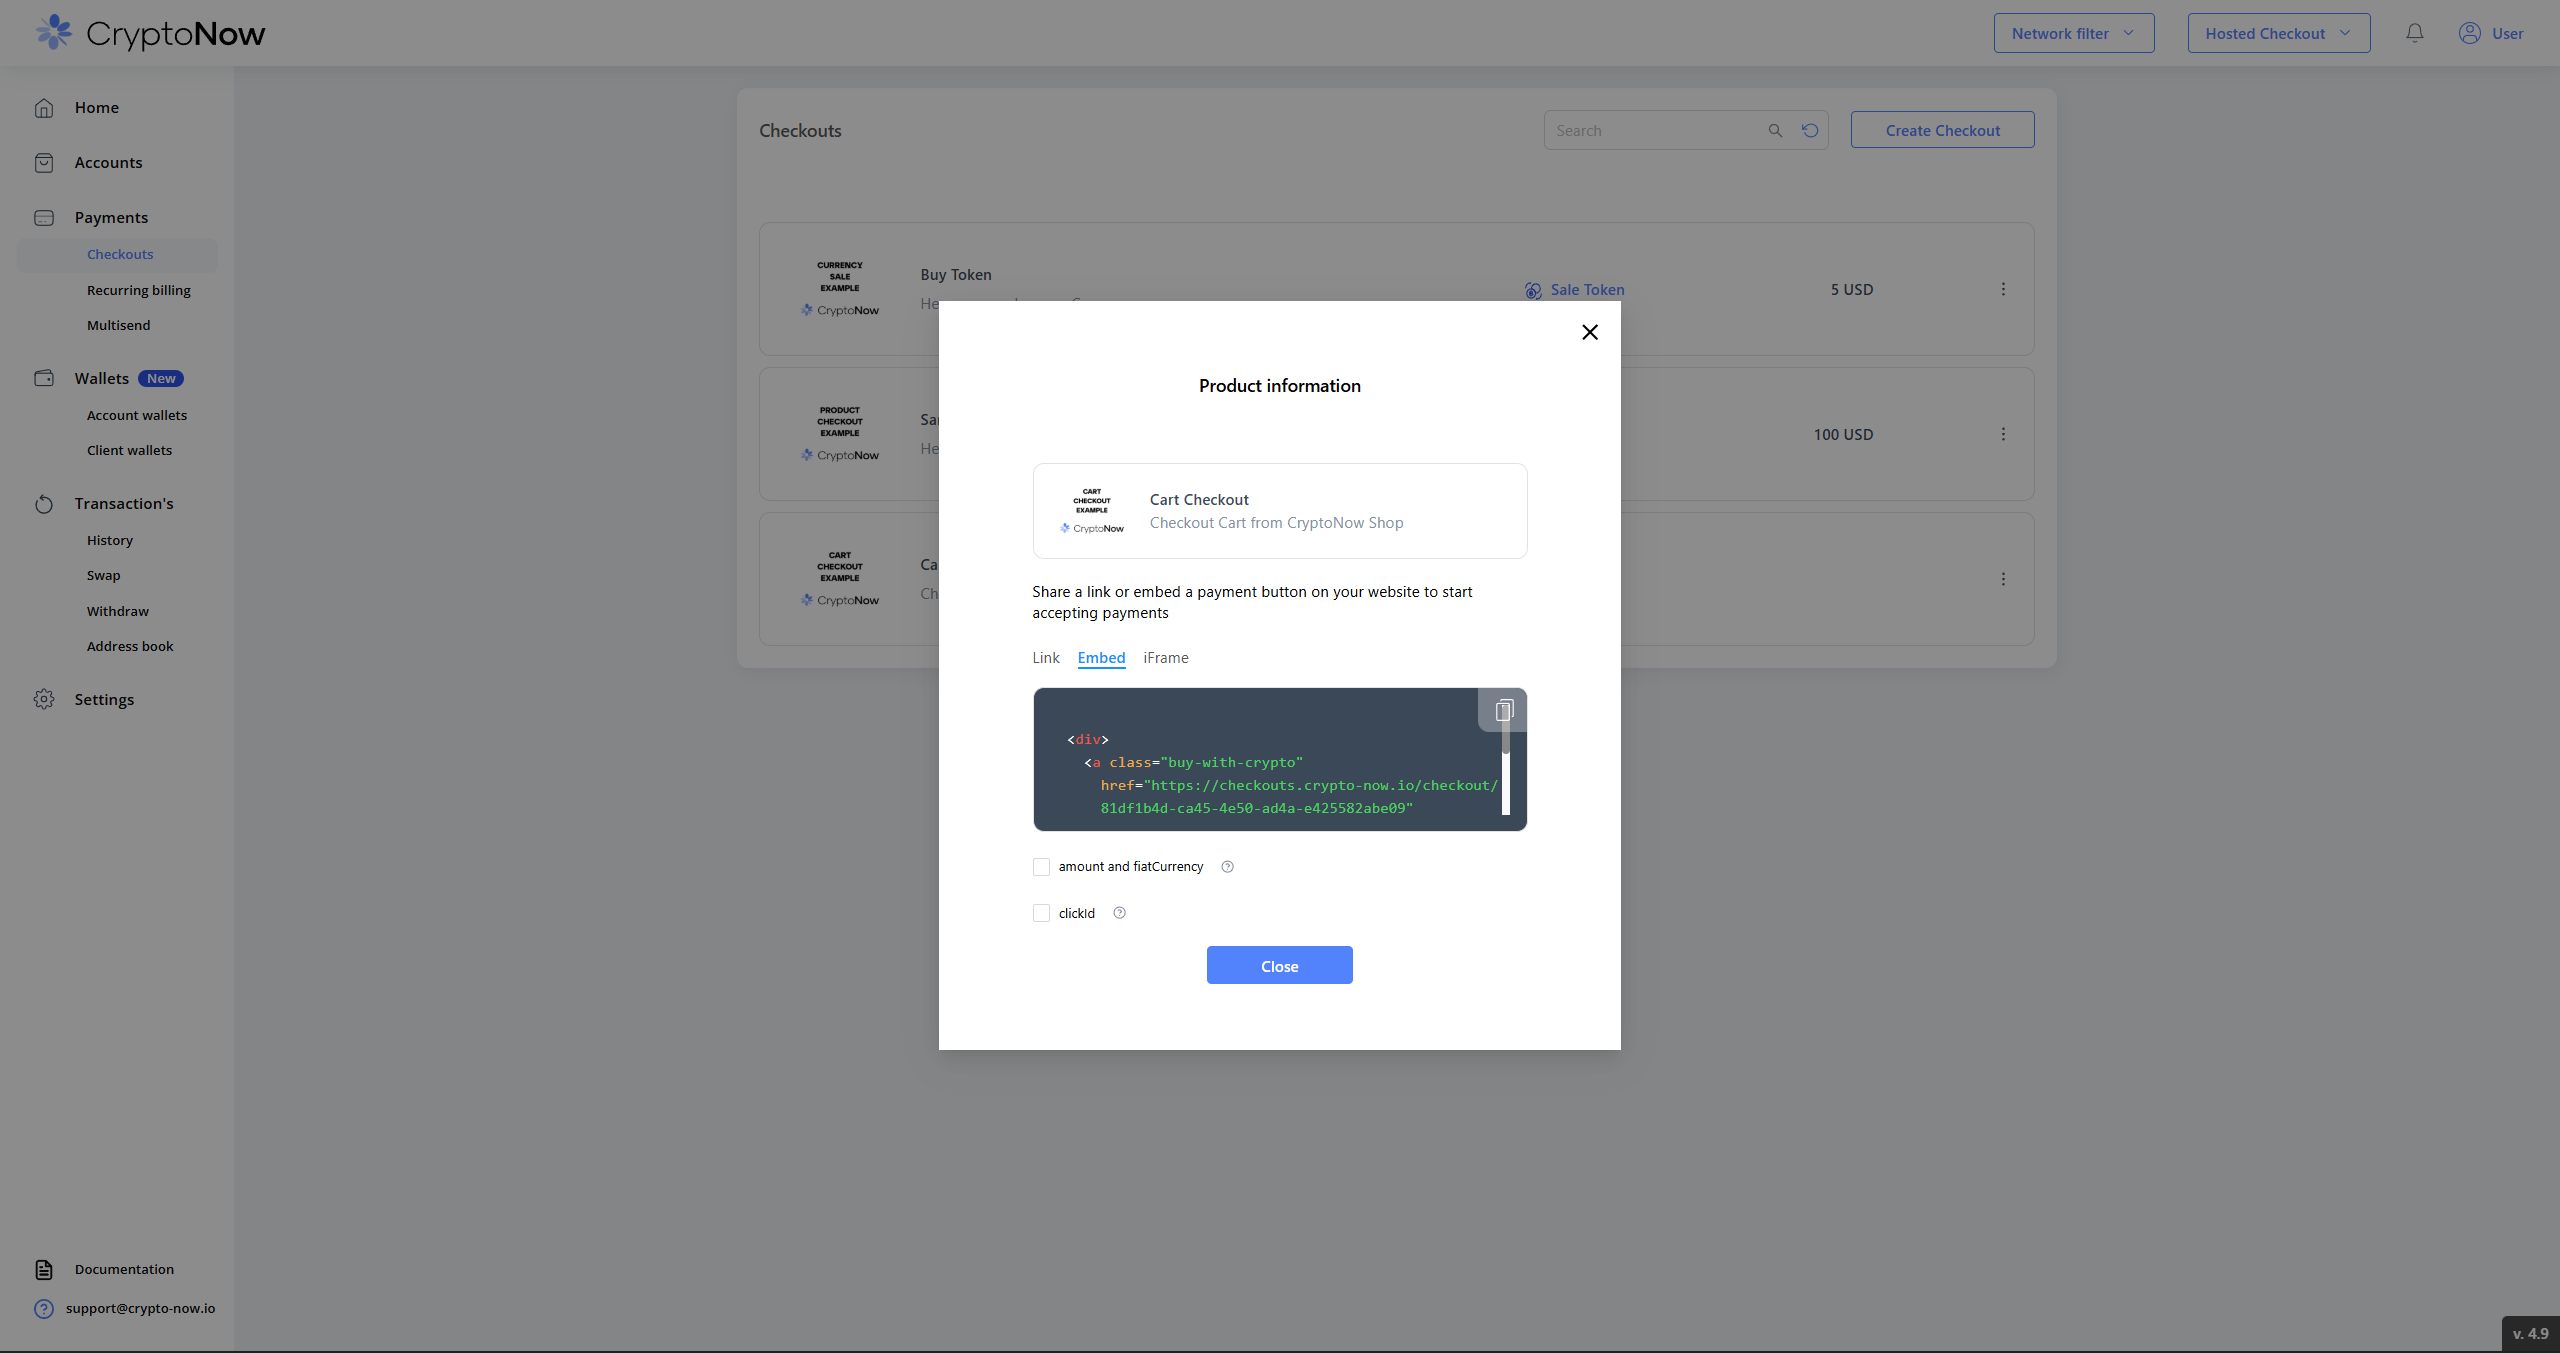 The **Embed** (button) snippet:
```html theme={"system"}
```
The **iFrame** (inline) snippet:
```html theme={"system"}
```
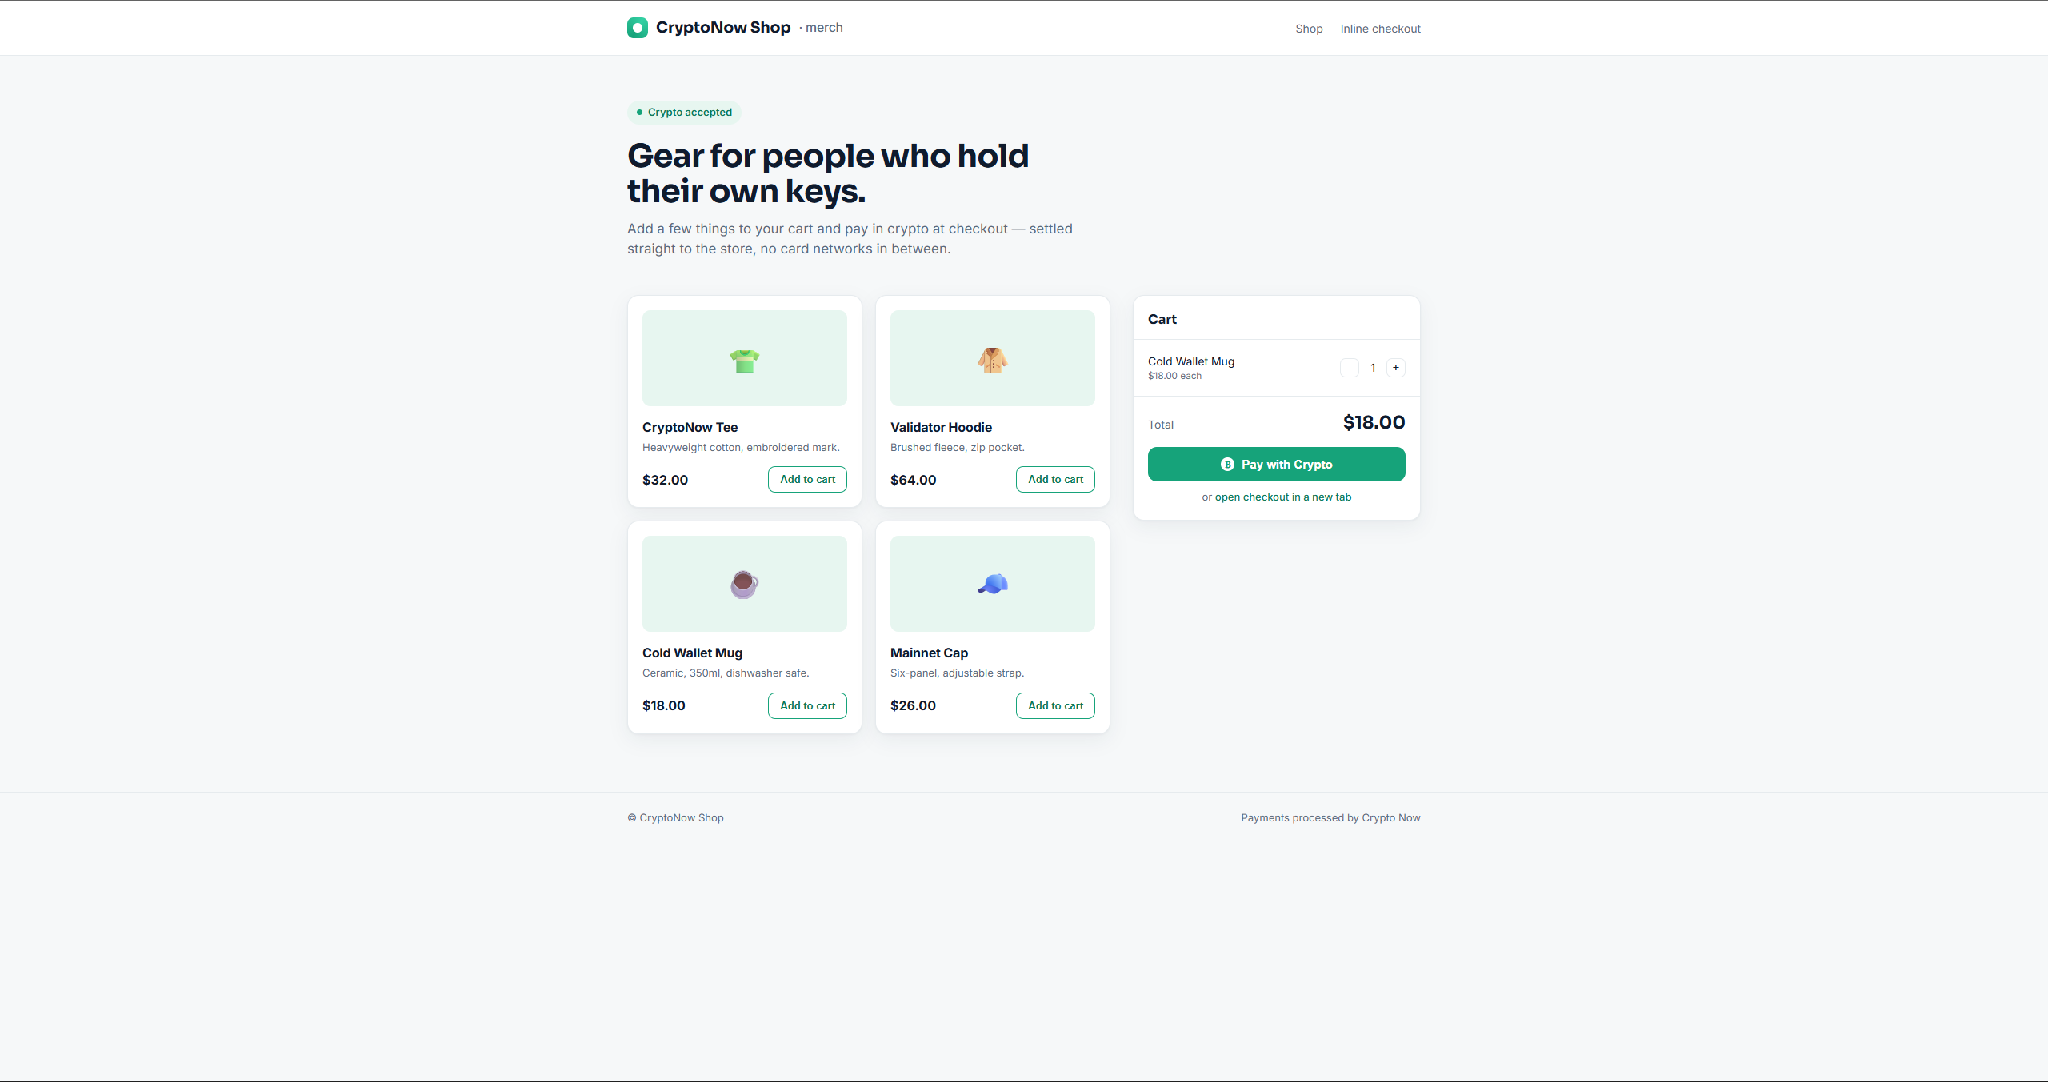
Paste the button (or iframe) snippet into your page. The button renders wherever you place it — here on a storefront's cart.
The **Embed** (button) snippet:
```html theme={"system"}
```
The **iFrame** (inline) snippet:
```html theme={"system"}
```
Paste the button (or iframe) snippet into your page. The button renders wherever you place it — here on a storefront's cart.
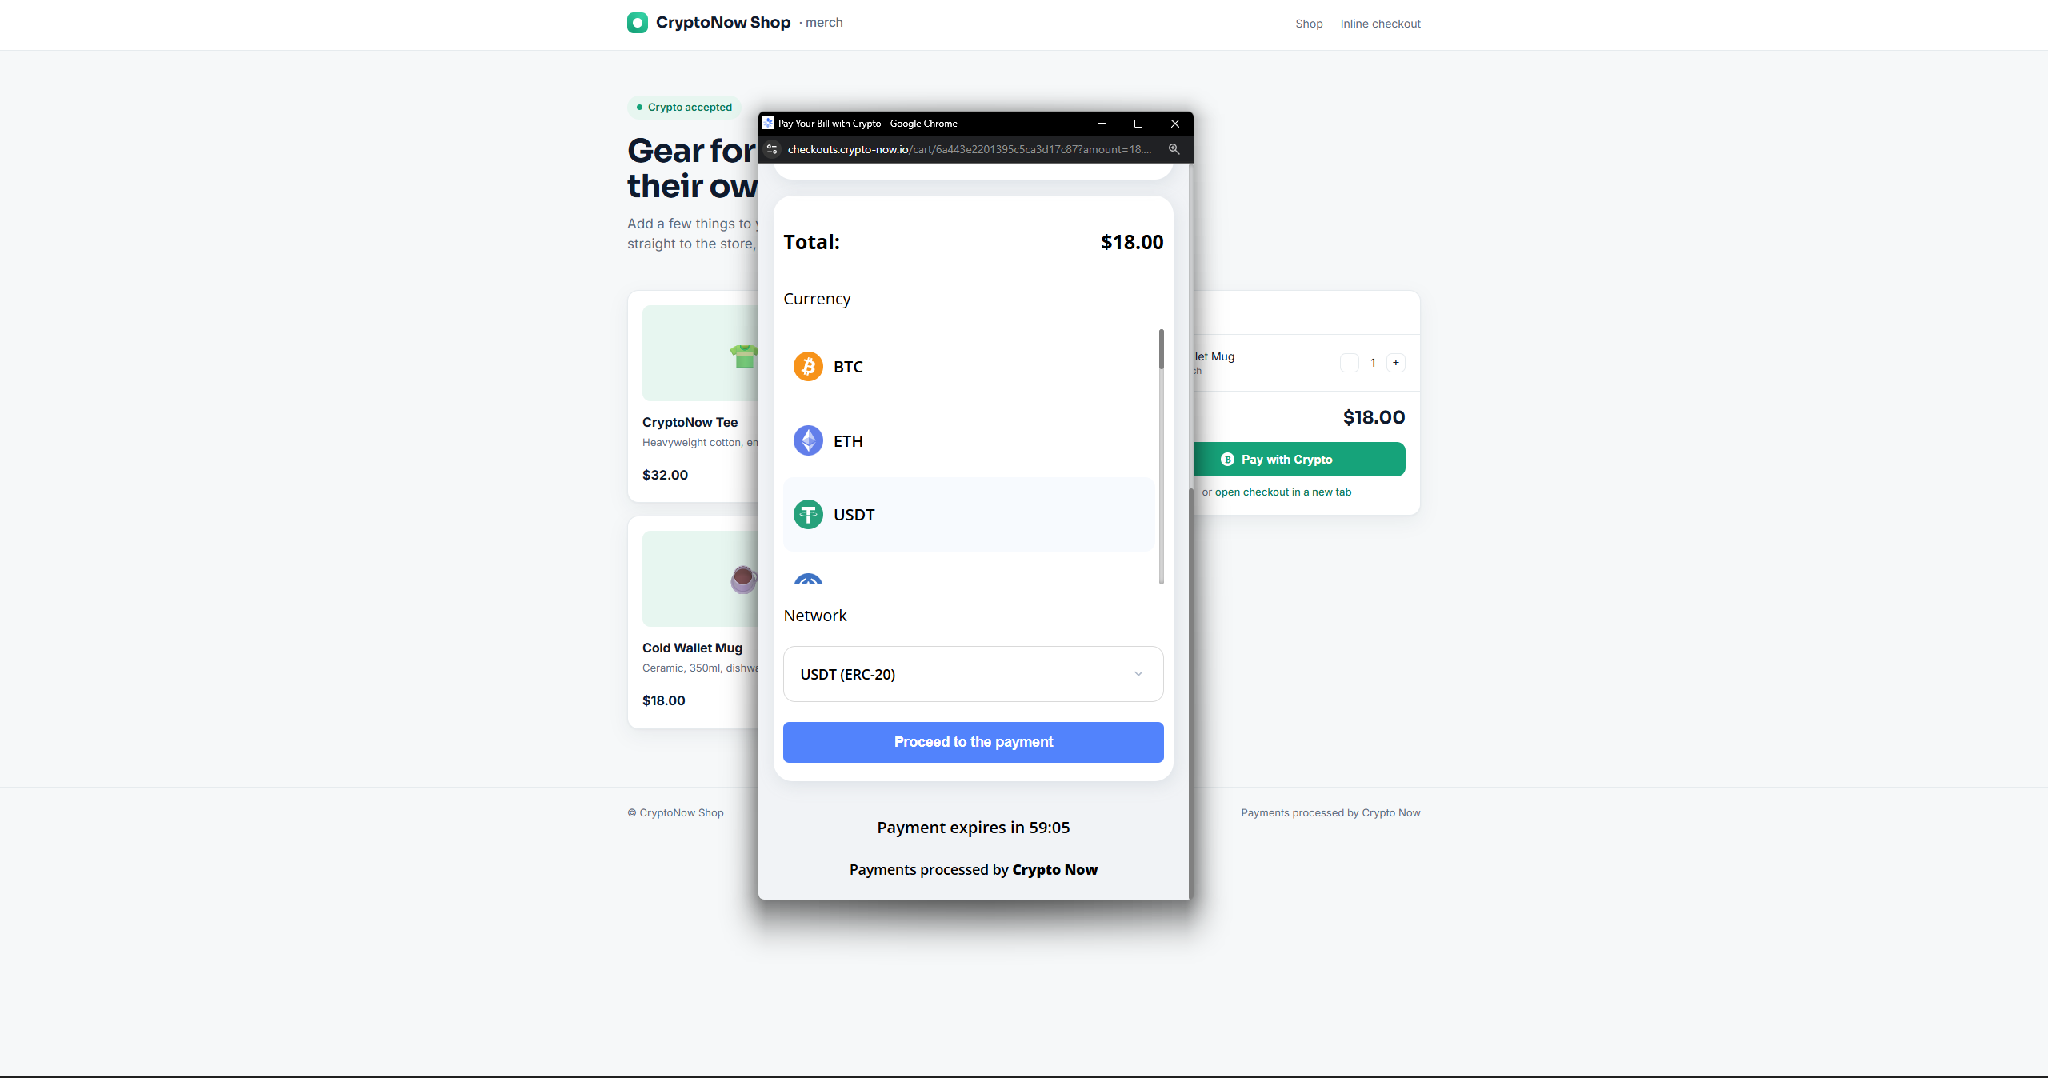
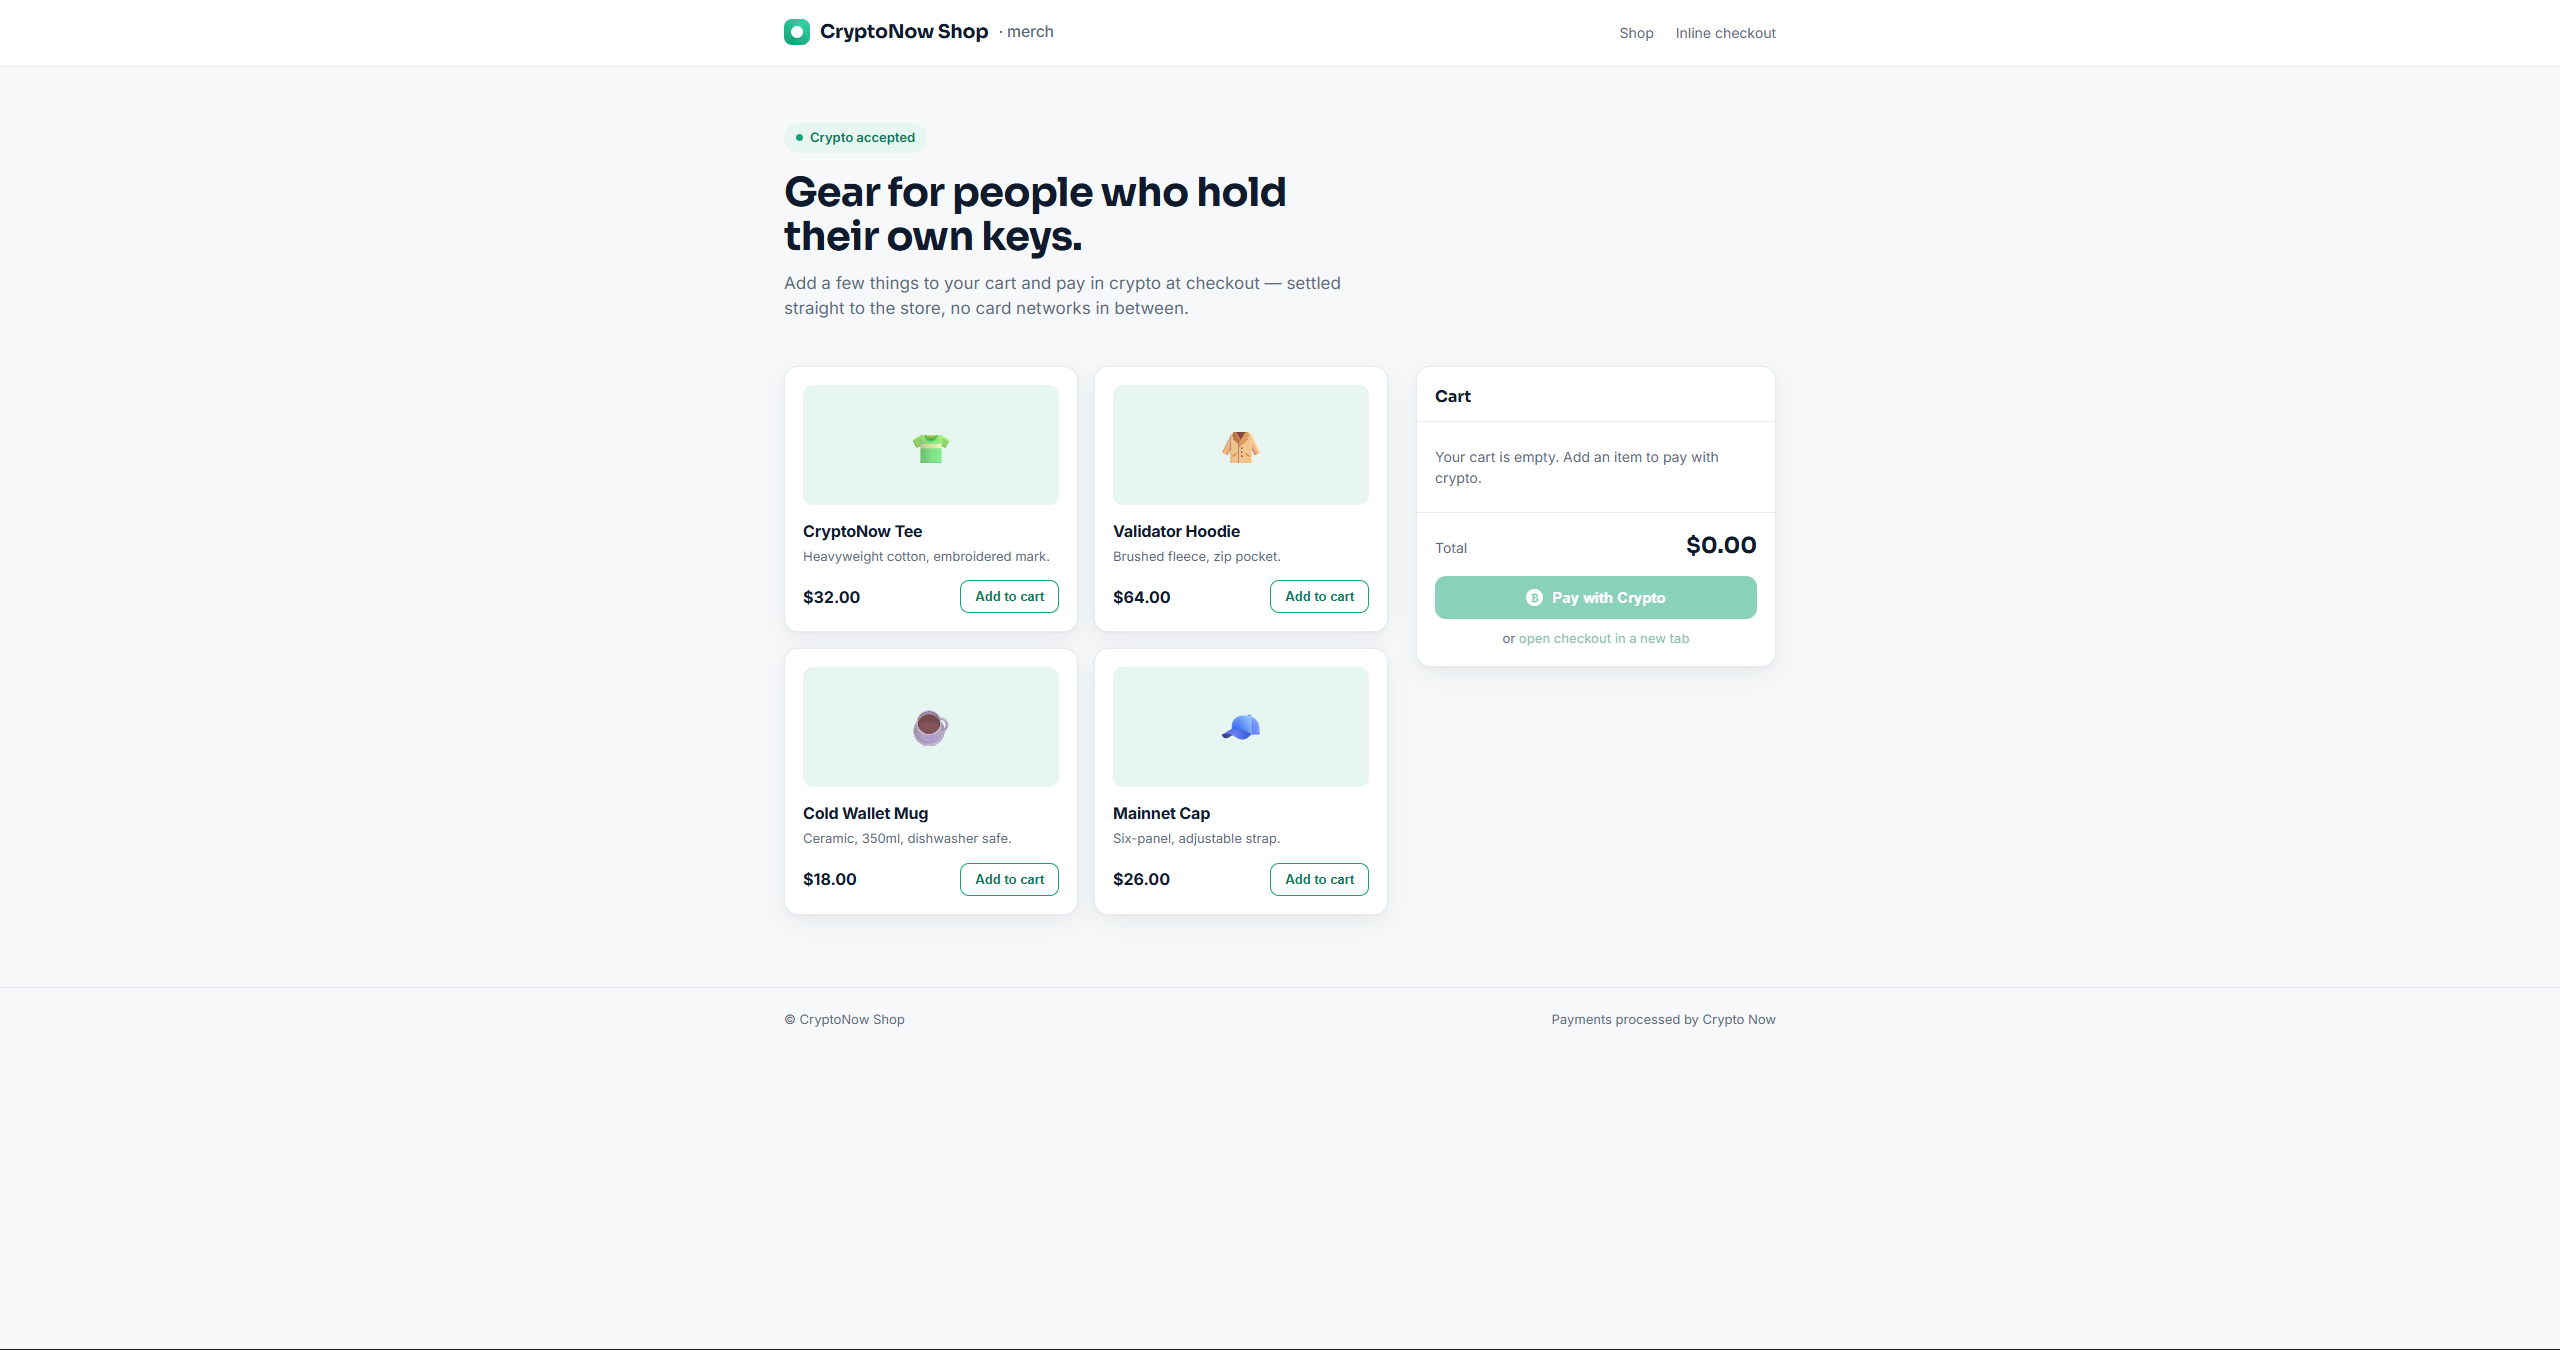 The customer fills their cart and selects **Pay with Crypto**. The hosted widget opens with the order total.
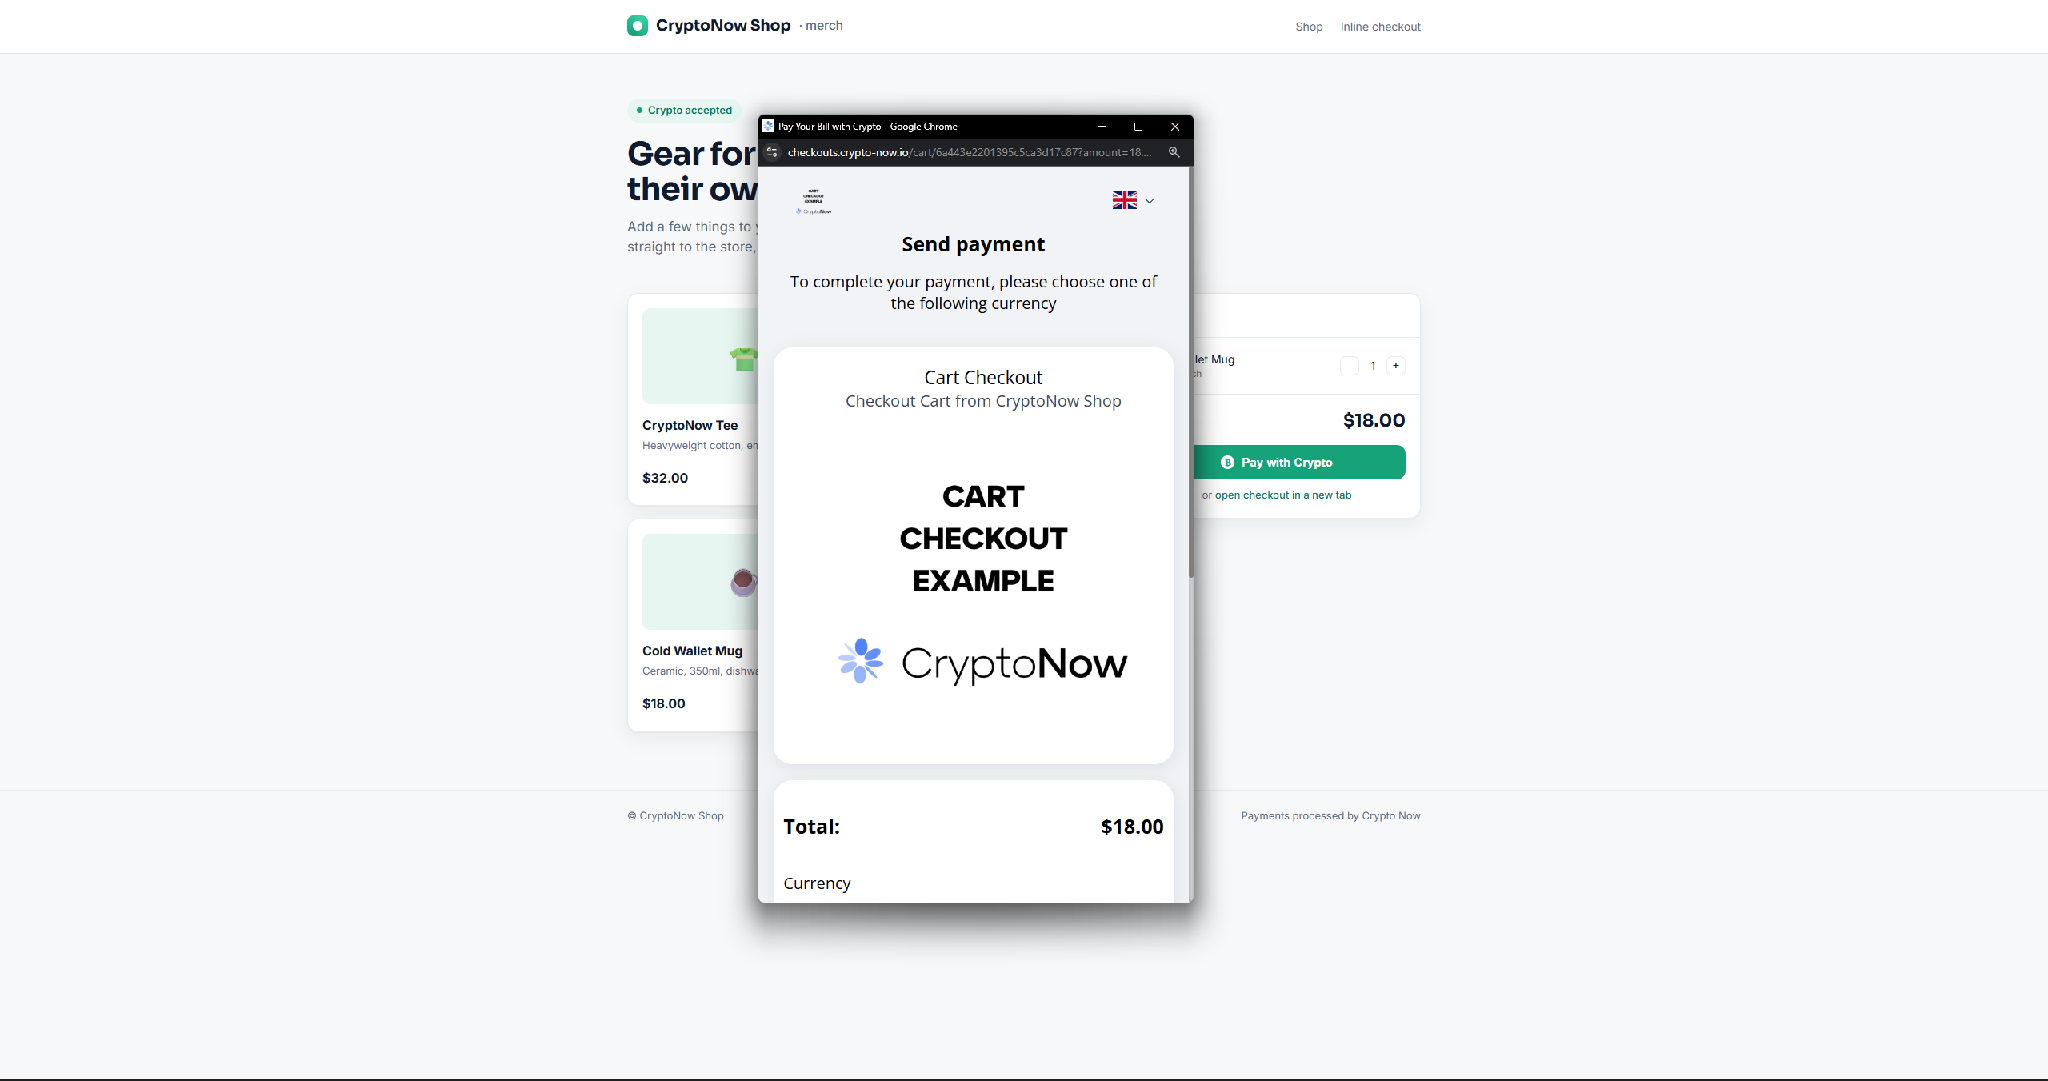 They choose a currency and network, then **Proceed to the payment**.
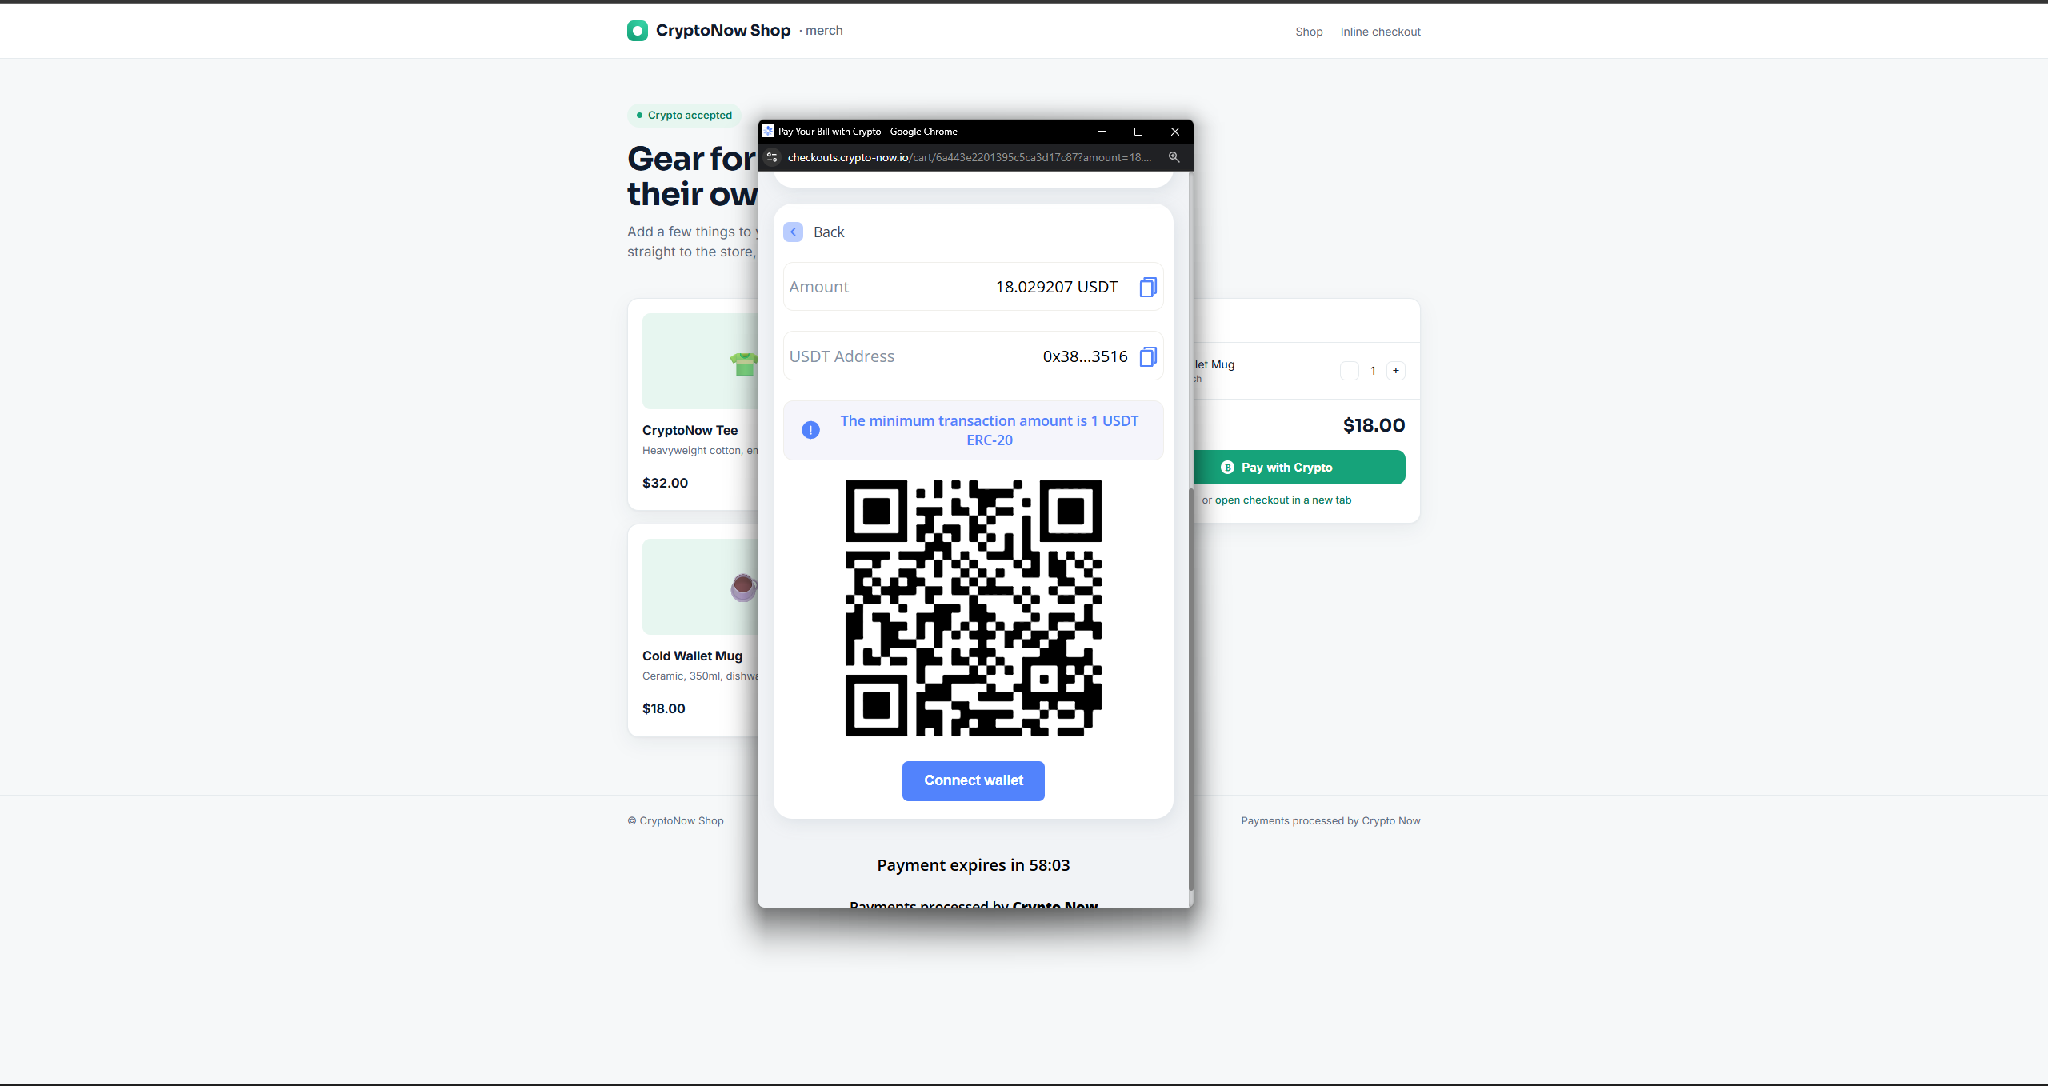
 The widget shows the exact amount, a deposit address, and a QR code, with a countdown until the charge expires.
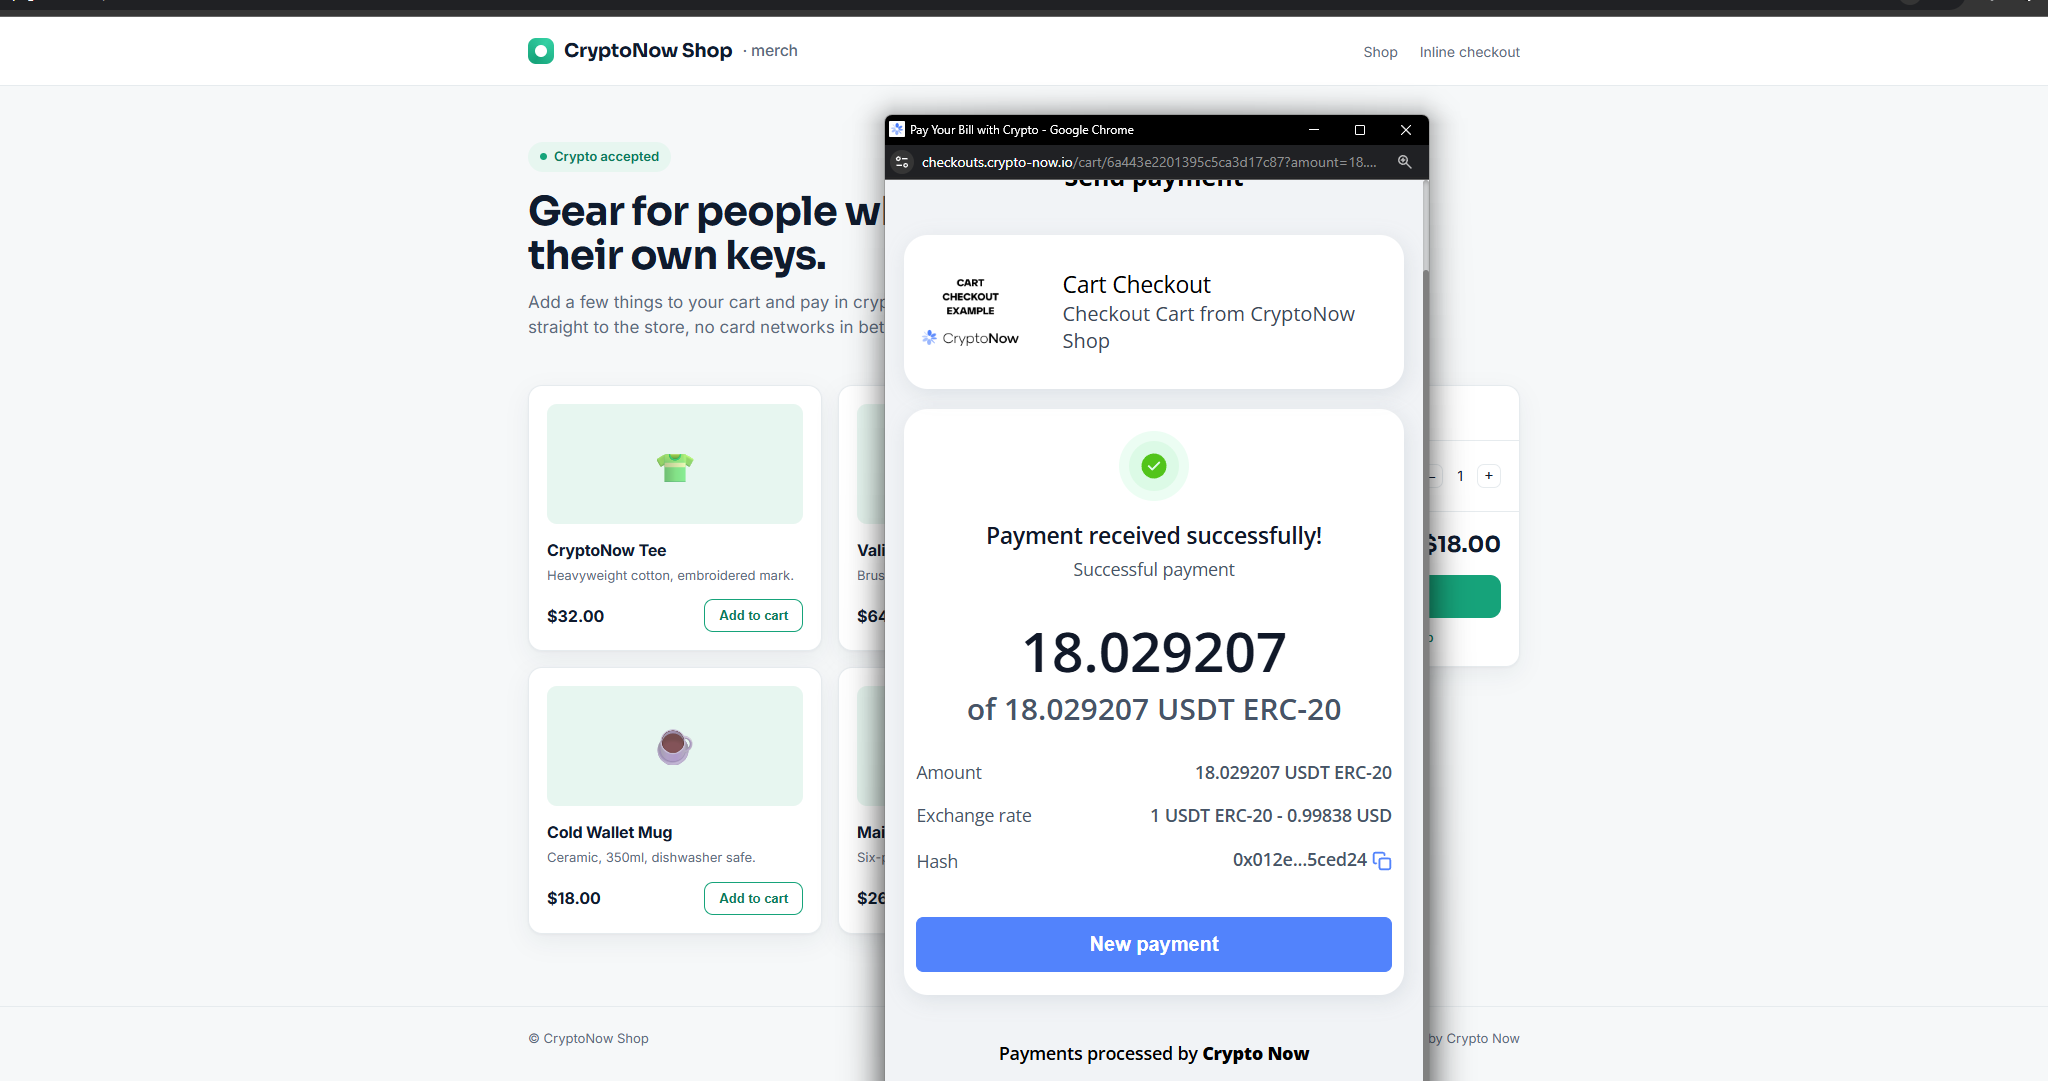
 Once the funds confirm, the widget shows success with the received amount and transaction hash.
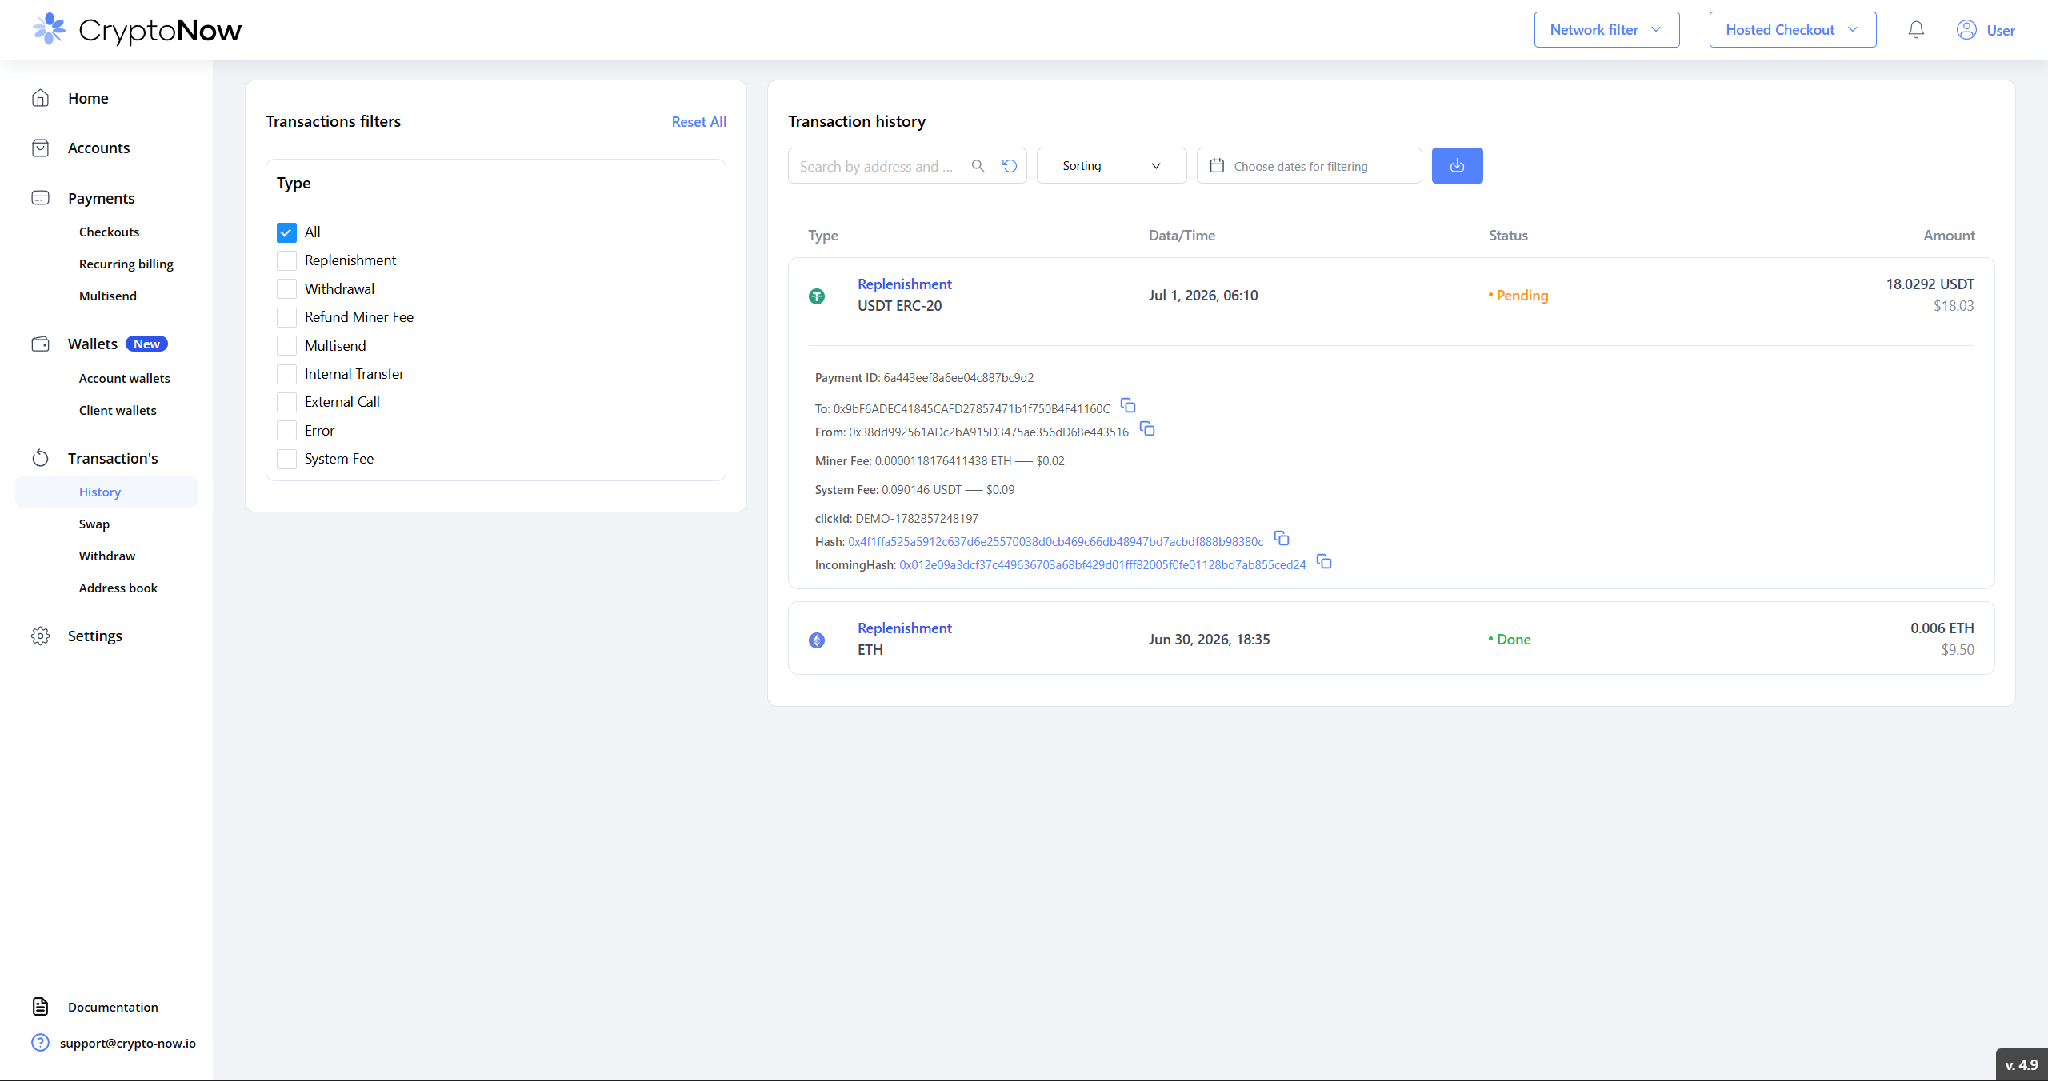
 The payment appears in **Transaction's → History** as a **Replenishment**, carrying your **clickId** and an **IncomingHash** that matches the widget's hash — so you can tie each on-chain payment back to the exact order.
 **Button vs iframe.** The **button** opens the widget in a popup or new tab. The **iframe** keeps the widget inline on your page so the customer visually stays on your site. Both run the same hosted checkout.
**Settlement.** The funds land in your account wallet as a replenishment, net of the standard 0.5% replenishment fee, with your `clickId` echoed back on the transaction (`outsideOrderId` in the charge response). Match on `clickId` to reconcile against your store.
The widget URL is `checkouts.crypto-now.io`. Set a **custom domain** on the checkout to white-label it as your own.
**Button vs iframe.** The **button** opens the widget in a popup or new tab. The **iframe** keeps the widget inline on your page so the customer visually stays on your site. Both run the same hosted checkout.
**Settlement.** The funds land in your account wallet as a replenishment, net of the standard 0.5% replenishment fee, with your `clickId` echoed back on the transaction (`outsideOrderId` in the charge response). Match on `clickId` to reconcile against your store.
The widget URL is `checkouts.crypto-now.io`. Set a **custom domain** on the checkout to white-label it as your own.