Configure a hosted checkout, pick one of four payment types, brand it, and share a link to start accepting crypto.
A checkout is the reusable object behind your payment links, buttons, and iFrames. Create one once, then share its link anywhere — email, chat, social, a QR code — and your customer pays in crypto on a CryptoNow-hosted page. No code required.
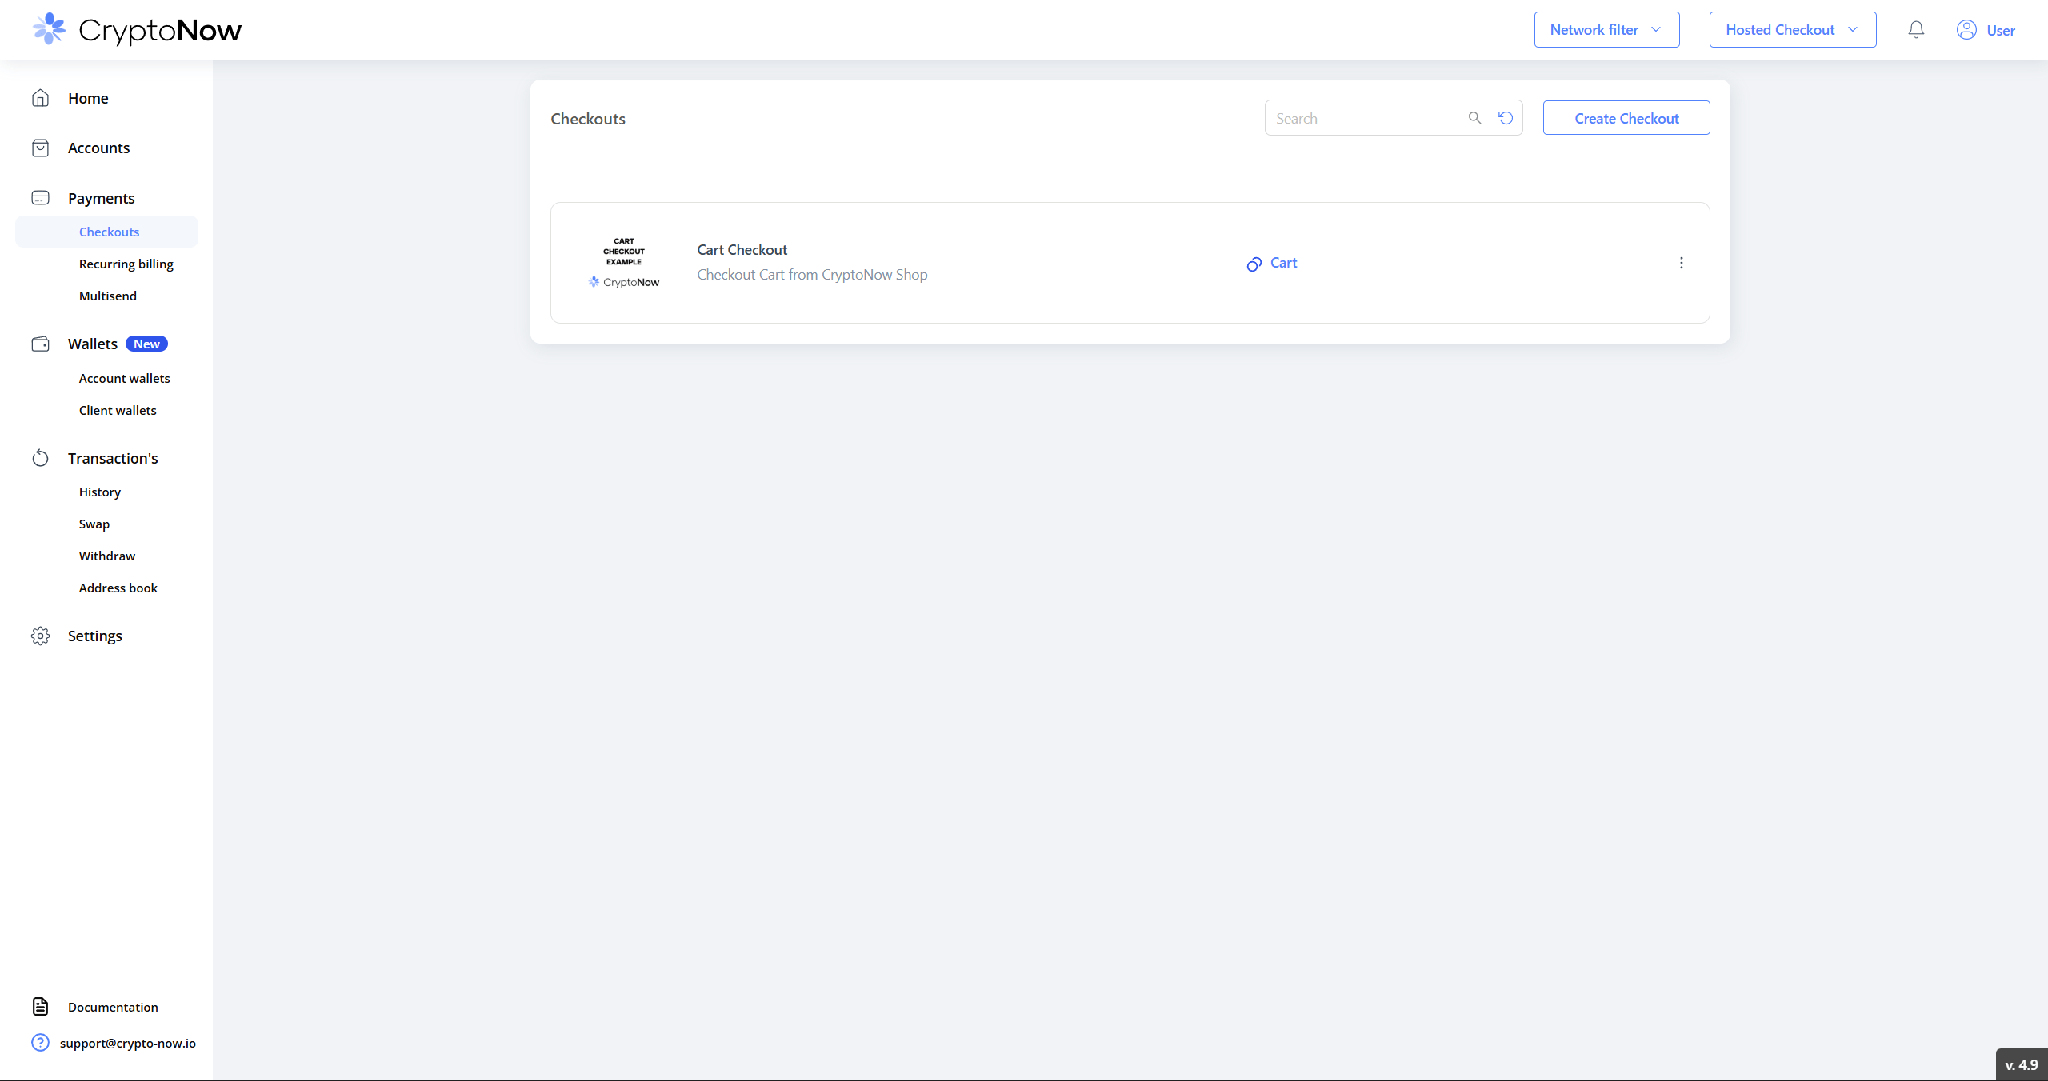
Go to Payments → Checkouts and click Create Checkout.
The Checkouts list. Click Create Checkout to begin.
2
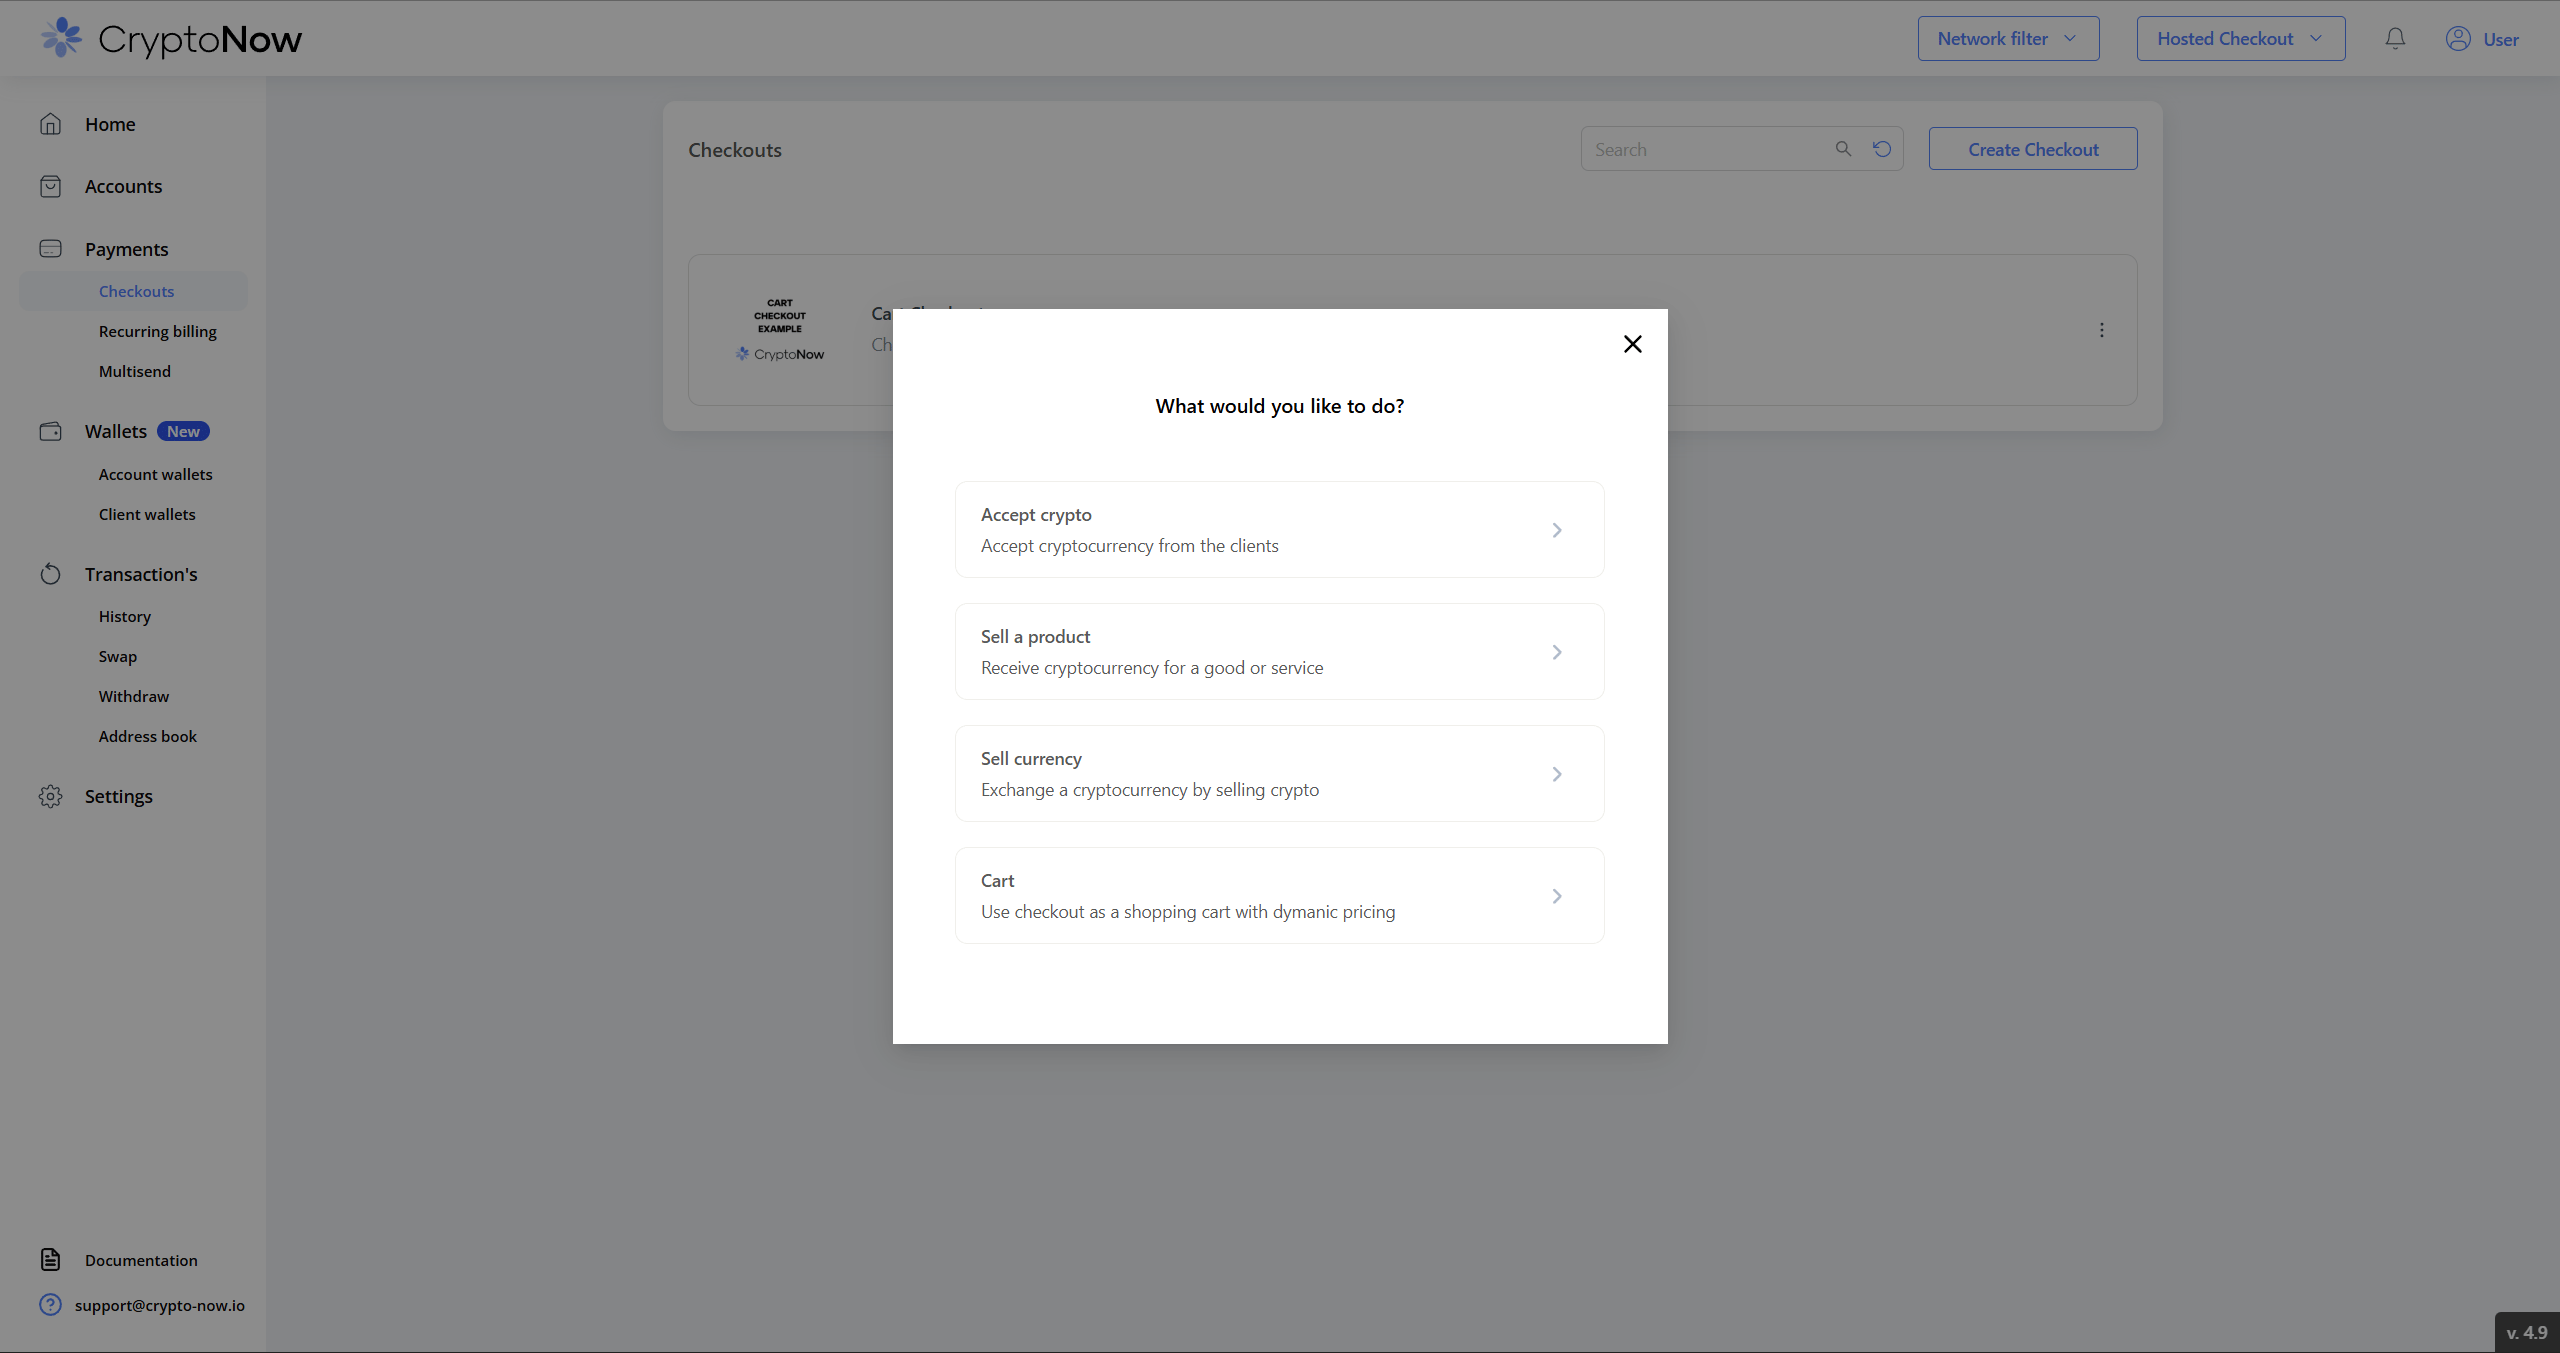
Choose what you're doing
Pick one of the four payment types. This is the first decision and it shapes the rest of the form.
The four checkout types.
Accept crypto — customer chooses any amount (deposits, top-ups, donations).
Sell a product — fixed price in fiat (stores, digital goods, invoices).
Sell currency — customer sends one coin and receives another (in-widget exchange).
Cart — no stored amount; the total and fiat currency are passed in the link as parameters.
The steps below use Sell a product as the worked example.
3
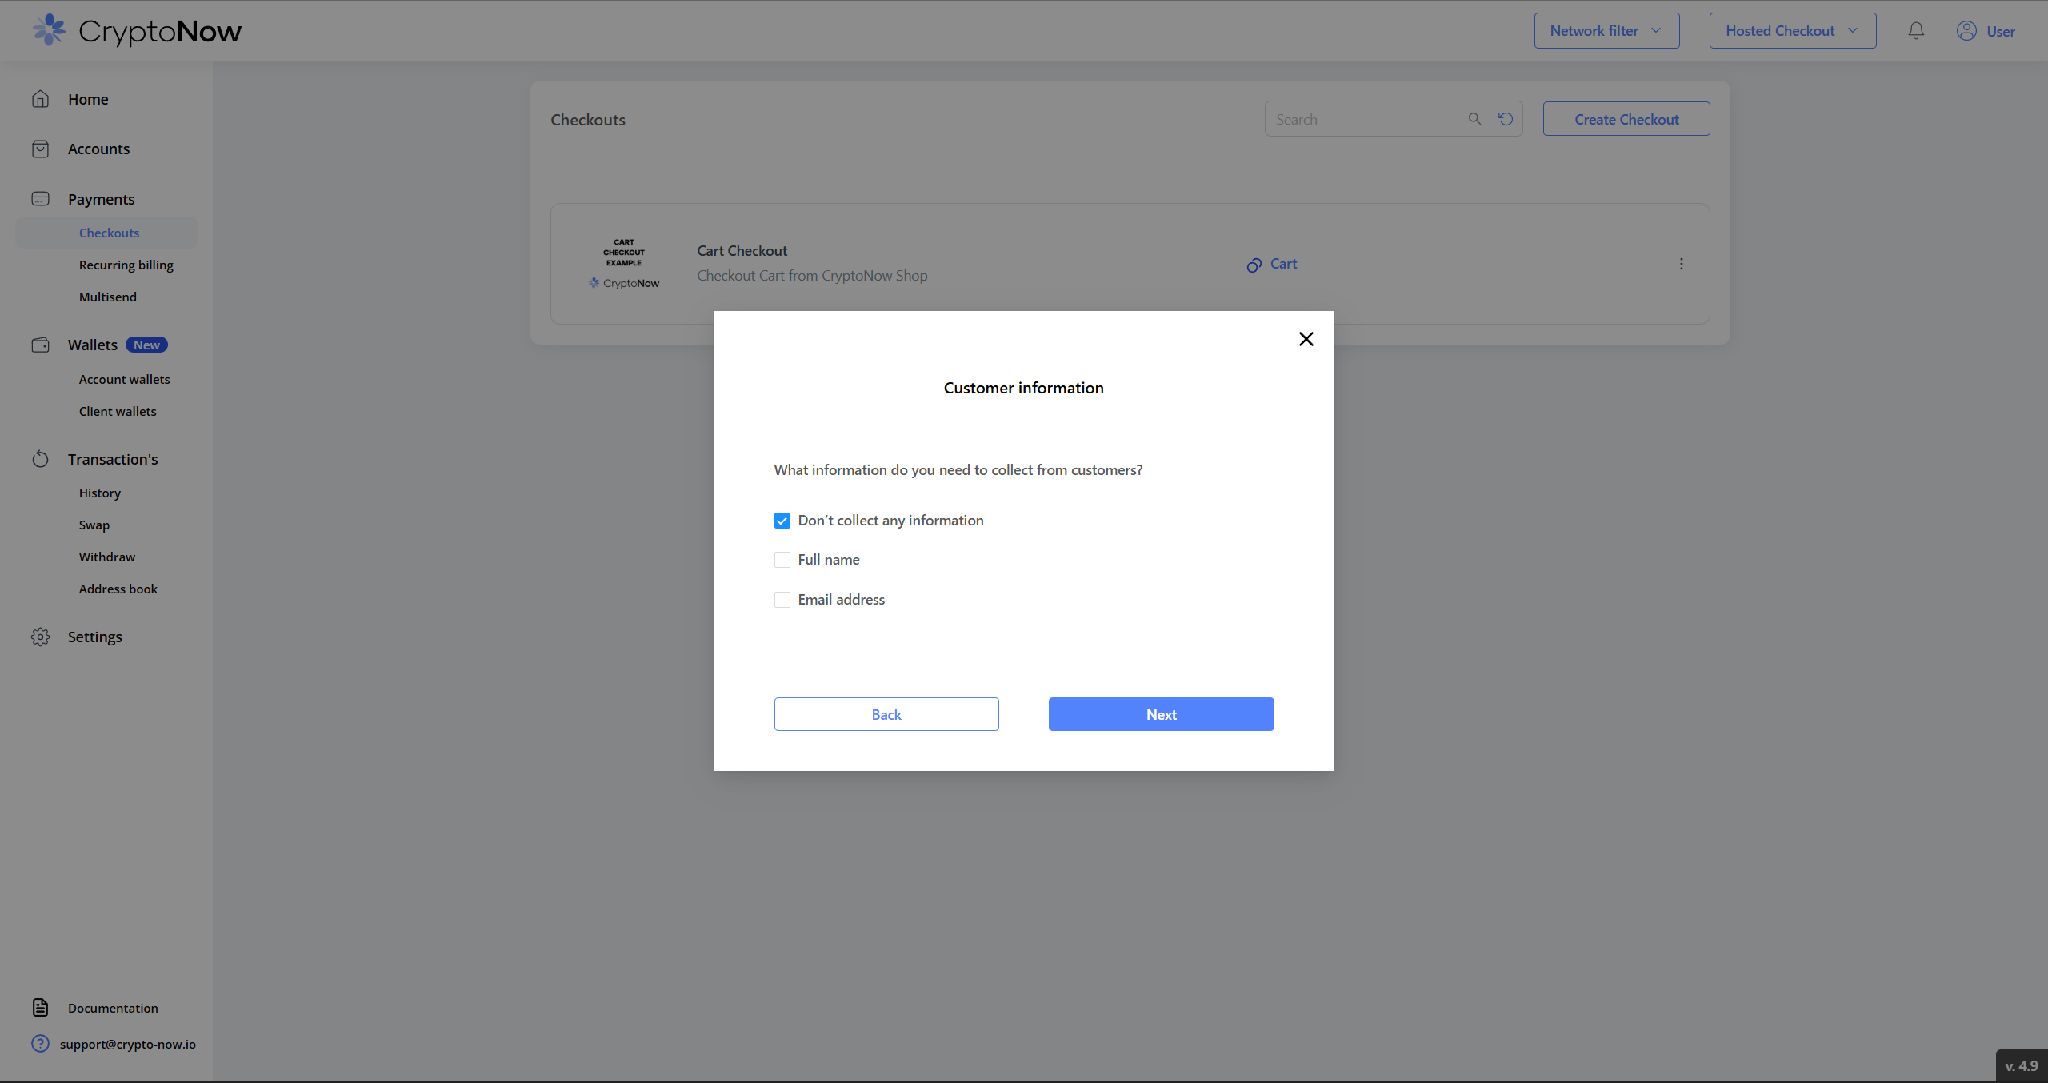
Choose what to collect from the customer
Decide whether to capture the payer’s details: nothing, full name, and/or email. Click Next.
Customer information capture.
4
Fill in the checkout details
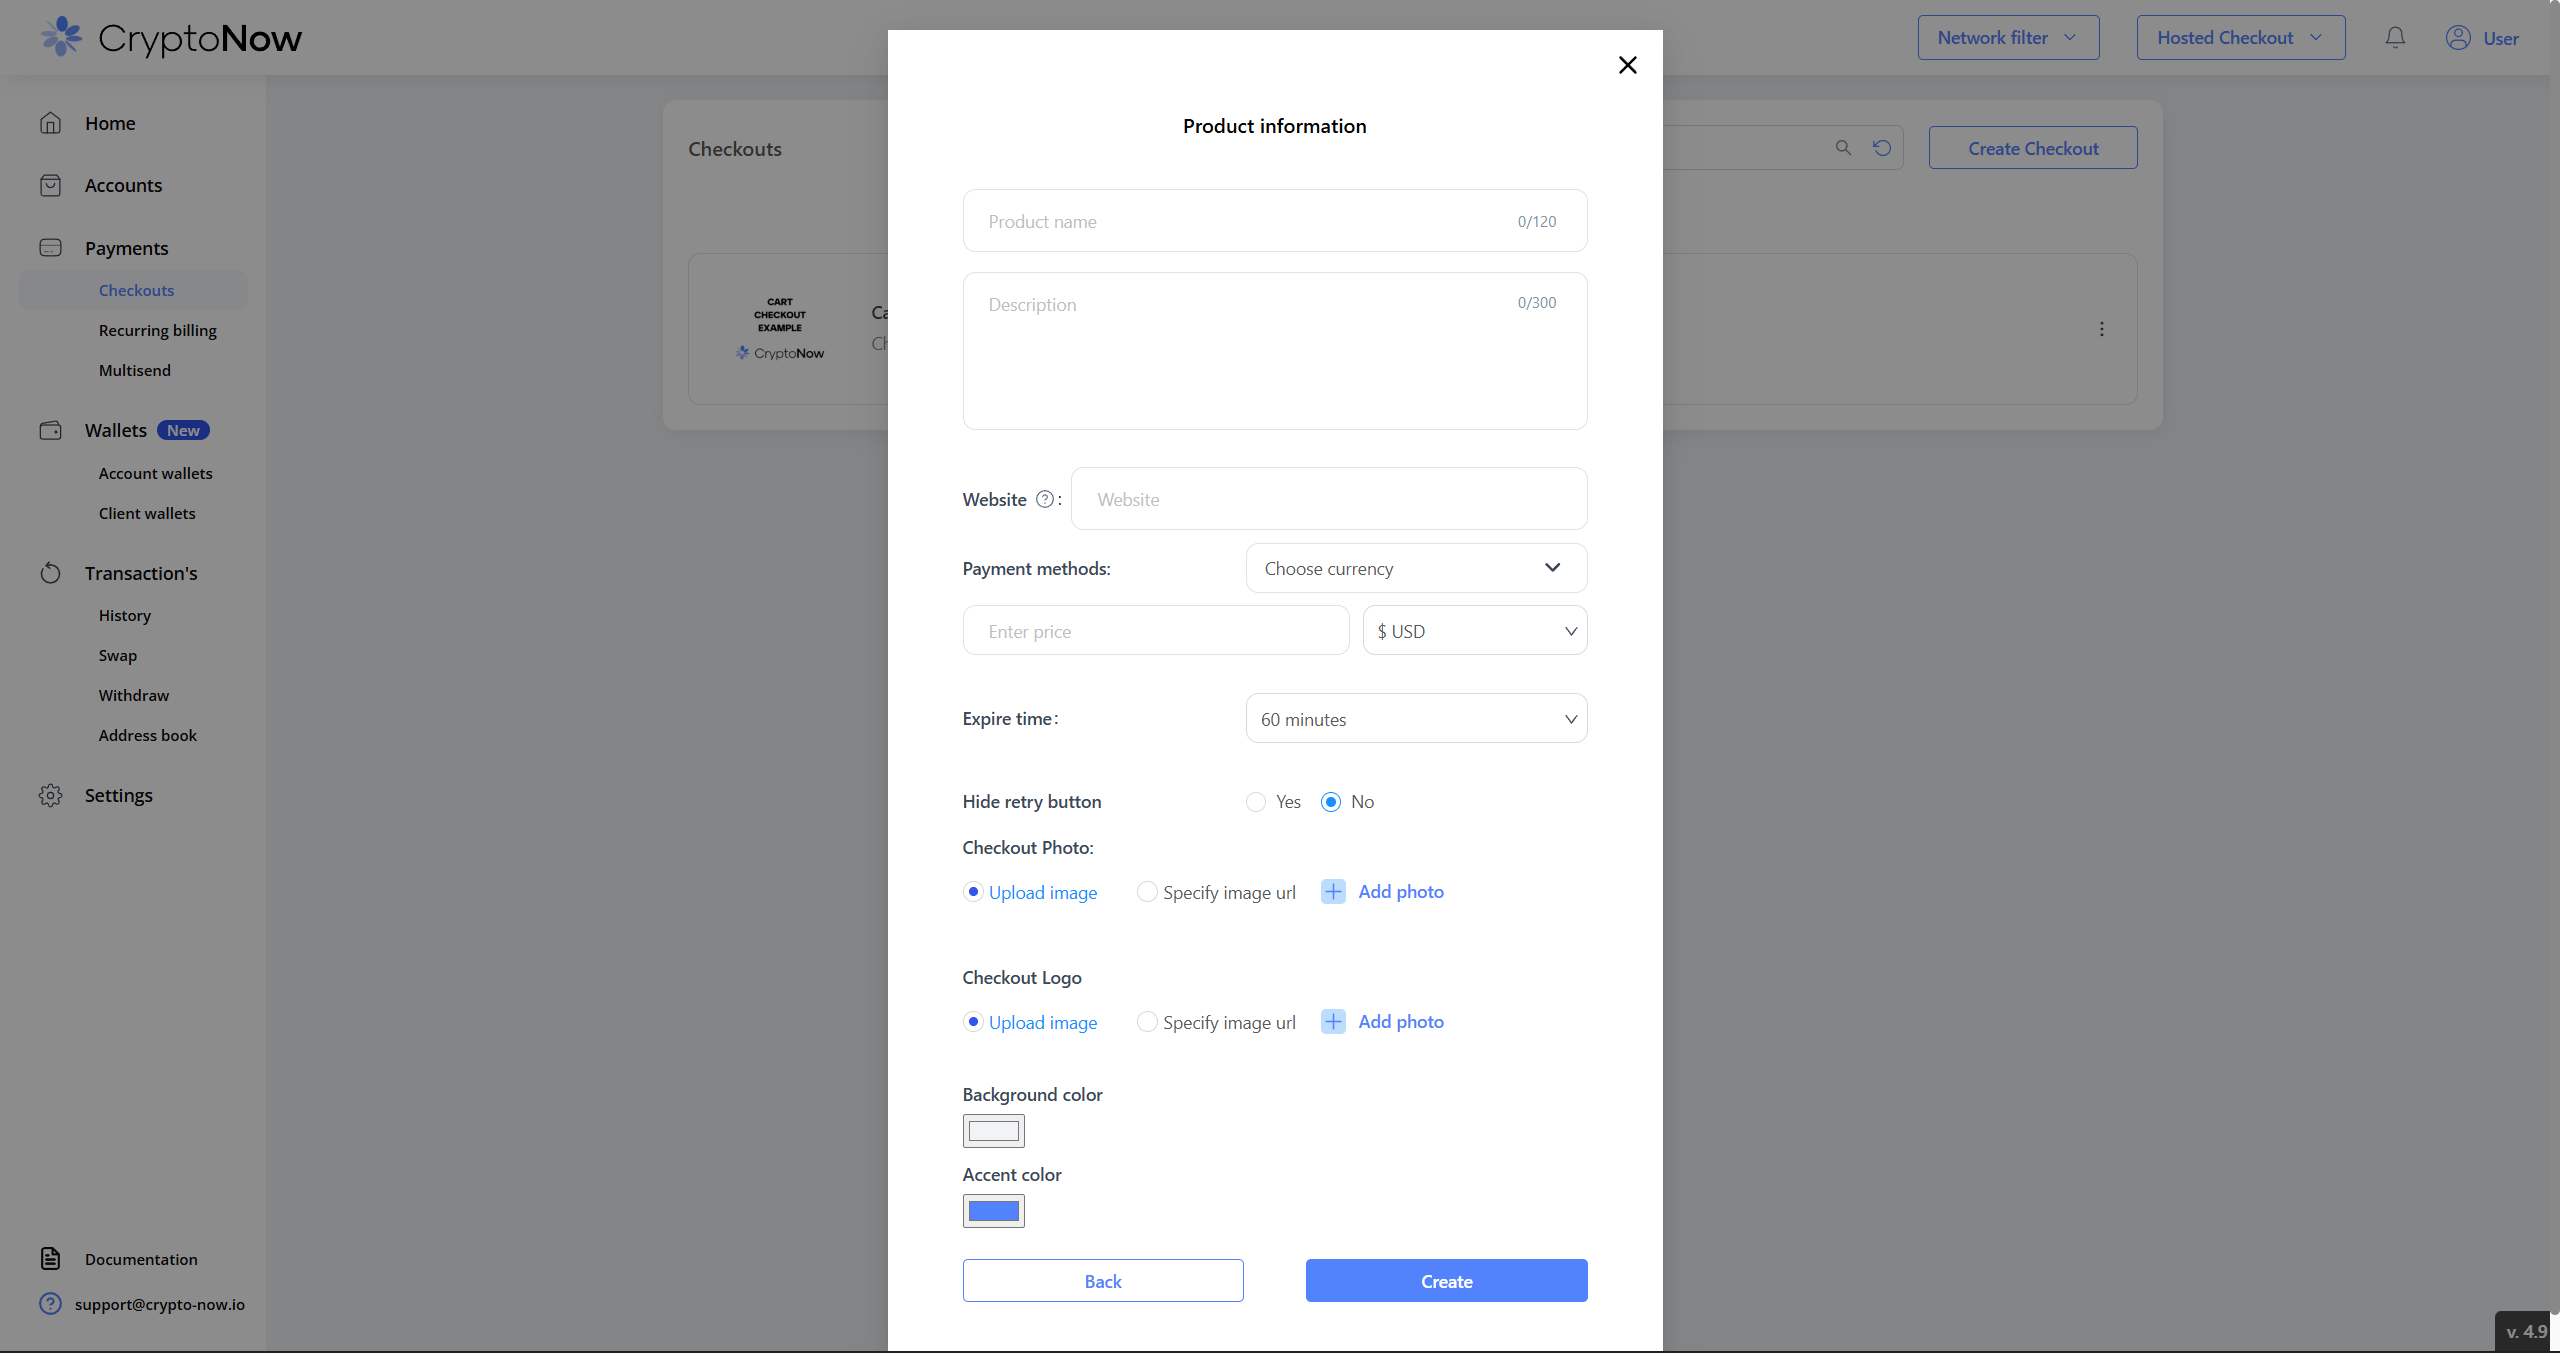
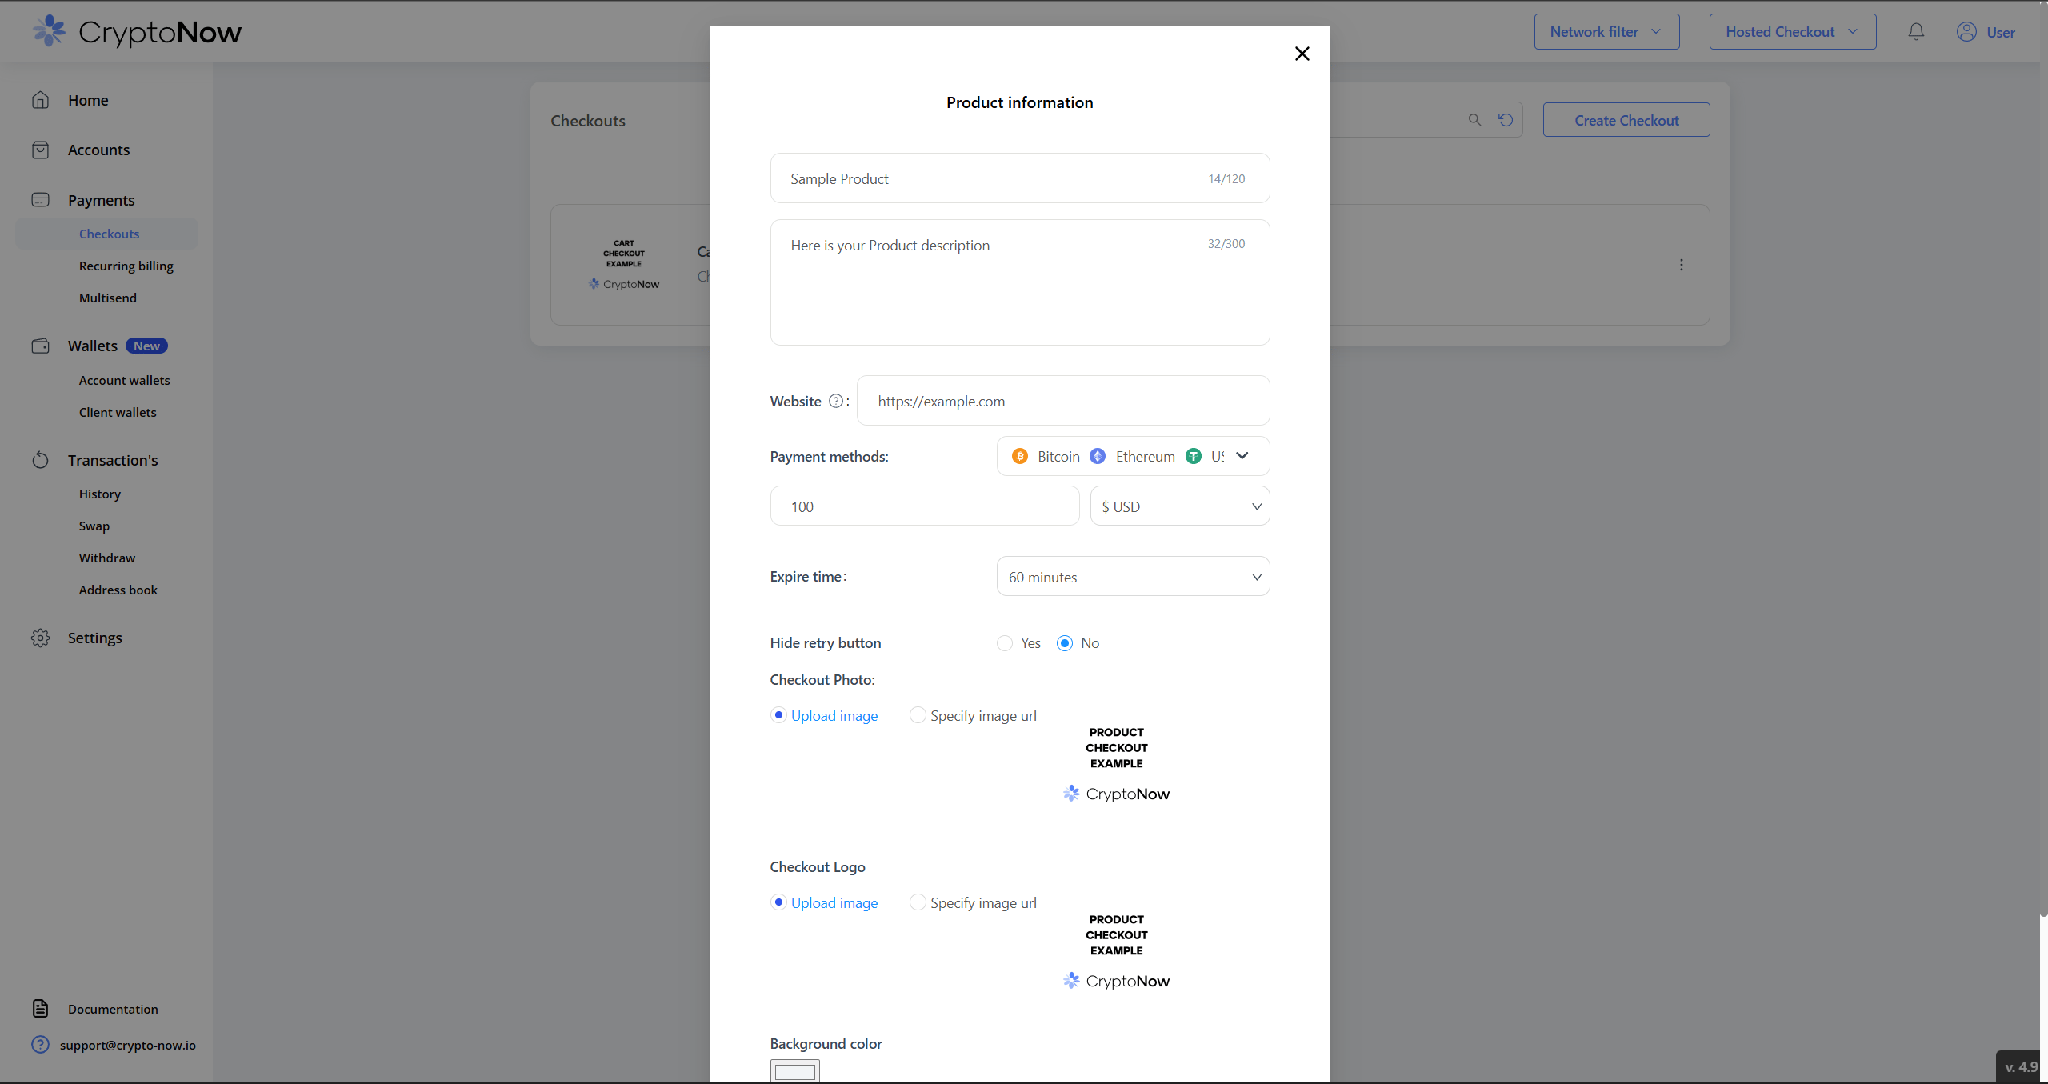
Set the product name, description, post-payment Website (where the customer lands after paying), Payment methods (which coins you accept), price + fiat currency, and Expire time (how long a charge stays open — 10 / 30 / 60 min). Brand it with a checkout photo, logo, background and accent colour. Then click Create.
The Sell-a-product form, with branding fields.
The same form, filled in.
Accept crypto uses this same form without the price field — the customer enters any amount at pay time.
5
Copy the link and share it
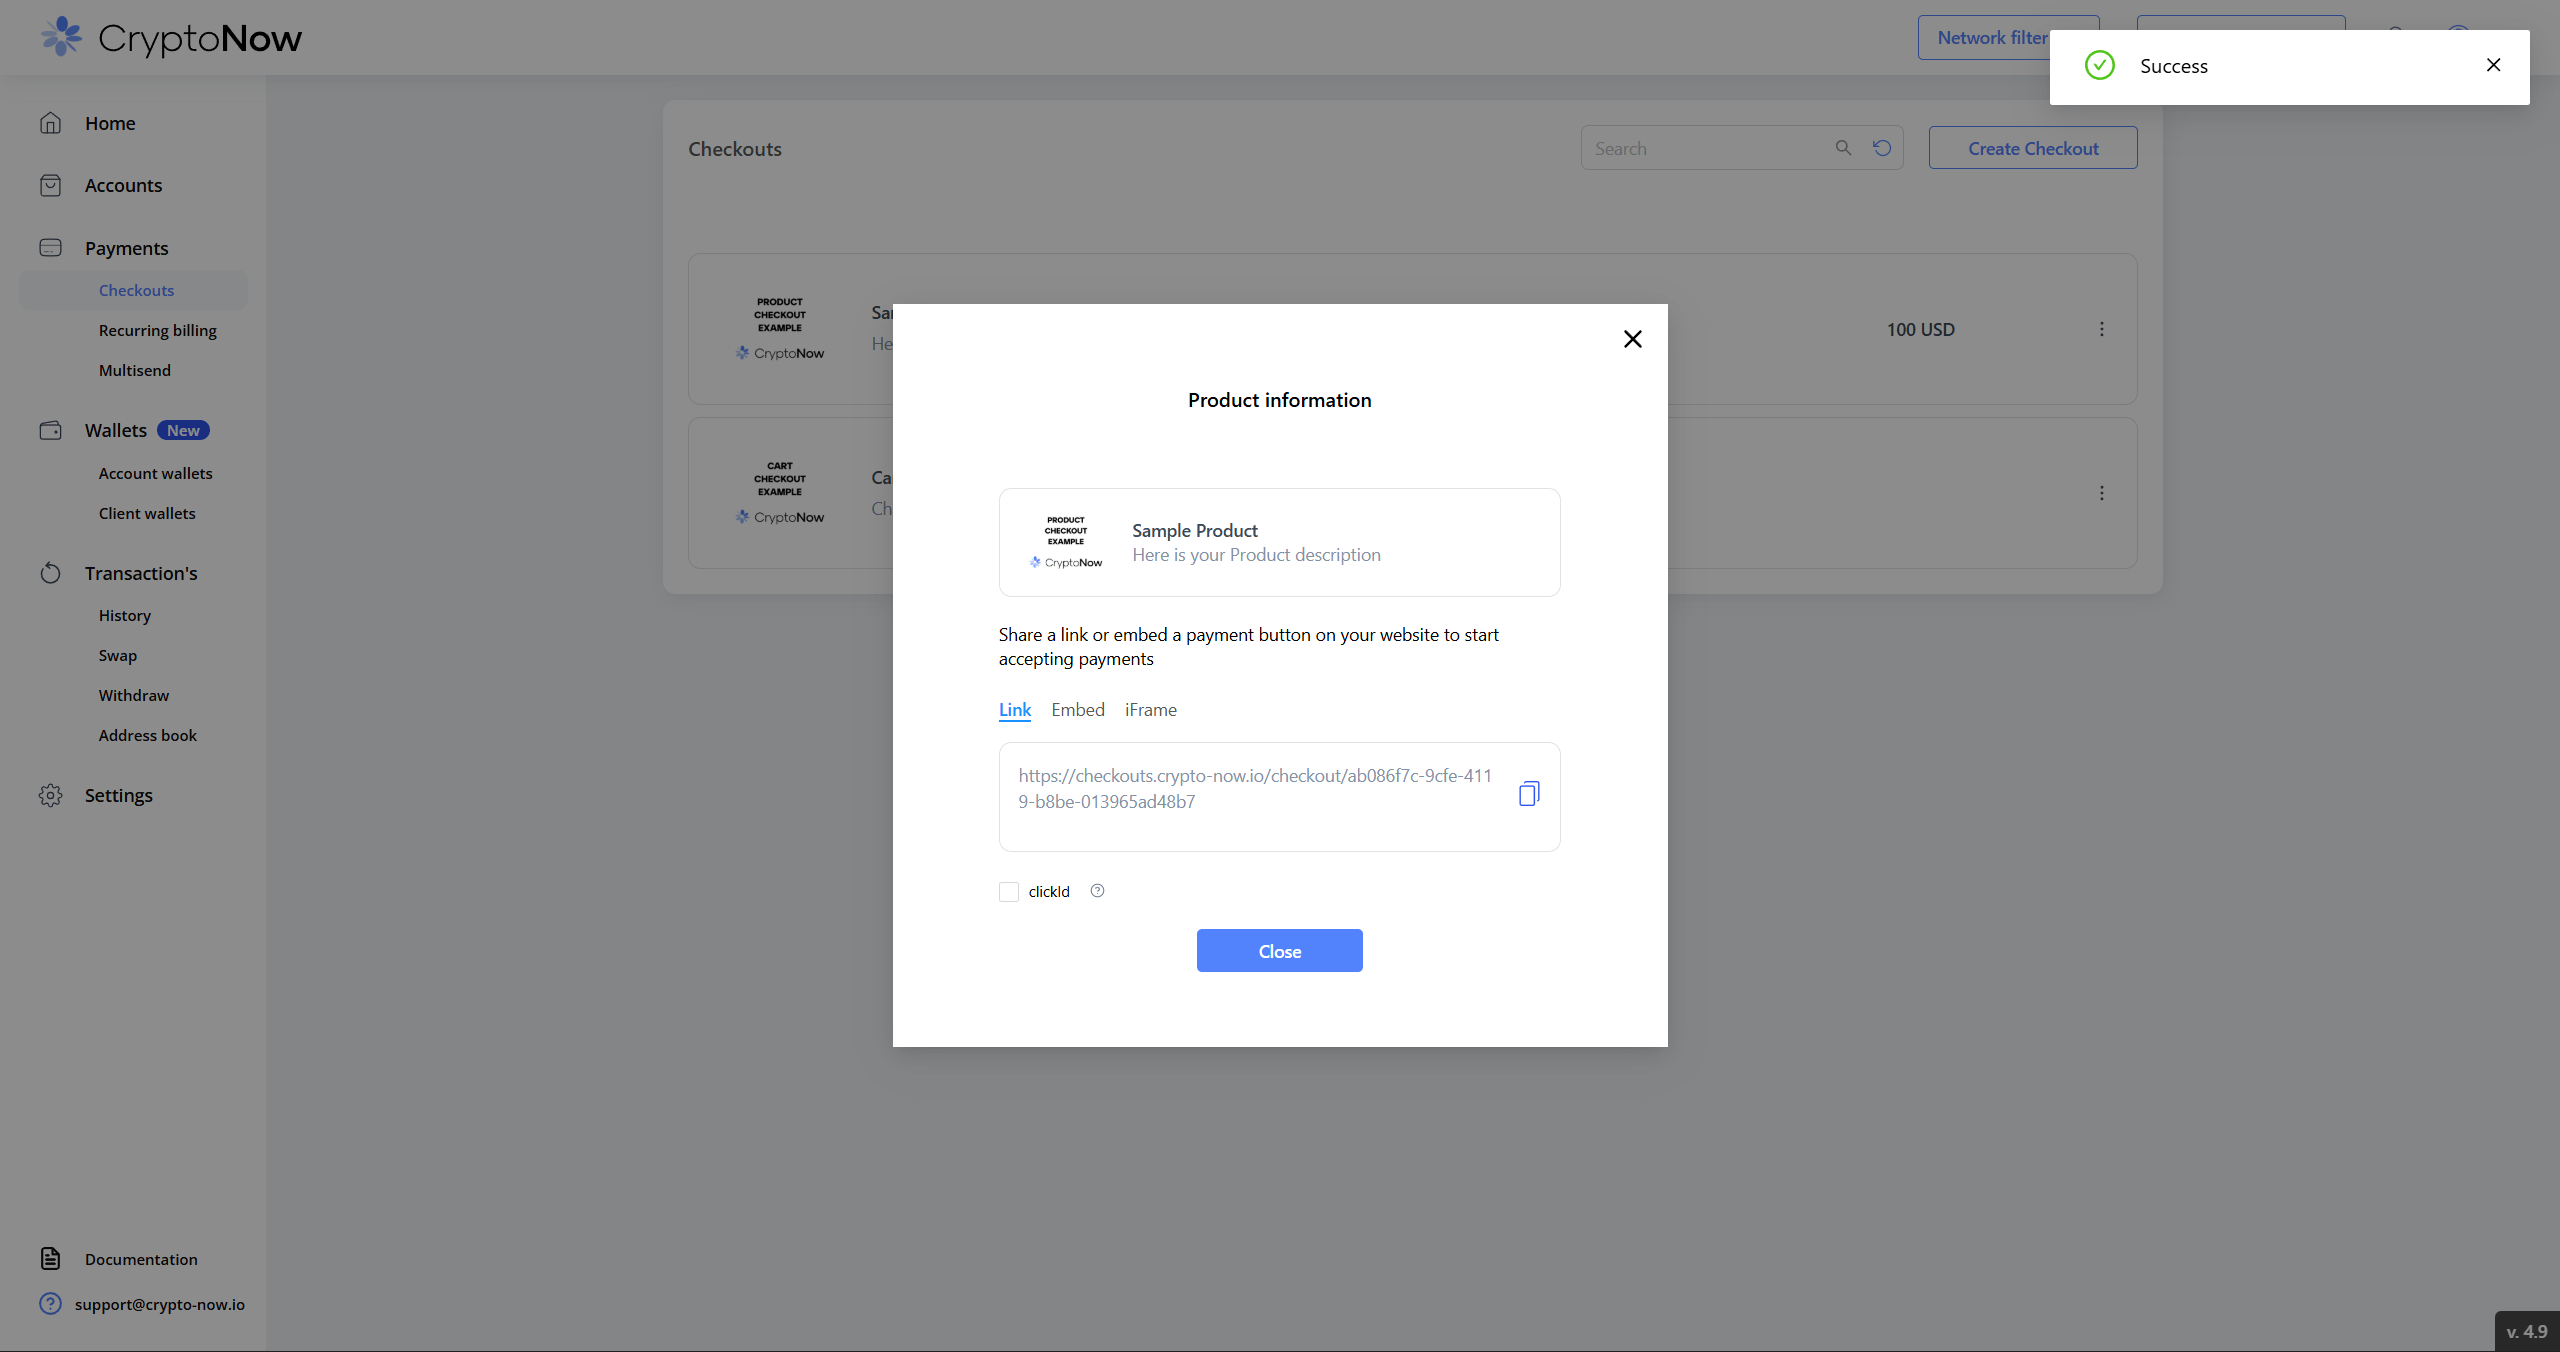
On success you get three ways to deliver the checkout — Link, Embed (button snippet), and iFrame — plus the clickId option. Copy the link and you’re live.
Share as a link, an embed button, or an iFrame.
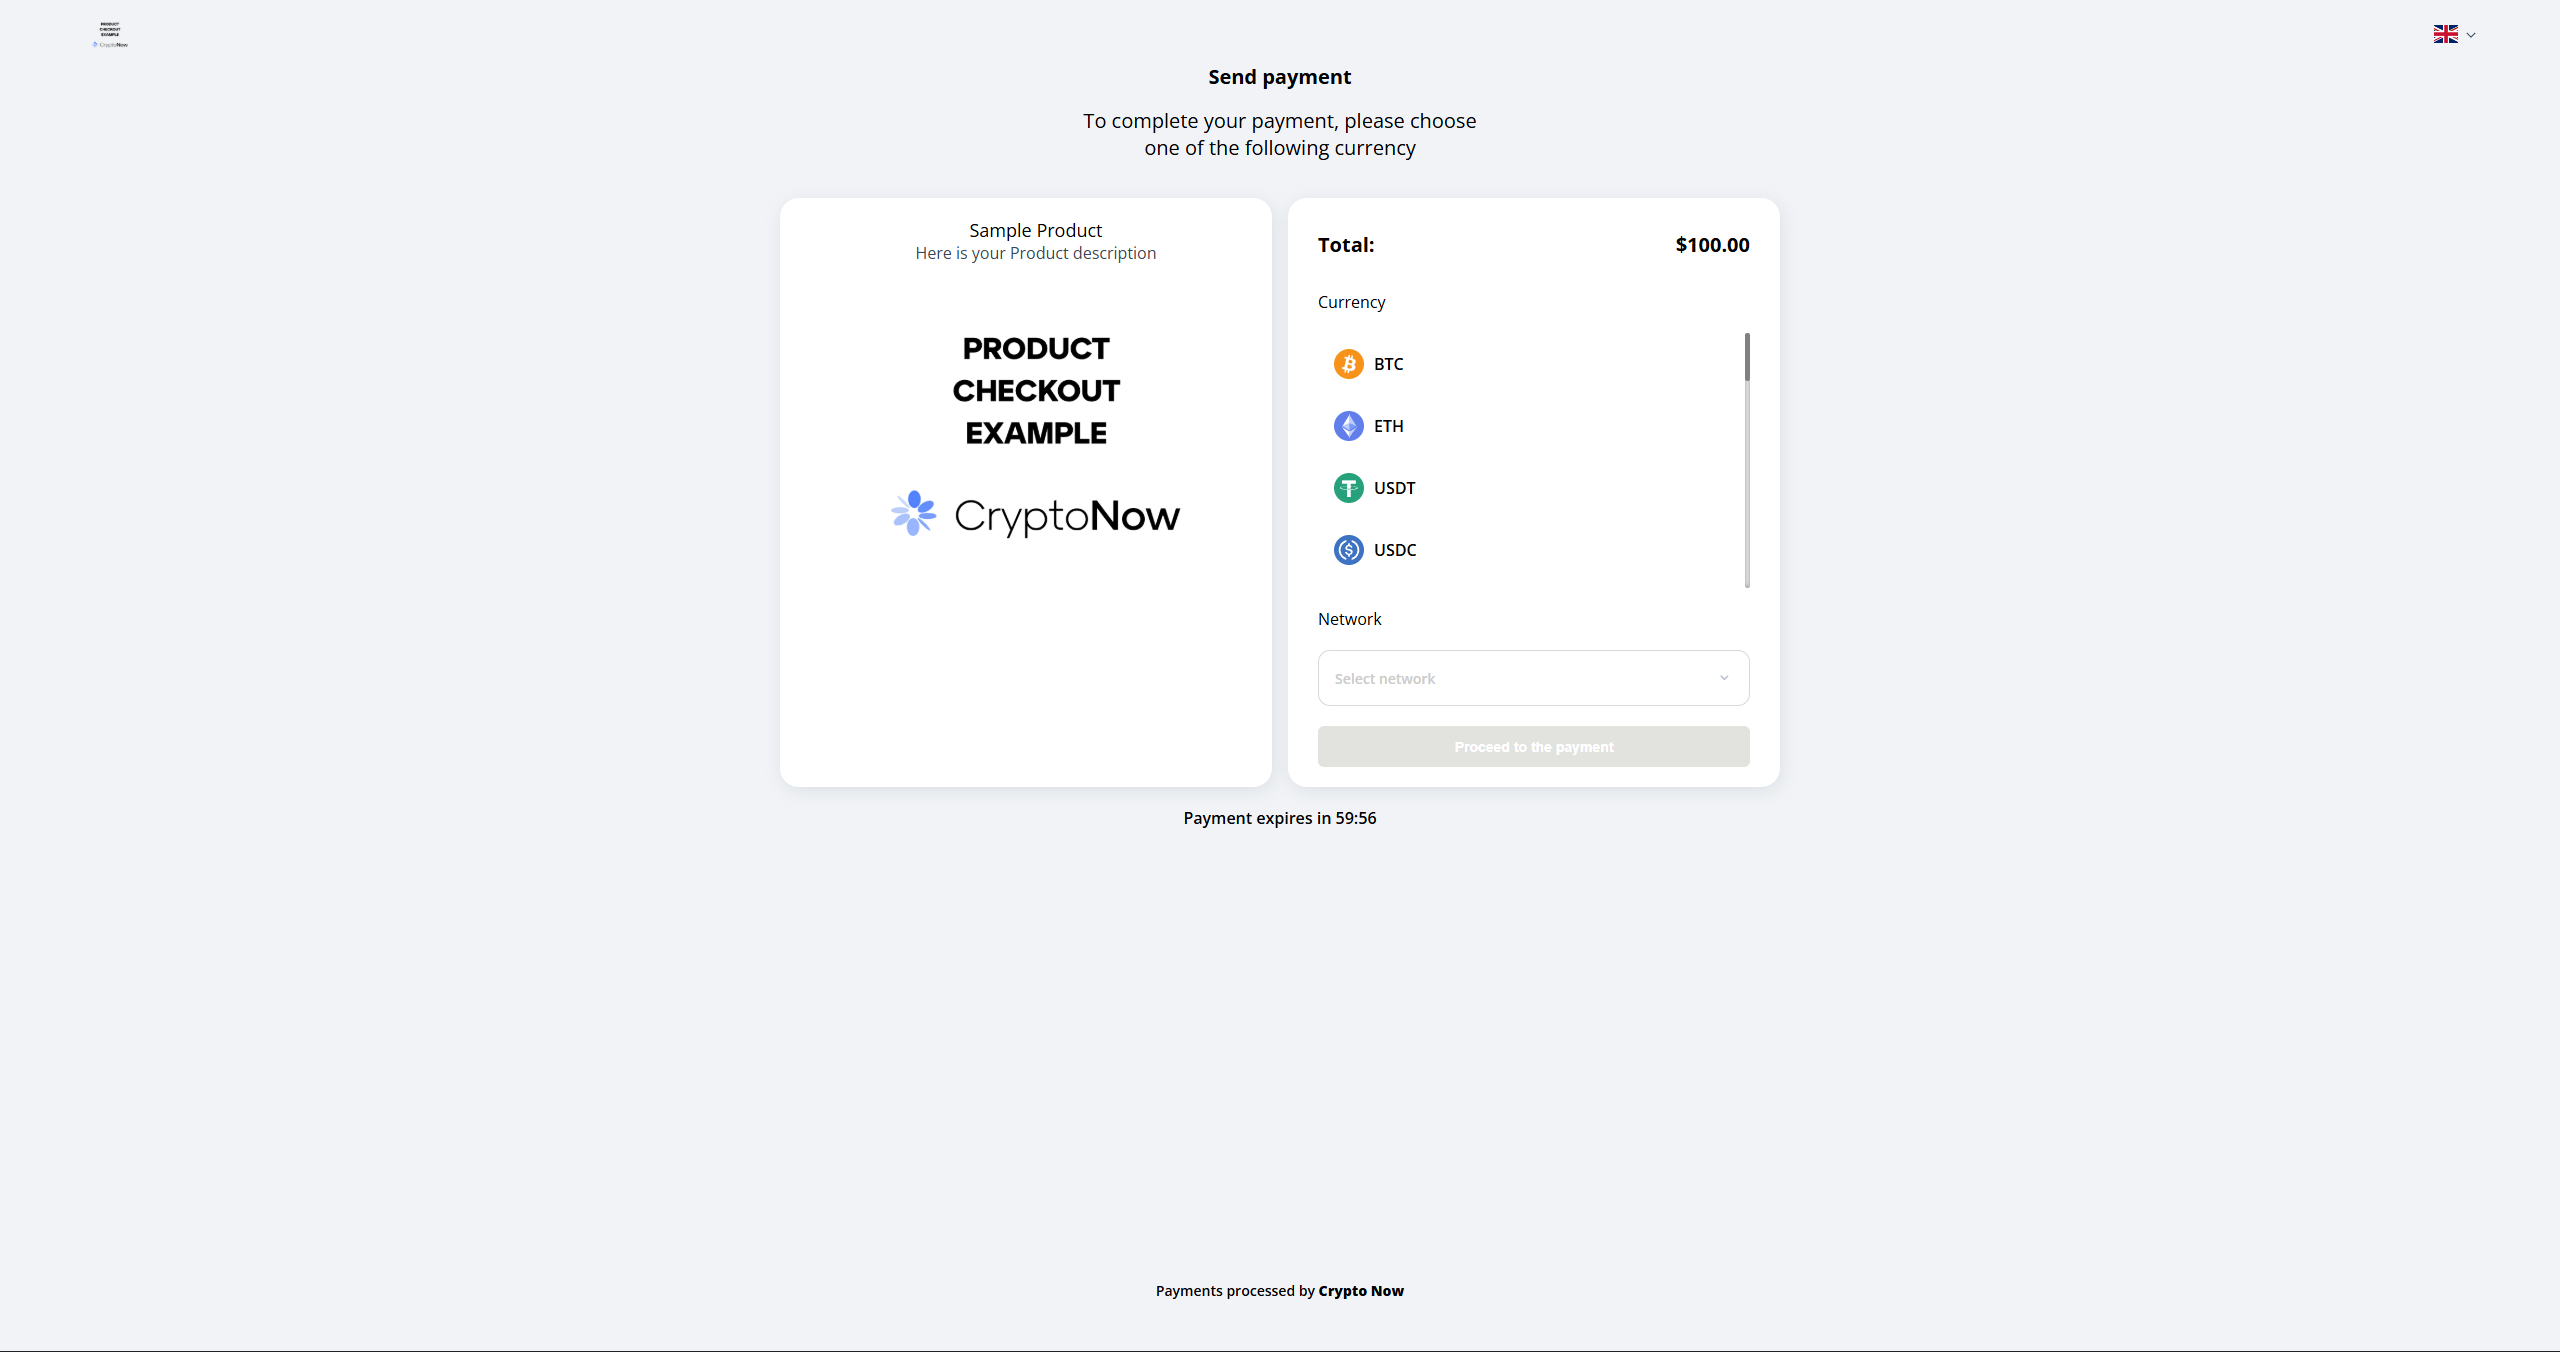
This is what your customer sees when they open the link — your branding, the total, and the coins you accept:
Enable clickId on the share panel and append your own id to the link (?clickId=...) — an order id, customer id, or any other reference (numbers and characters). It’s attached to the transaction, searchable, echoed back in callbacks, and returned in the API as outsideOrderId. This is how you reconcile an on-chain payment to a specific order or user in your CRM.
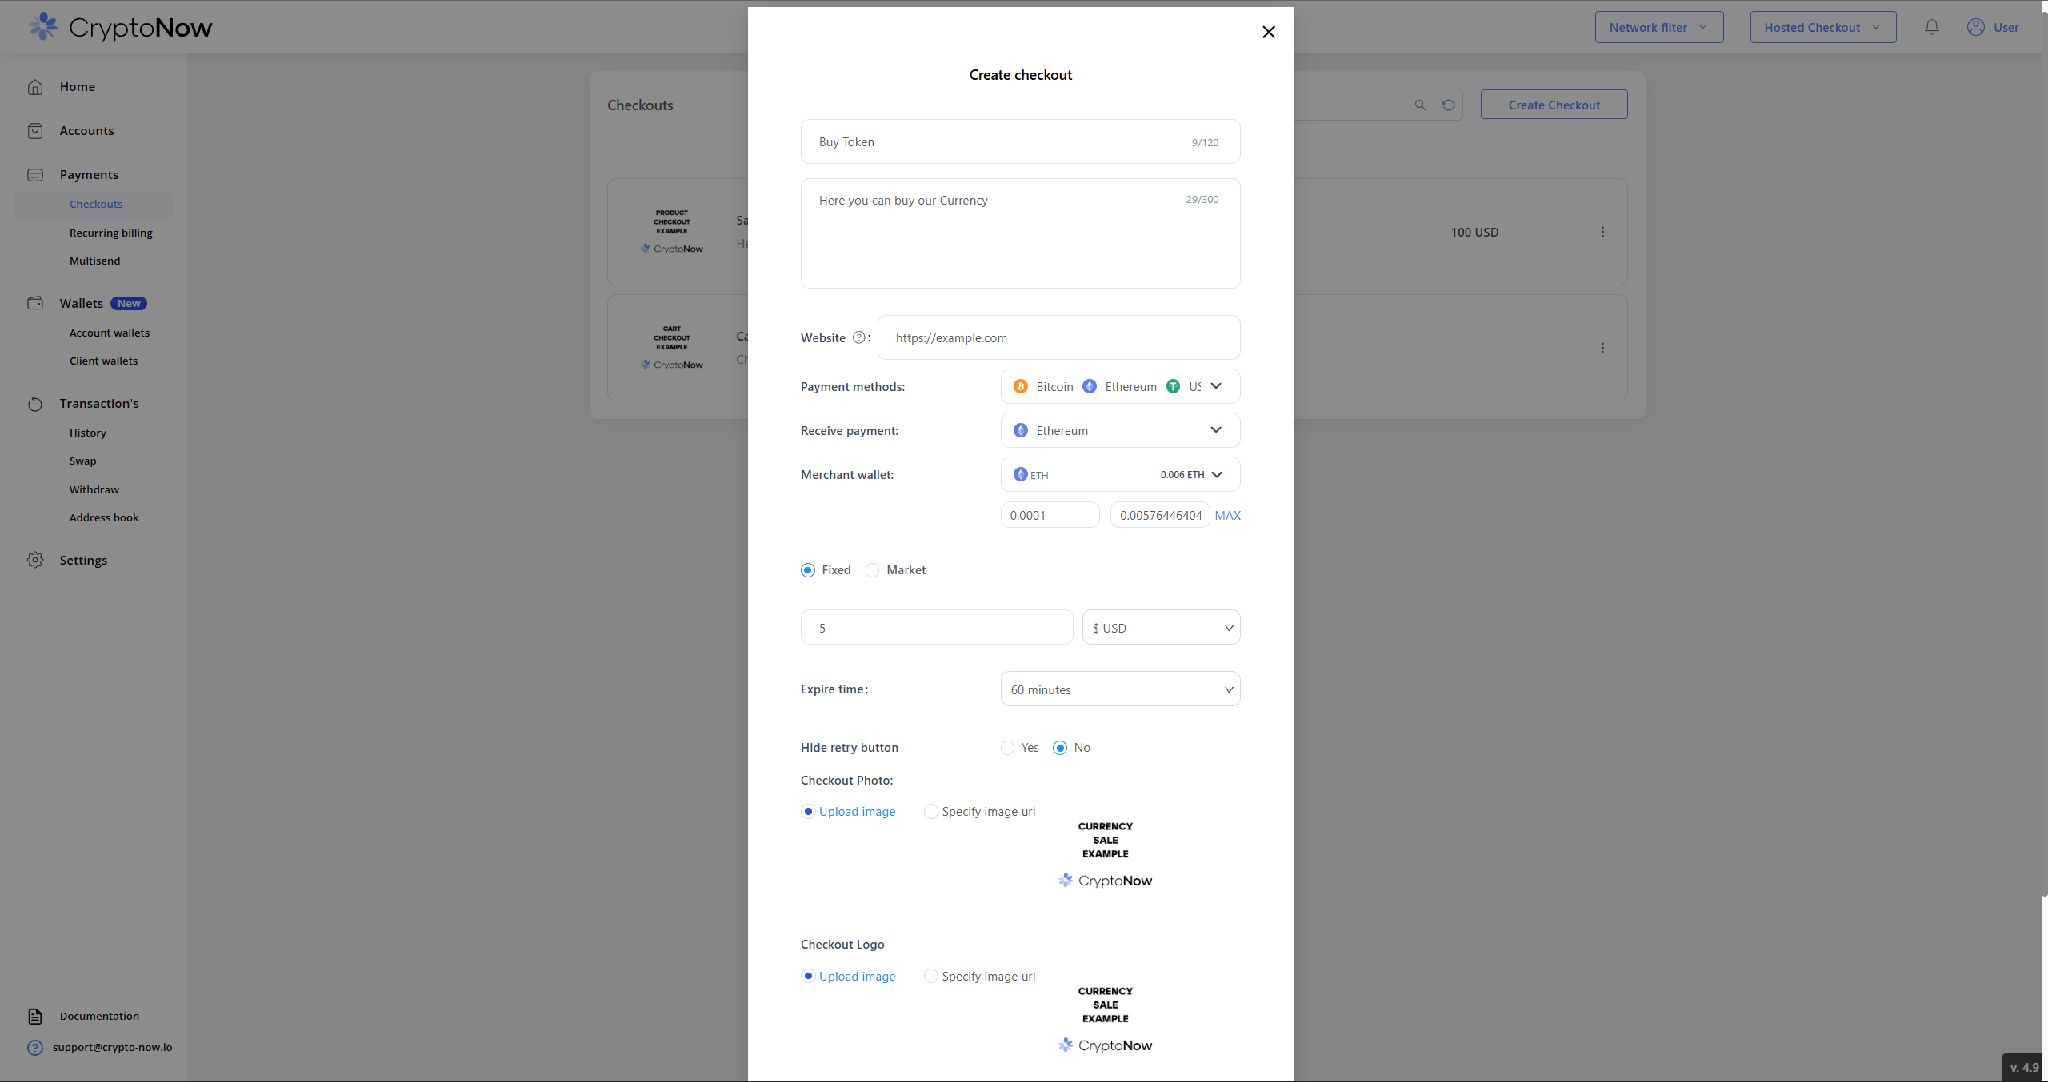
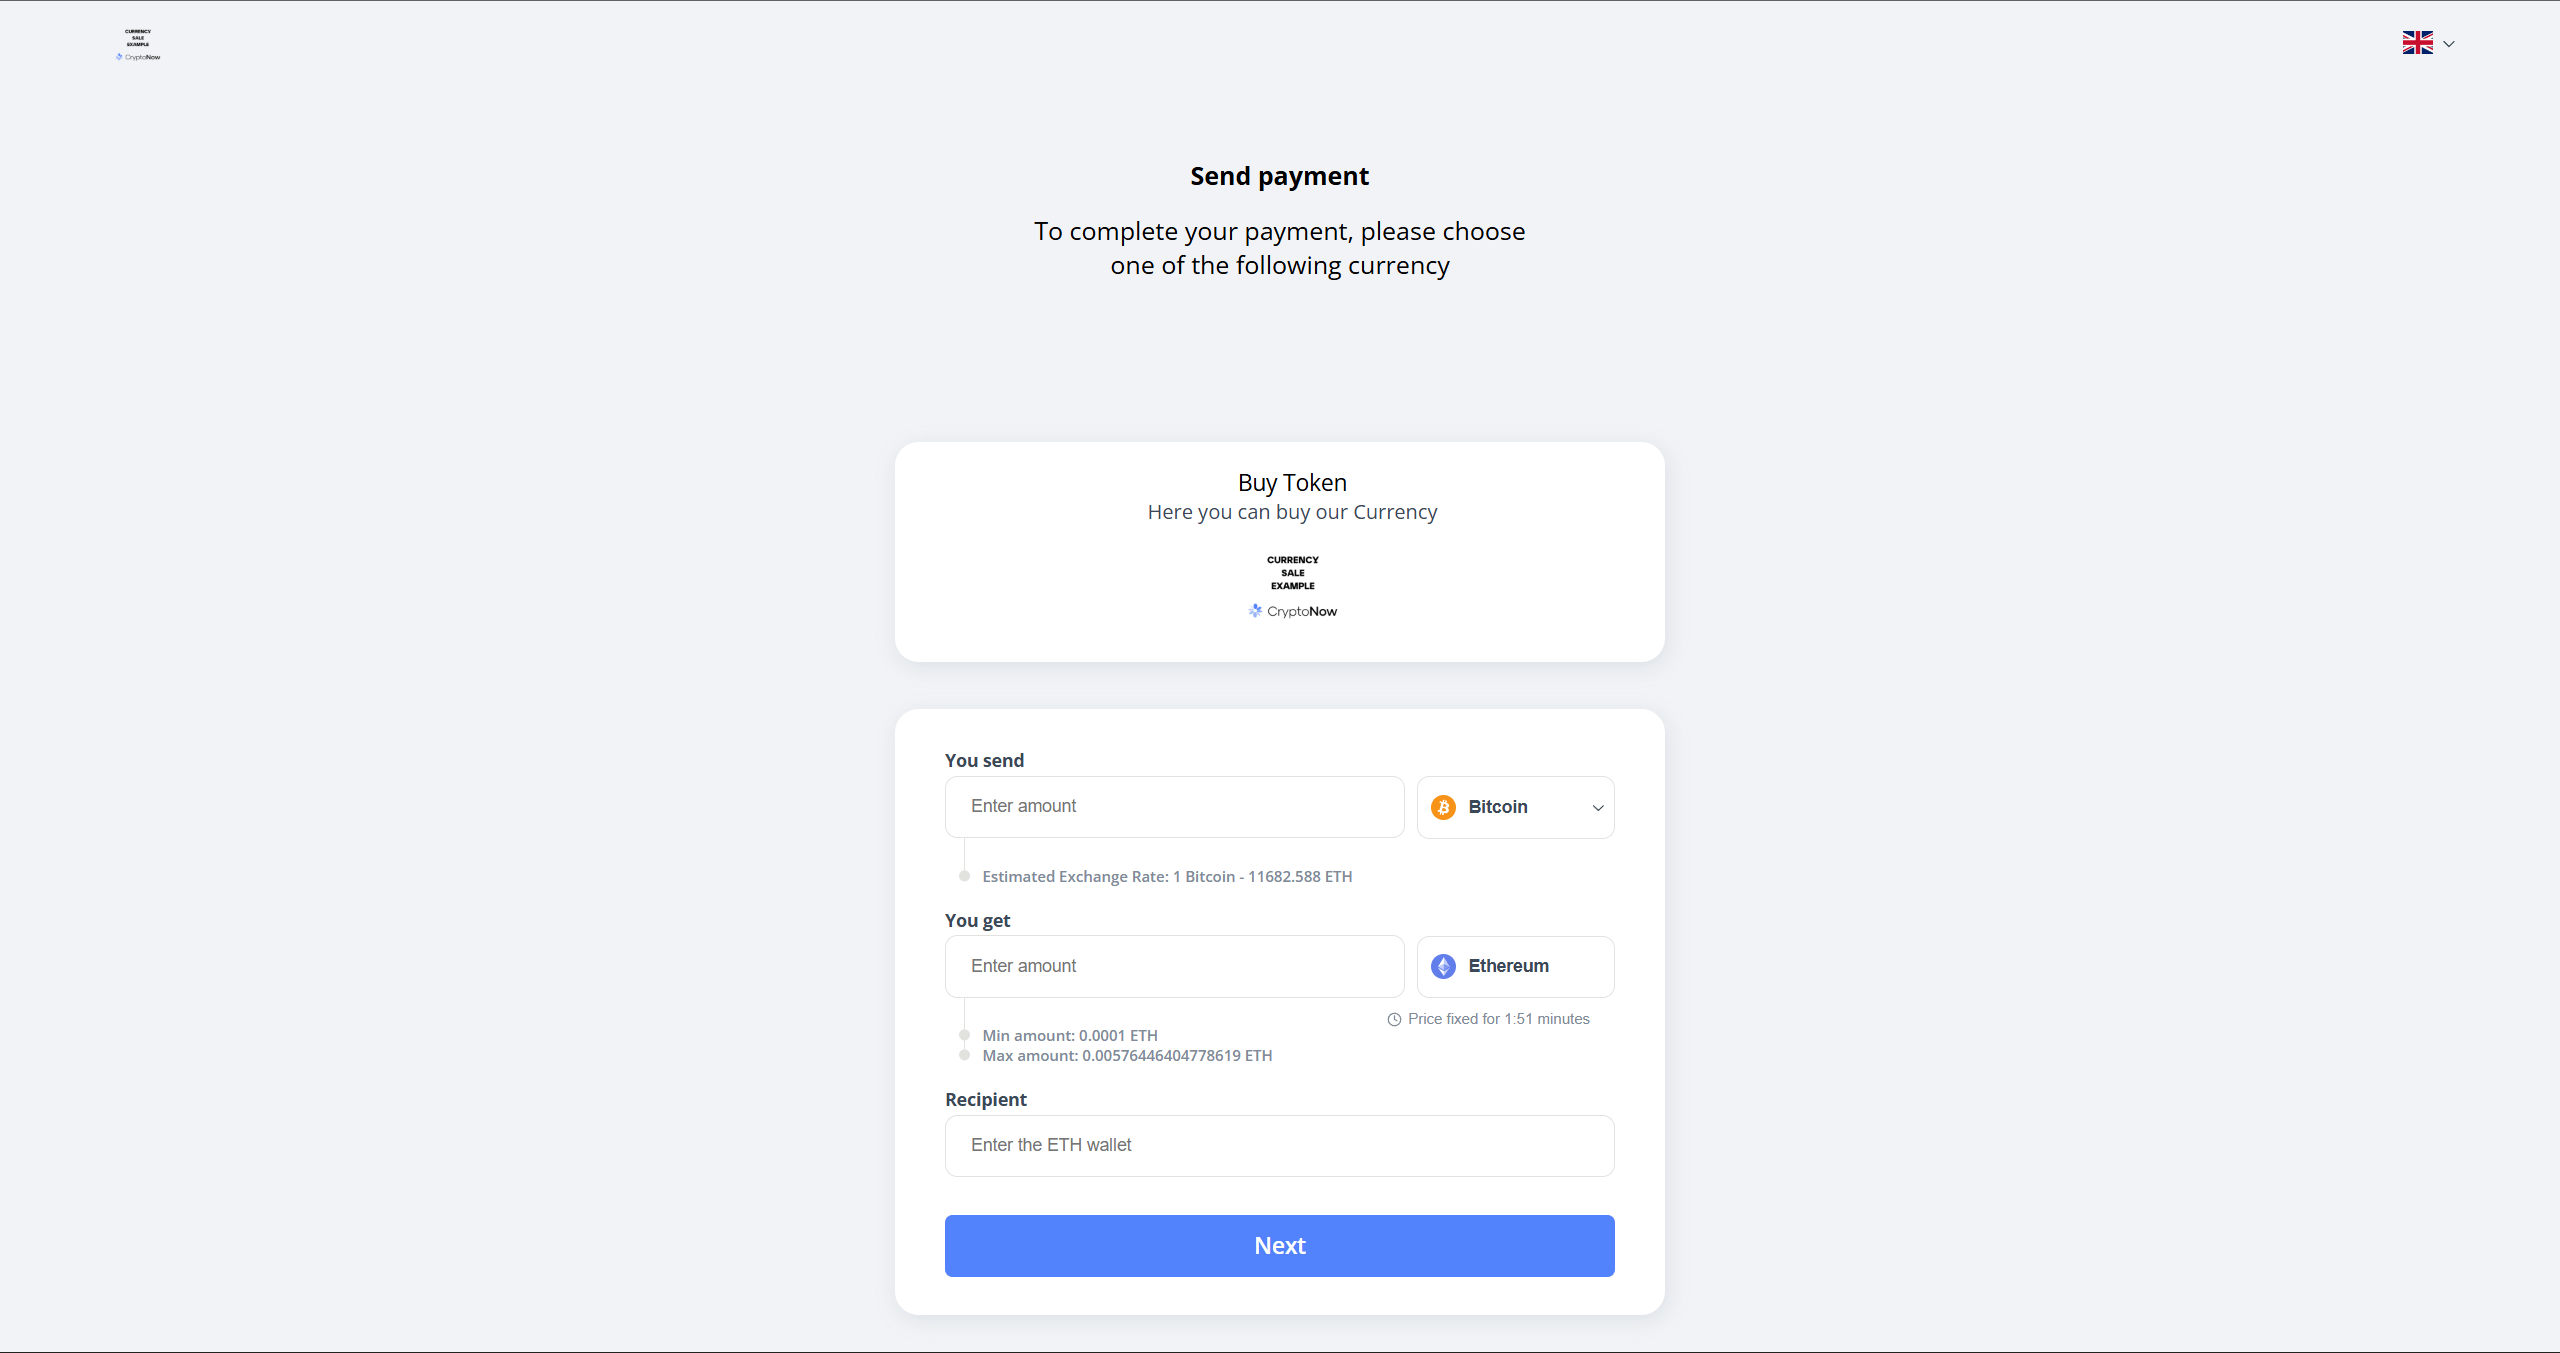
The customer sends one coin and receives another. Set Receive payment (the coin you pay out), the Merchant wallet it pays from, min / max amounts, and Fixed or Market price.
Sell-currency form — exchange-specific fields.
The payer enters a “you send” amount, sees the live rate, and provides a recipient wallet for the coin they receive. If they send less than quoted they get proportionally fewer tokens (but never below min); if more, never above max.
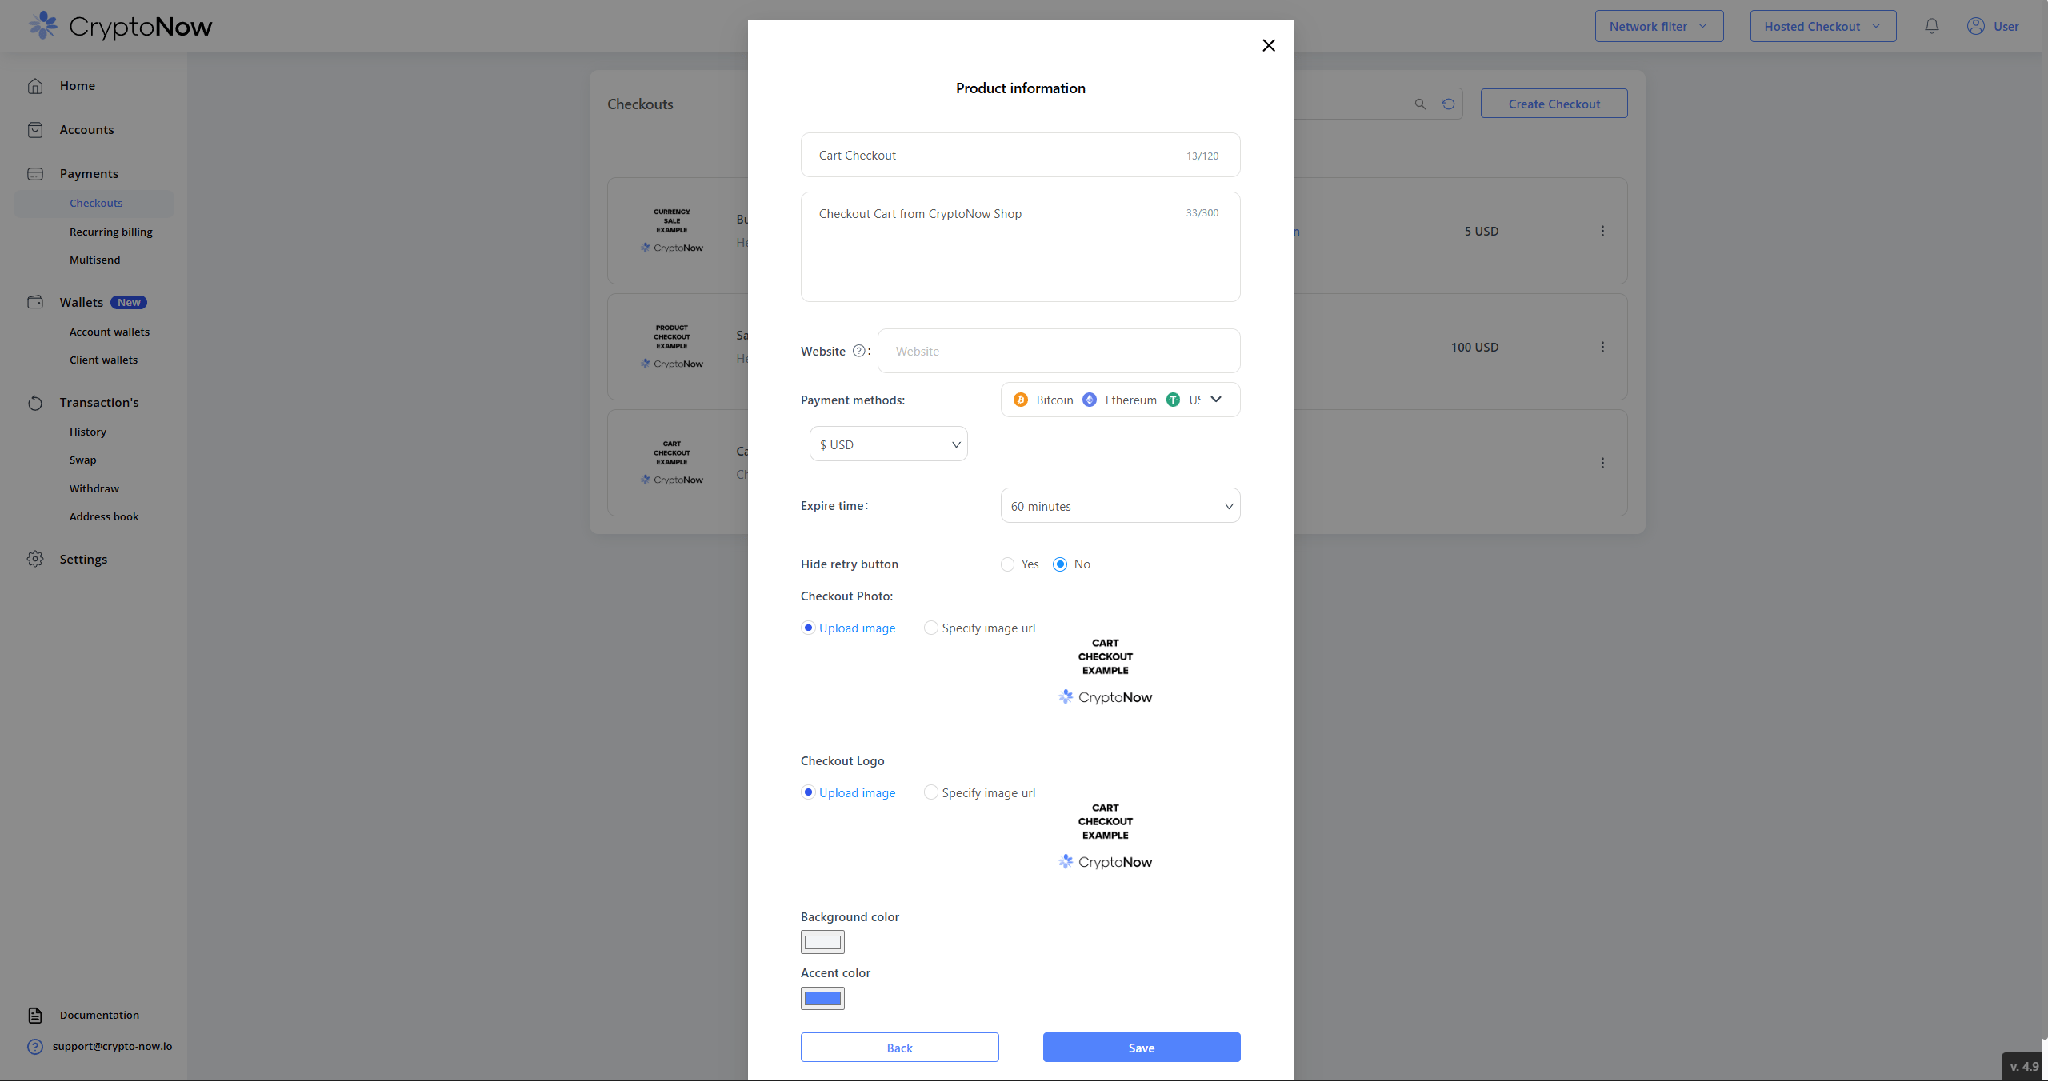
A Cart checkout stores no price — just a fiat currency. The amount is passed in at pay time, which makes it the right choice for a shopping basket with dynamic totals.
Cart form — fiat currency, no price field.
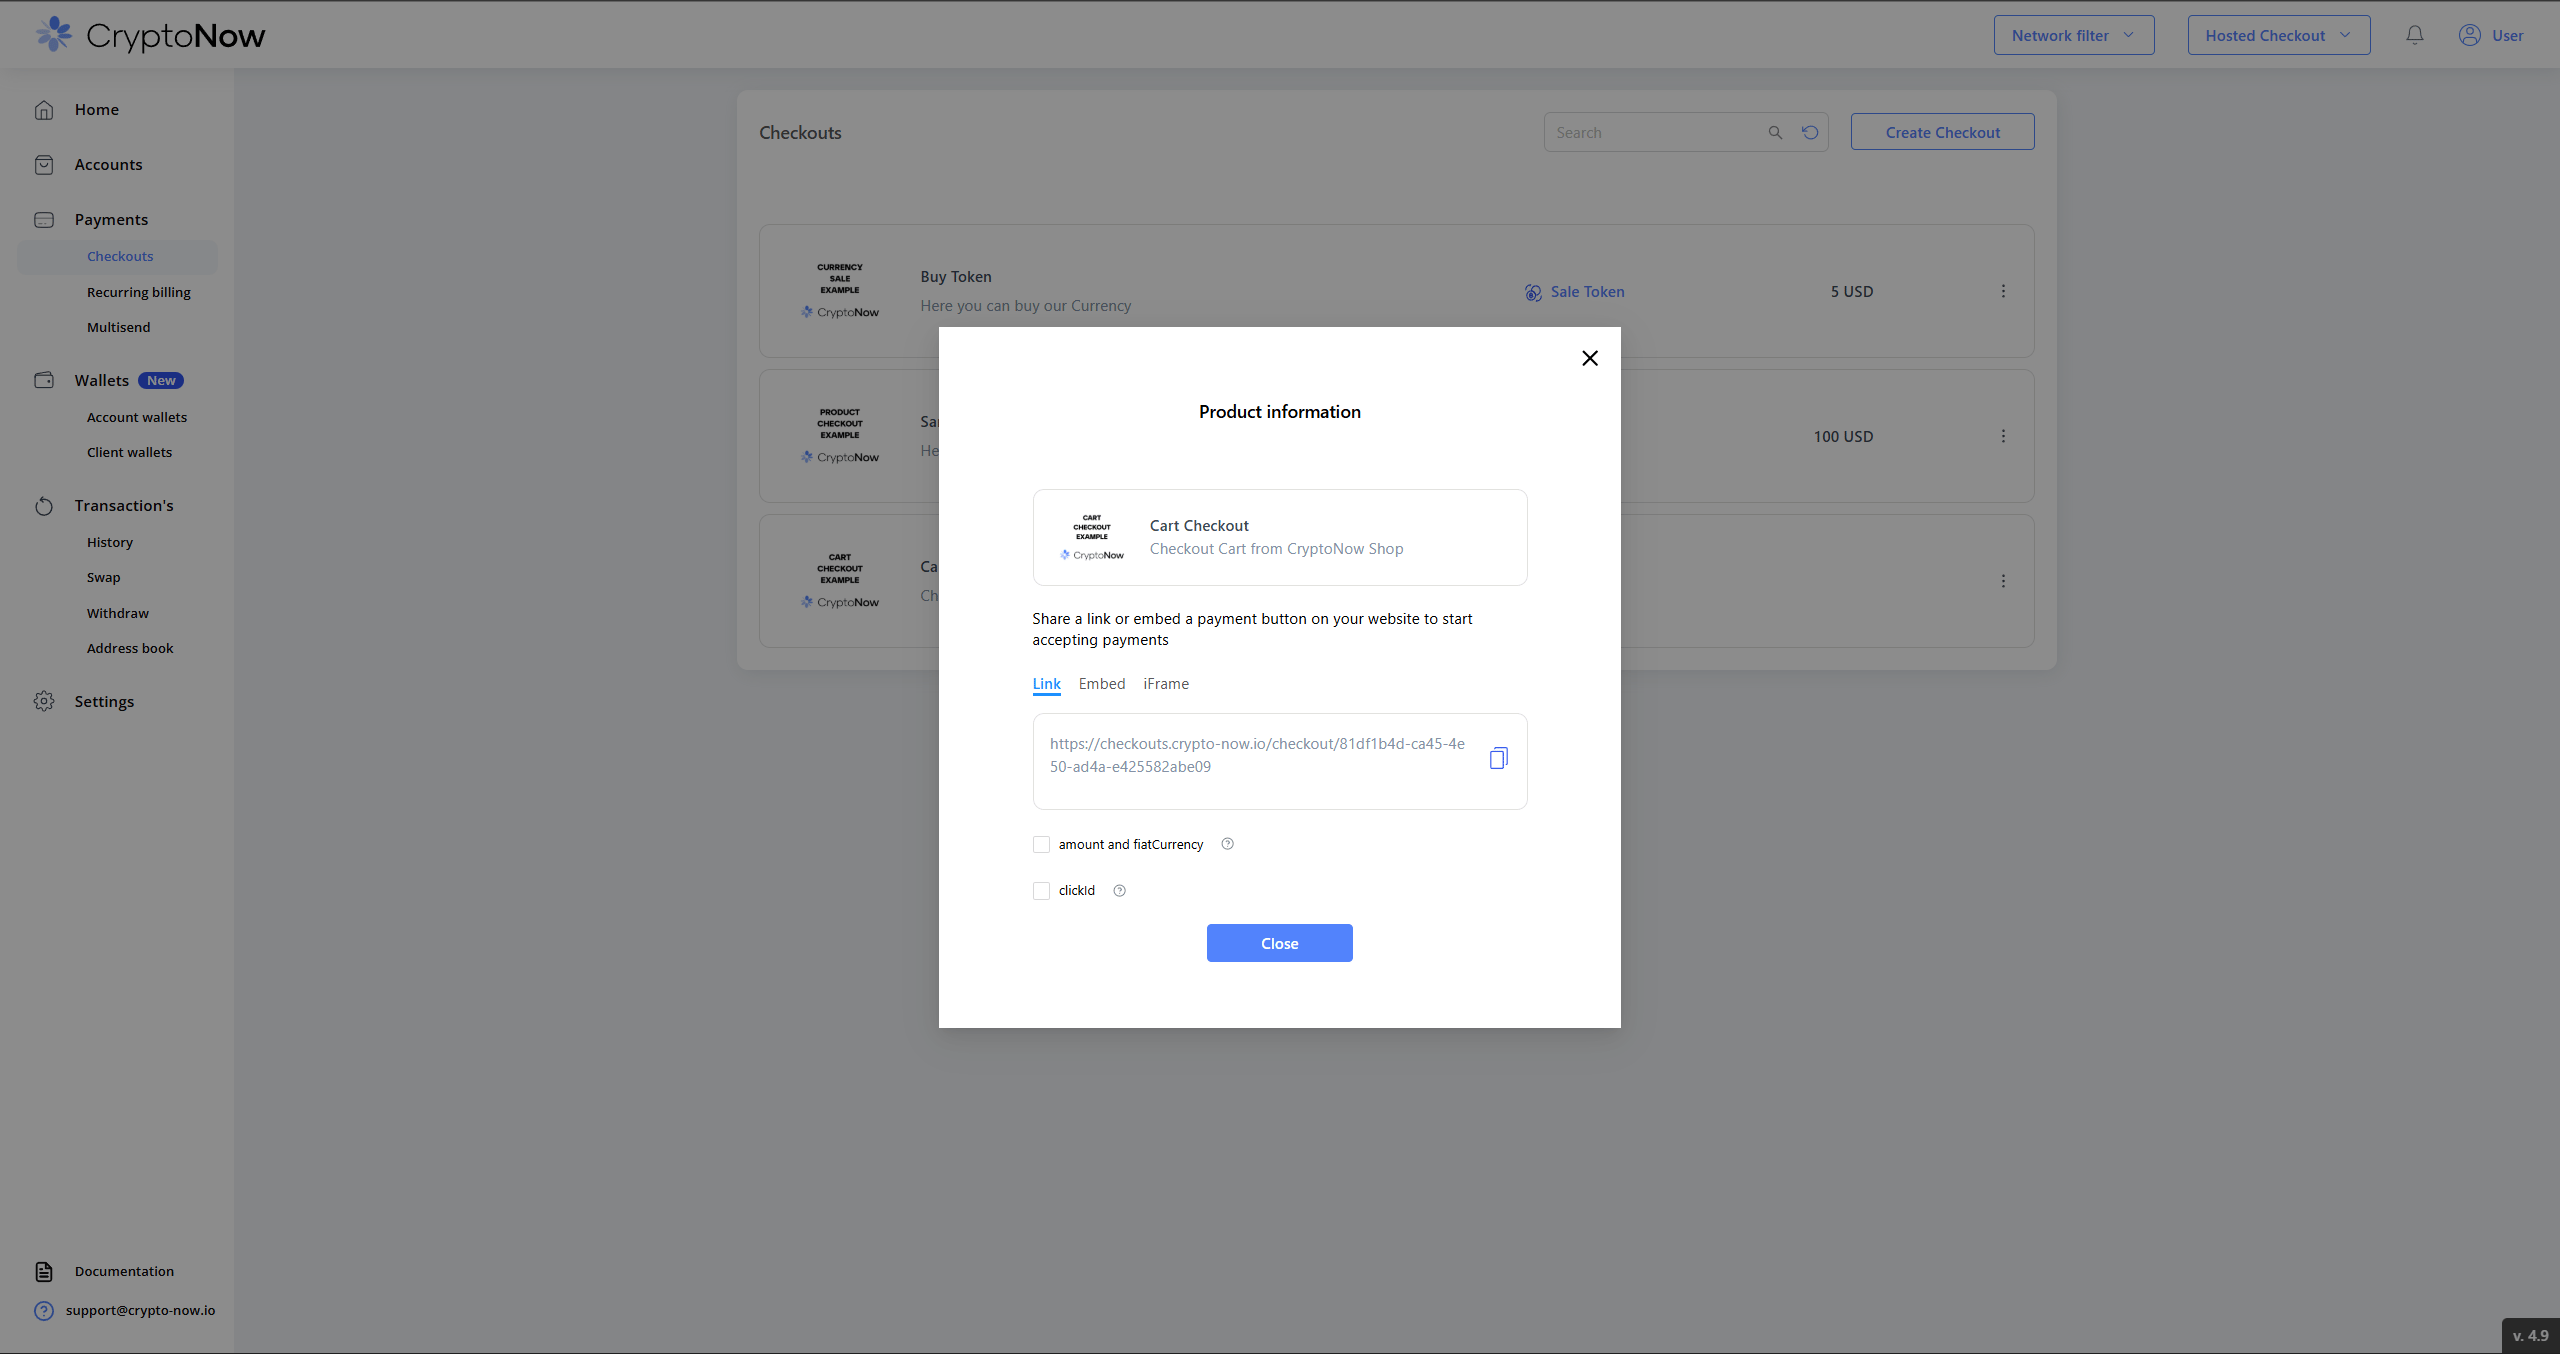
Its share panel adds an amount and fiatCurrency toggle — those two values travel as URL parameters on each charge, alongside the optional clickId.
Cart share panel with the amount & fiatCurrency parameter.
Need to embed the checkout on your own site instead of sharing a link? See Embed payments on your site.