

The structure in one line: you log in as a User. Inside, you have one or more Accounts — switch between them with the toggle at the top right. Each account holds two wallet groups: Account wallets (your own money) and Client wallets (where your customers pay in). A Client is any customer sending you funds.
Account wallets — your treasury
Account wallets hold your own funds — one wallet per coin and network, each with its own address. The amount shown is the real balance held in each. This is also where the account keeps the gas it needs to move crypto on your behalf.Client wallets — where customers pay in
Client wallets are permanent deposit addresses, one per client — the same address every time that client pays you.Funds never sit in a client wallet — every deposit sweeps to your Account wallets automatically. So a client wallet’s figure is total throughput over time, not a current balance.
Run more than one brand
Each brand can have its own account — up to five — with completely separate wallets and books. Switch between them with the Account toggle at the top right.Home — your dashboard
Home shows your total balance and every coin at a glance for the account you’re currently in.Next step
Create your first payment link
Now that you know the layout, take your first crypto payment.
See your treasury
Go to Wallets → Account wallets for the per-network view of your balances.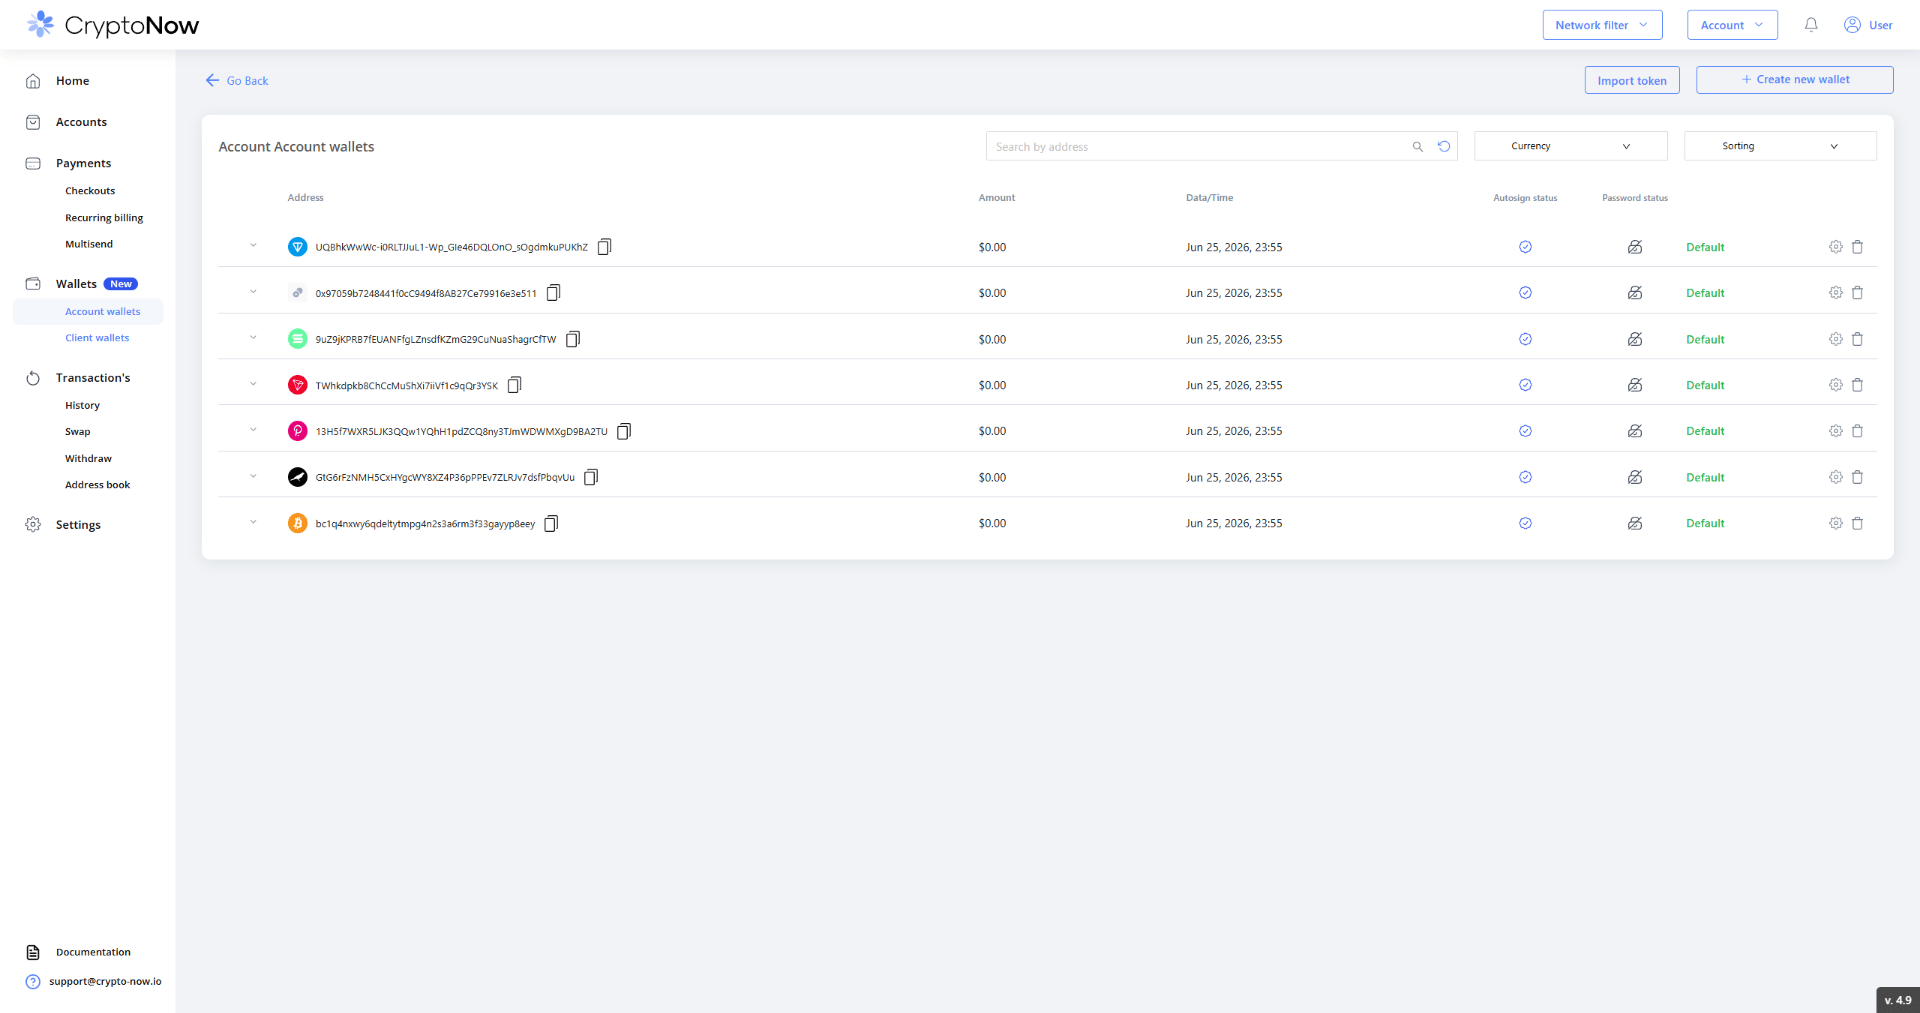
Account wallets — one per network, each its own address.
Fund gas
Open Receive on the native coin of a network you’ll use (e.g. Ethereum), then send a small amount of that token to the address shown — scan the QR or copy the address.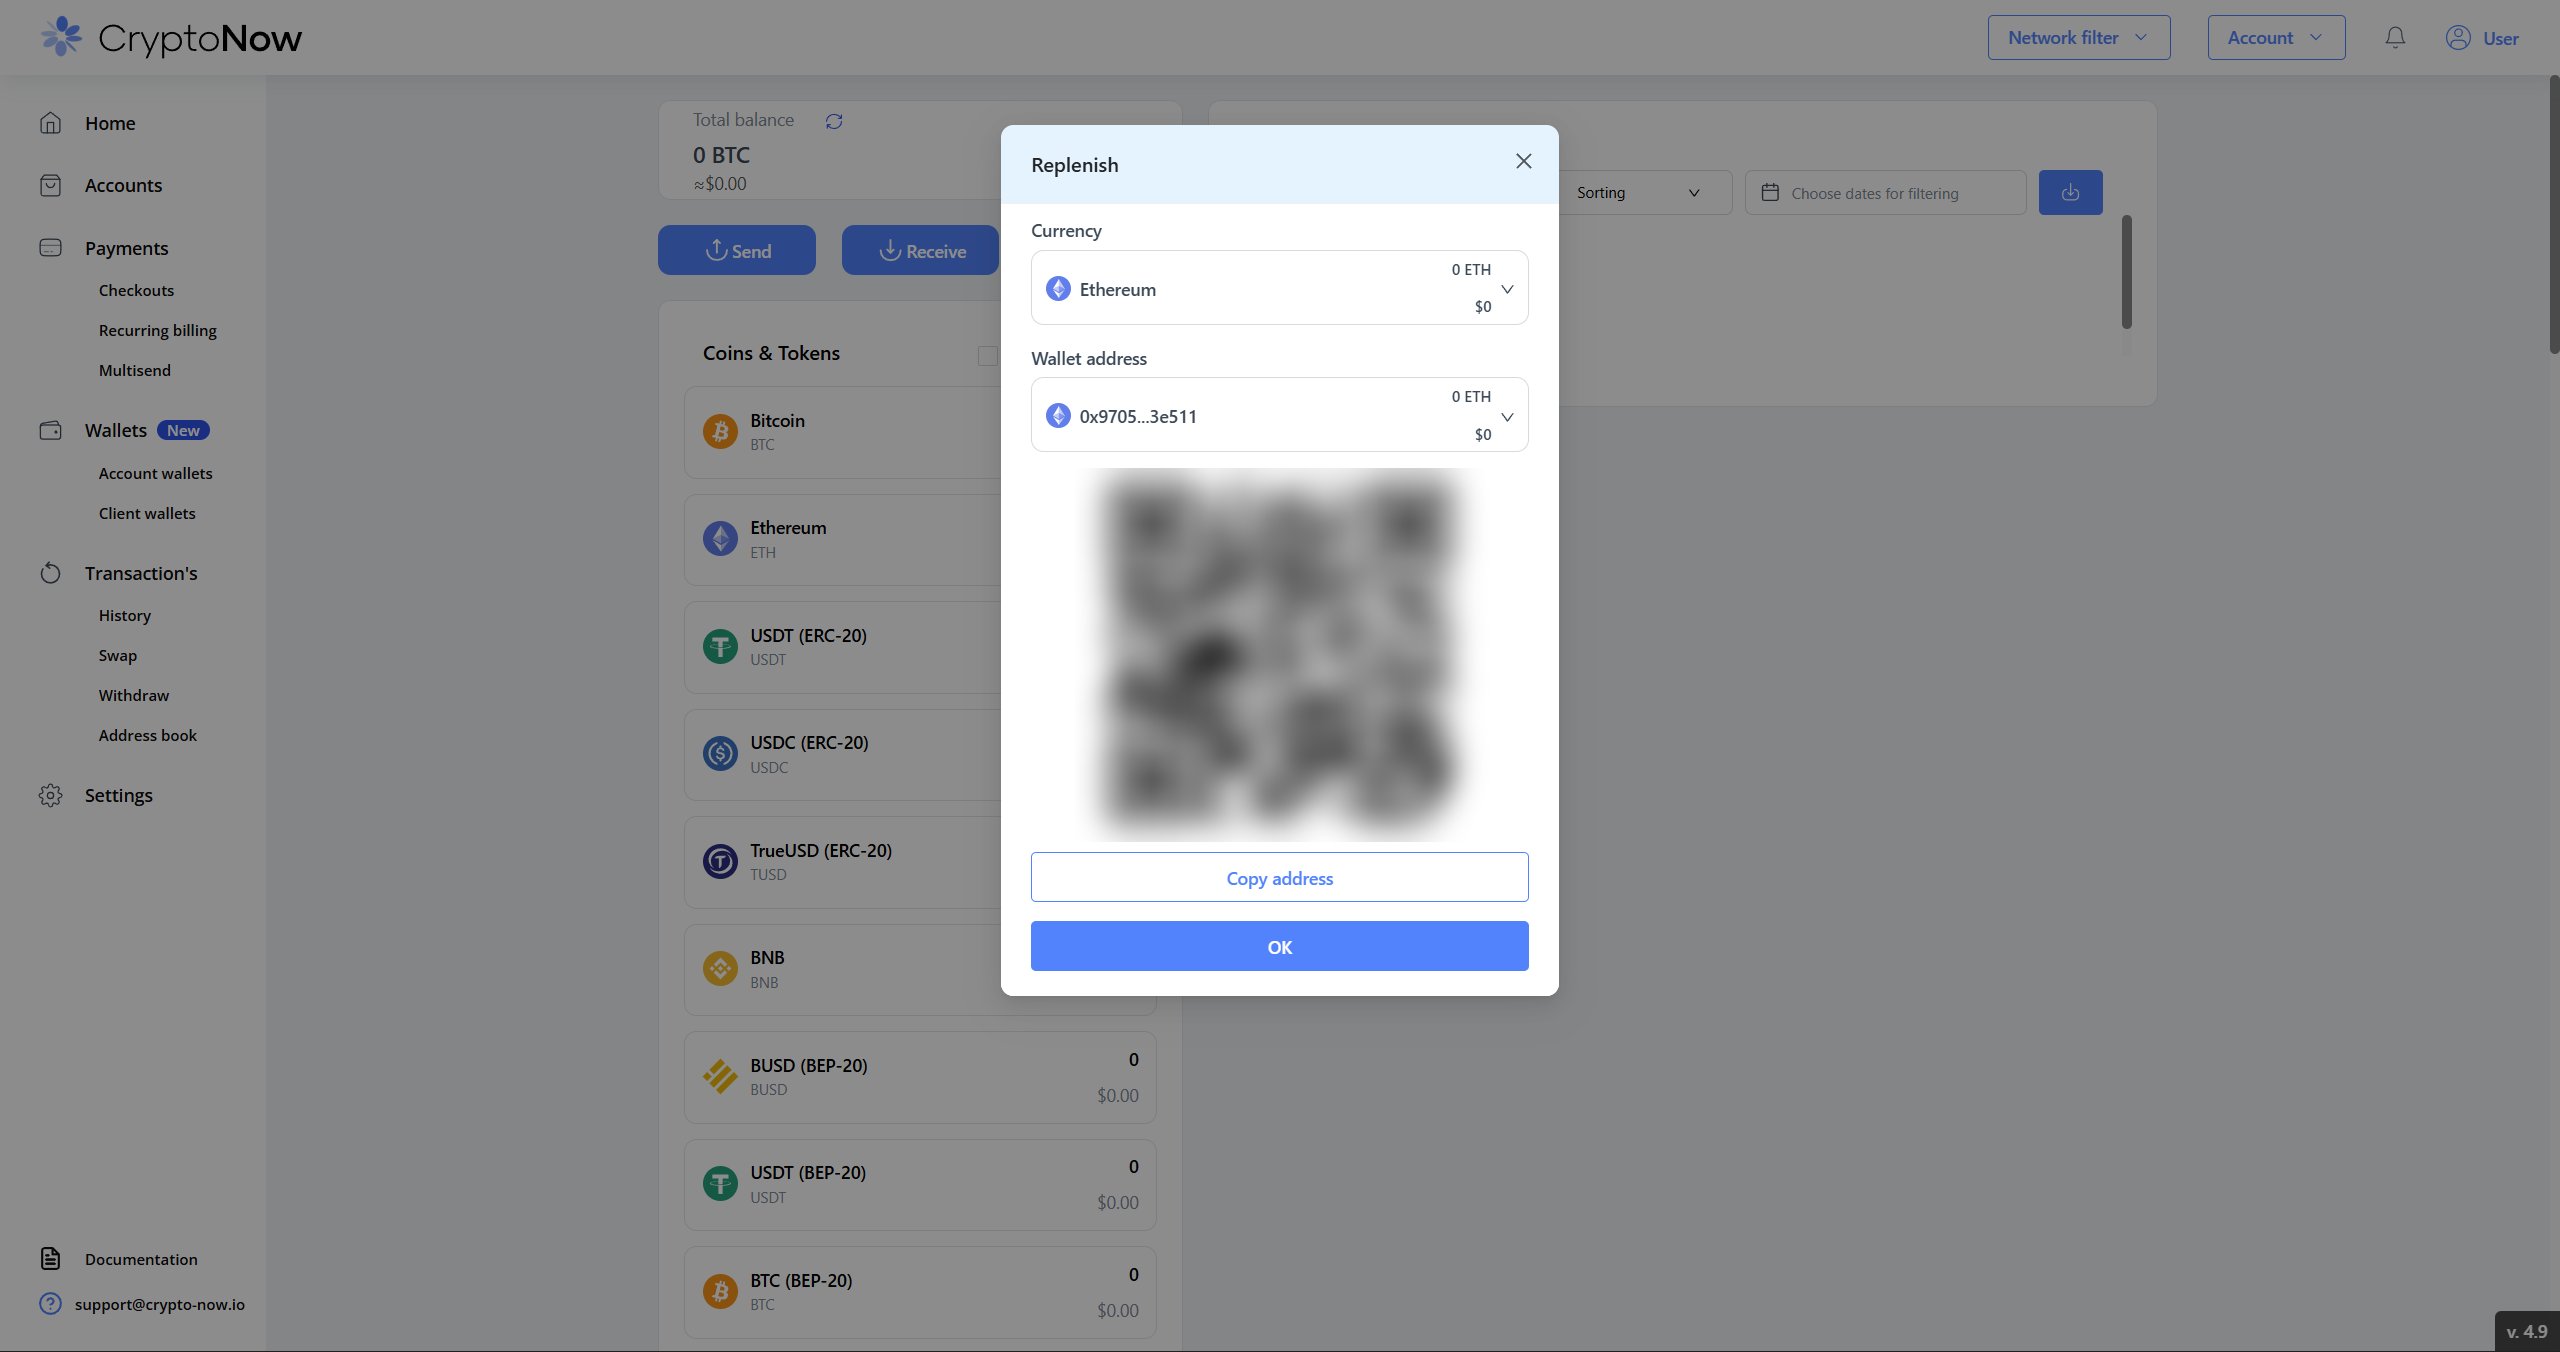
Send a little native gas to this network's account-wallet address.
Choose who pays gas
In Settings → Account Settings, the Miner Fee for withdrawal / replenishment pays toggles decide whether you (Me) or the customer covers the network fee. The same panel holds your Account fee percentages — your optional commission on withdrawals and replenishments.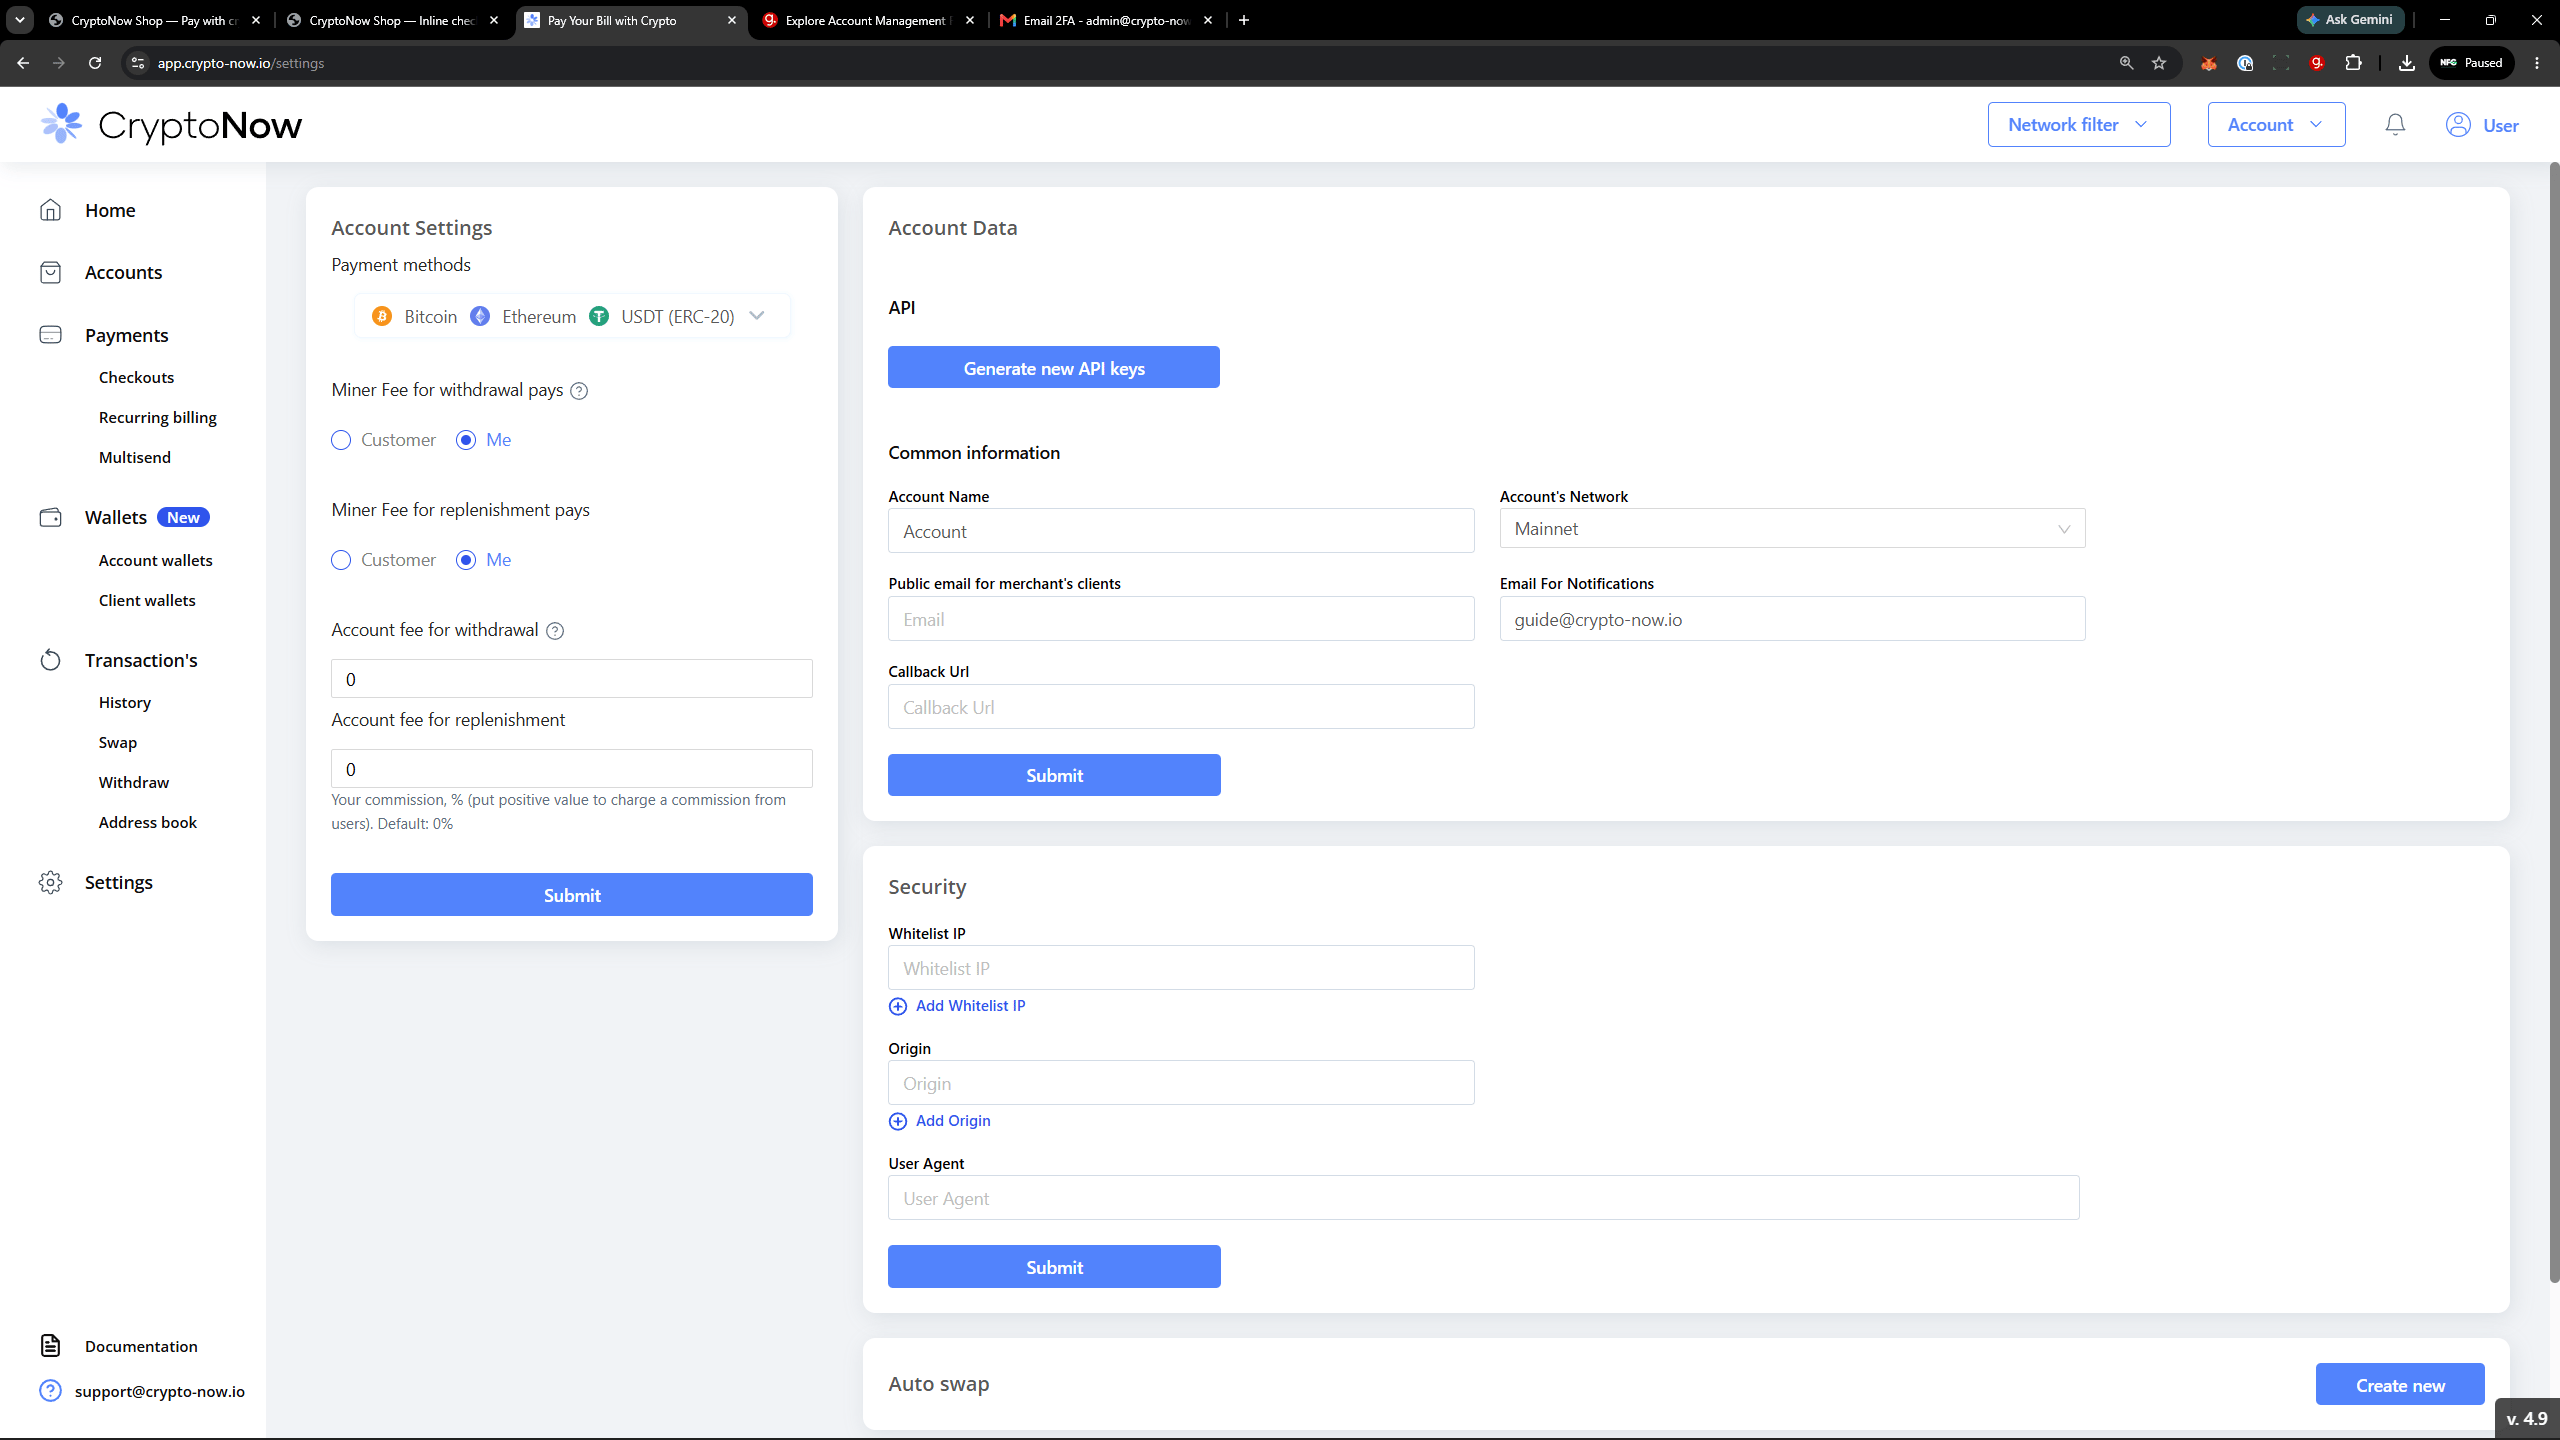
Set the gas payer and your account-fee percentages.