Confirm your email and switch on Email 2FA and Google Authenticator in CryptoNow. Both are required before you can view keys, withdraw, or move funds.
CryptoNow protects every money- and key-related action with two independent layers: Email 2FA and Google Authenticator. This guide confirms your email (a prerequisite) and turns both on.
Both layers are effectively mandatory. Email 2FA and Google Authenticator each gate viewing private keys, viewing API keys, withdrawing, moving funds, deleting a wallet or account, and login. They aren’t forced at first login — they’re enforced the first time you try to act. Enable both now so you’re not blocked later.
This is a separate toggle from Email 2FA. It lives in the Two-factor authentication section — not the Enable E-mail 2FA section above it. You need both.
1
Open the setup dialog
In the Two-factor authentication section, click Enable 2FA to open the setup dialog with the QR code.
2
Scan the QR code
In Google Authenticator on your phone, add an account and scan the QR code. If you can’t scan, enter the setup key shown beneath it manually.
3
Enter the 6-digit code
Type the current 6-digit code from Google Authenticator into the Authenticator Code field.
4
Finalize
Click Enable 2FA to confirm. Google Authenticator is now active alongside Email 2FA.
Set your backup phrase too. In the Backup Phrase section, click Start Backup to generate your 12-word recovery phrase. It’s created once, can’t be changed, and is the way to reset your password if you’re locked out. Write it down and store it offline — never in the browser or a screenshot.
Leave Autosign ON. Autosign is on by default and is load-bearing — disabling it breaks token checkouts, client-wallet sweeps, swap, and auto-swap. Don’t turn it off while hardening your account.
Using the API? You can further restrict public-API access by IP, Origin, and User-Agent allowlists in your account’s Security settings.
You can disable either layer later with the Disable 2FA button, but you’ll need to pass your current 2FA to do it. We recommend keeping both on — they’re required before any withdrawal or key action regardless.
Fund your account wallet for gas and learn who pays network fees on deposits vs. withdrawals.
CryptoNow doesn’t force two-factor authentication at sign-up, but it’s required the moment you do anything that matters.
Email 2FA and Google Authenticator are effectively mandatory. Both must be on before you can withdraw, move funds, view private or API keys, or delete a wallet or account. Set them up now so nothing blocks you later.
Everything here lives under Settings → Security.
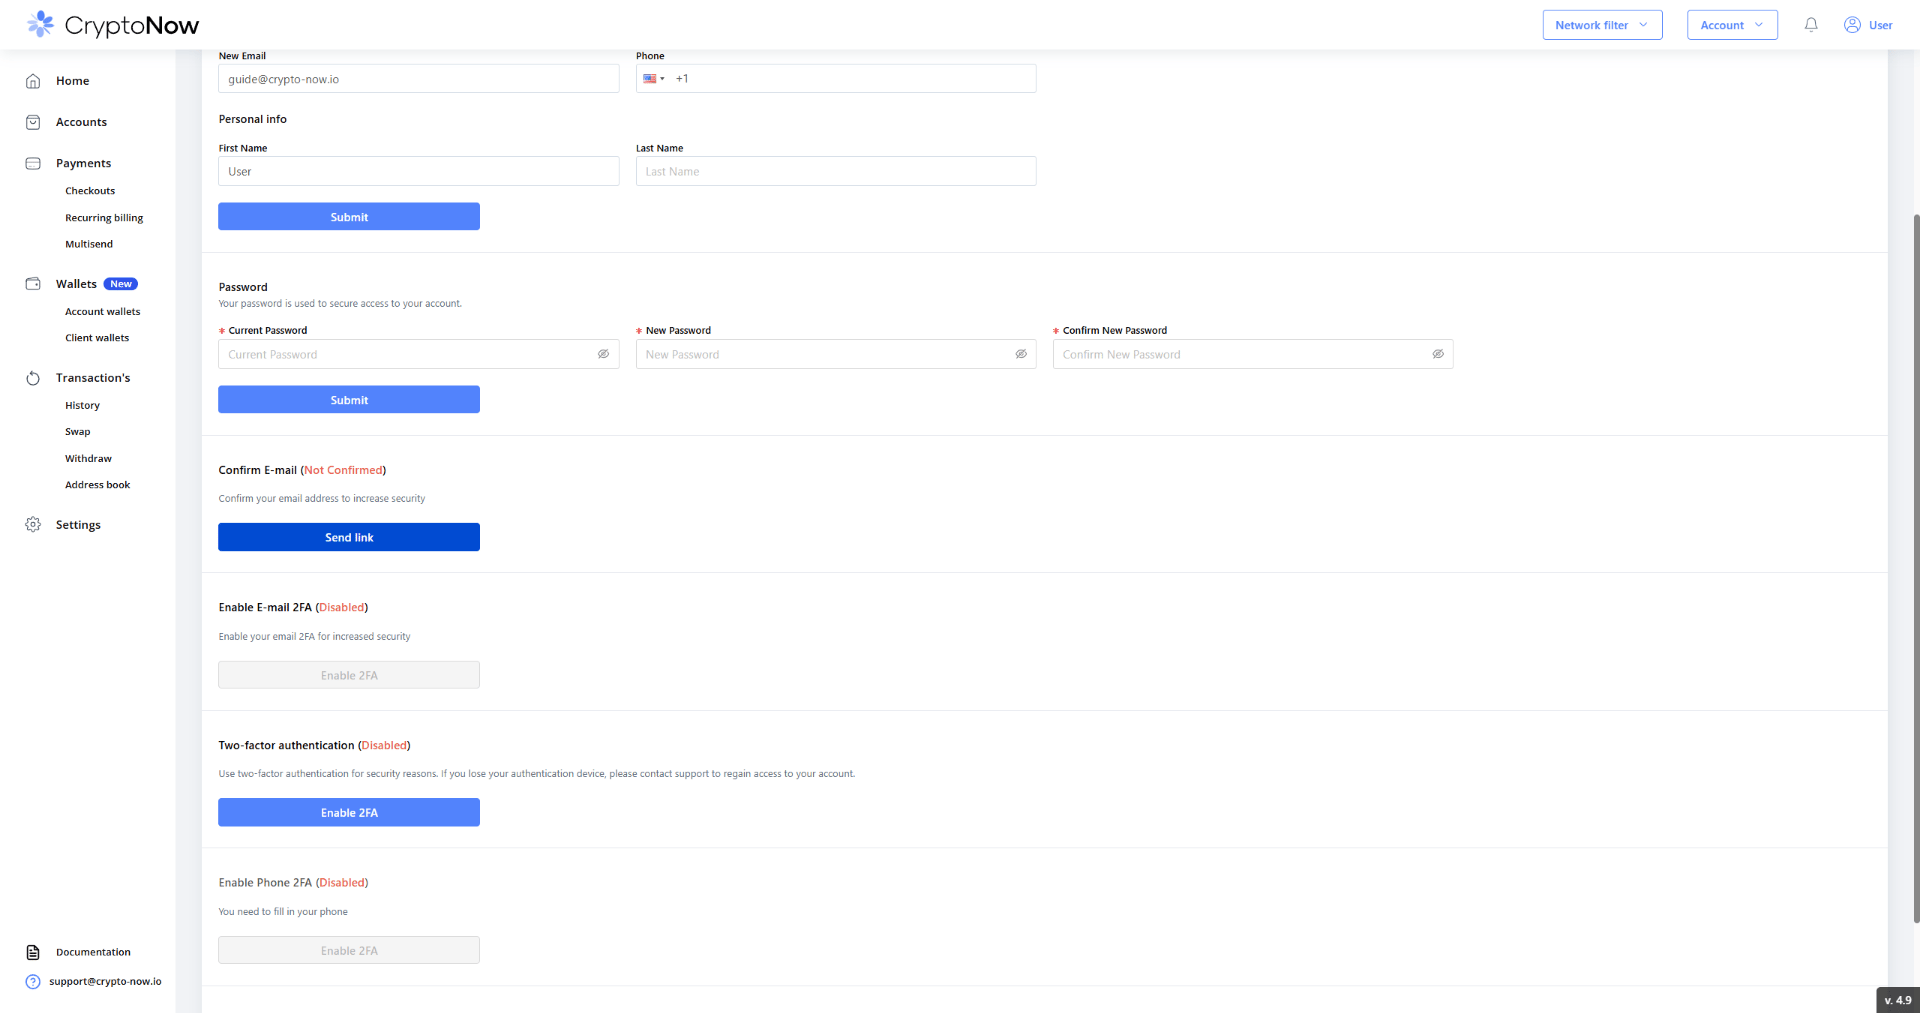
The Security section before setup — email unconfirmed, 2FA off.
1
Confirm your email
Under Confirm E-mail, click Send link, then open the message and confirm. The status flips to Confirmed.
2
Enable email 2FA
Click Enable 2FA under Enable E-mail 2FA. From now on, a code is emailed to you for sensitive actions.
3
Enable Google Authenticator
Under Two-factor authentication, click Enable 2FA, scan the QR code with Google Authenticator (or any TOTP app), and enter the 6-digit code to confirm.
Scan the QR with your authenticator app, then enter the code.
Store your authenticator backup somewhere safe. If you lose the device, regaining access means contacting support.
4
Save your backup phrase
Under Backup Phrase, click Start Backup and write down the 12 words in order, offline. This recovers your account if you lose your password.
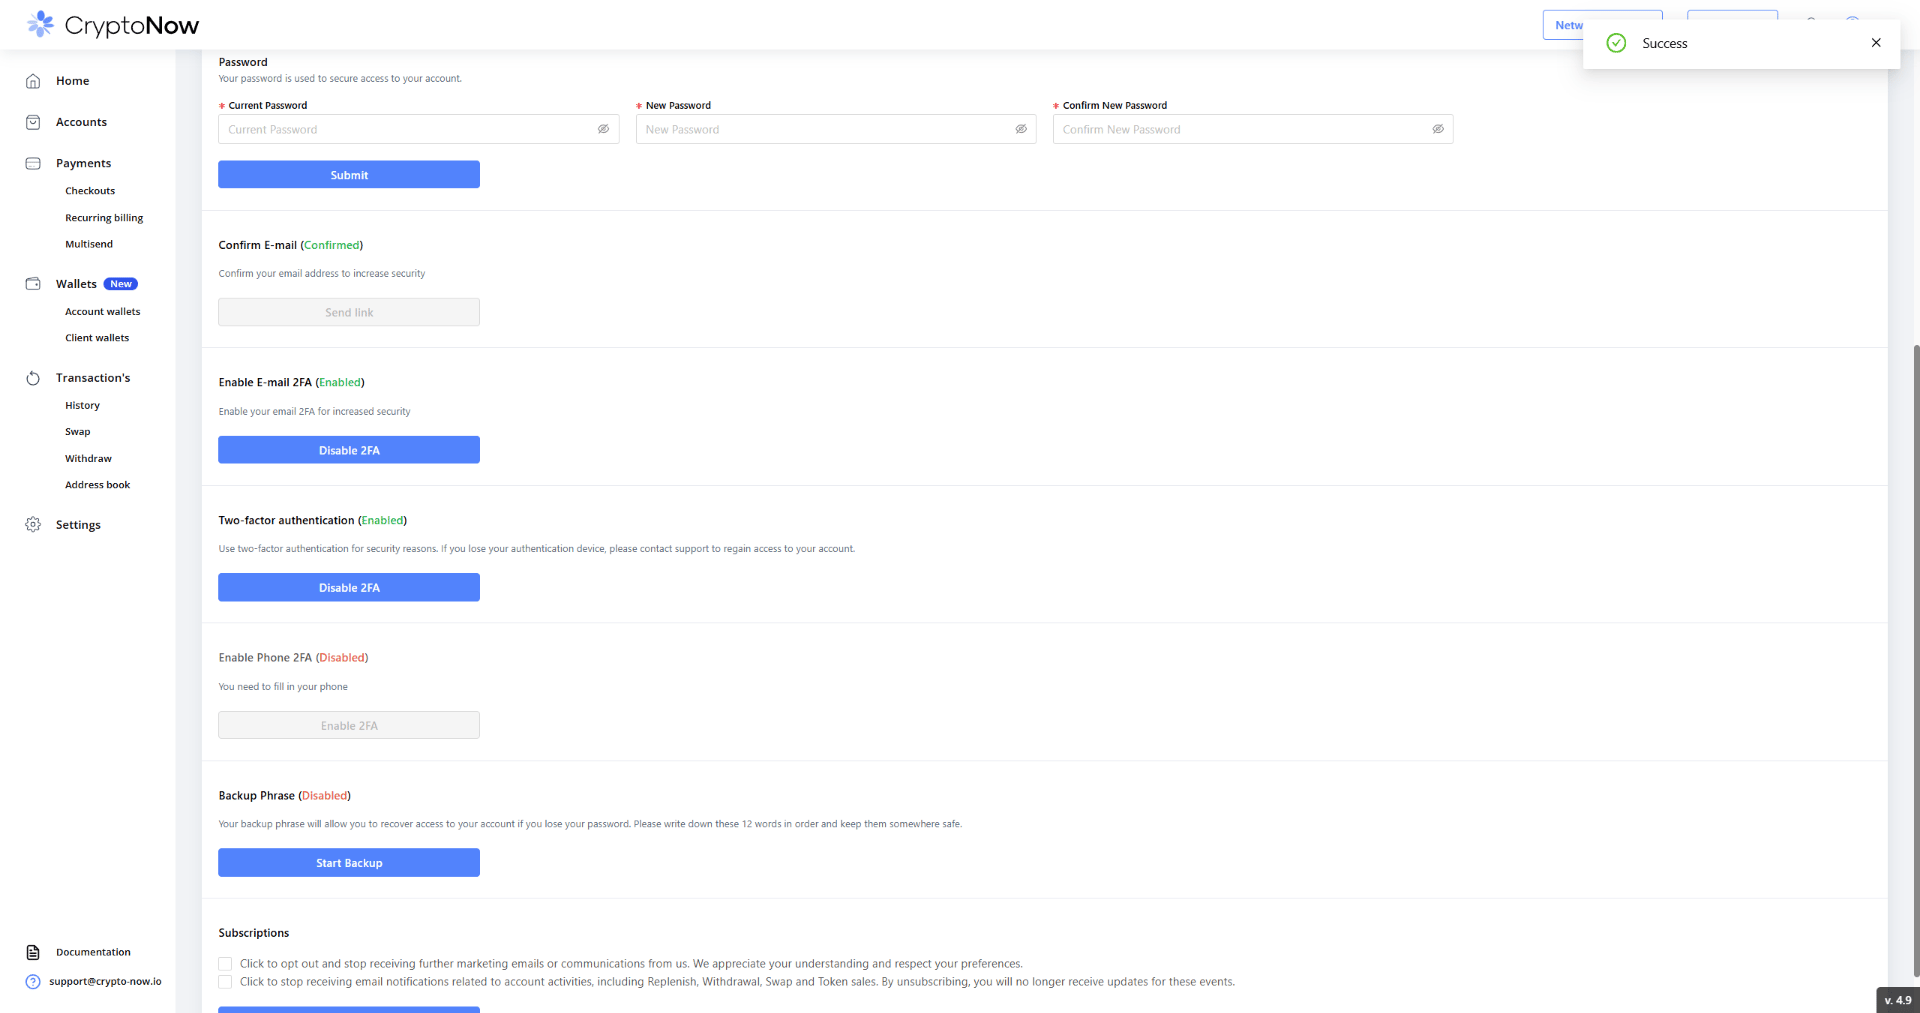
Both factors on, your account looks like this:
Email 2FA and two-factor authentication both enabled.
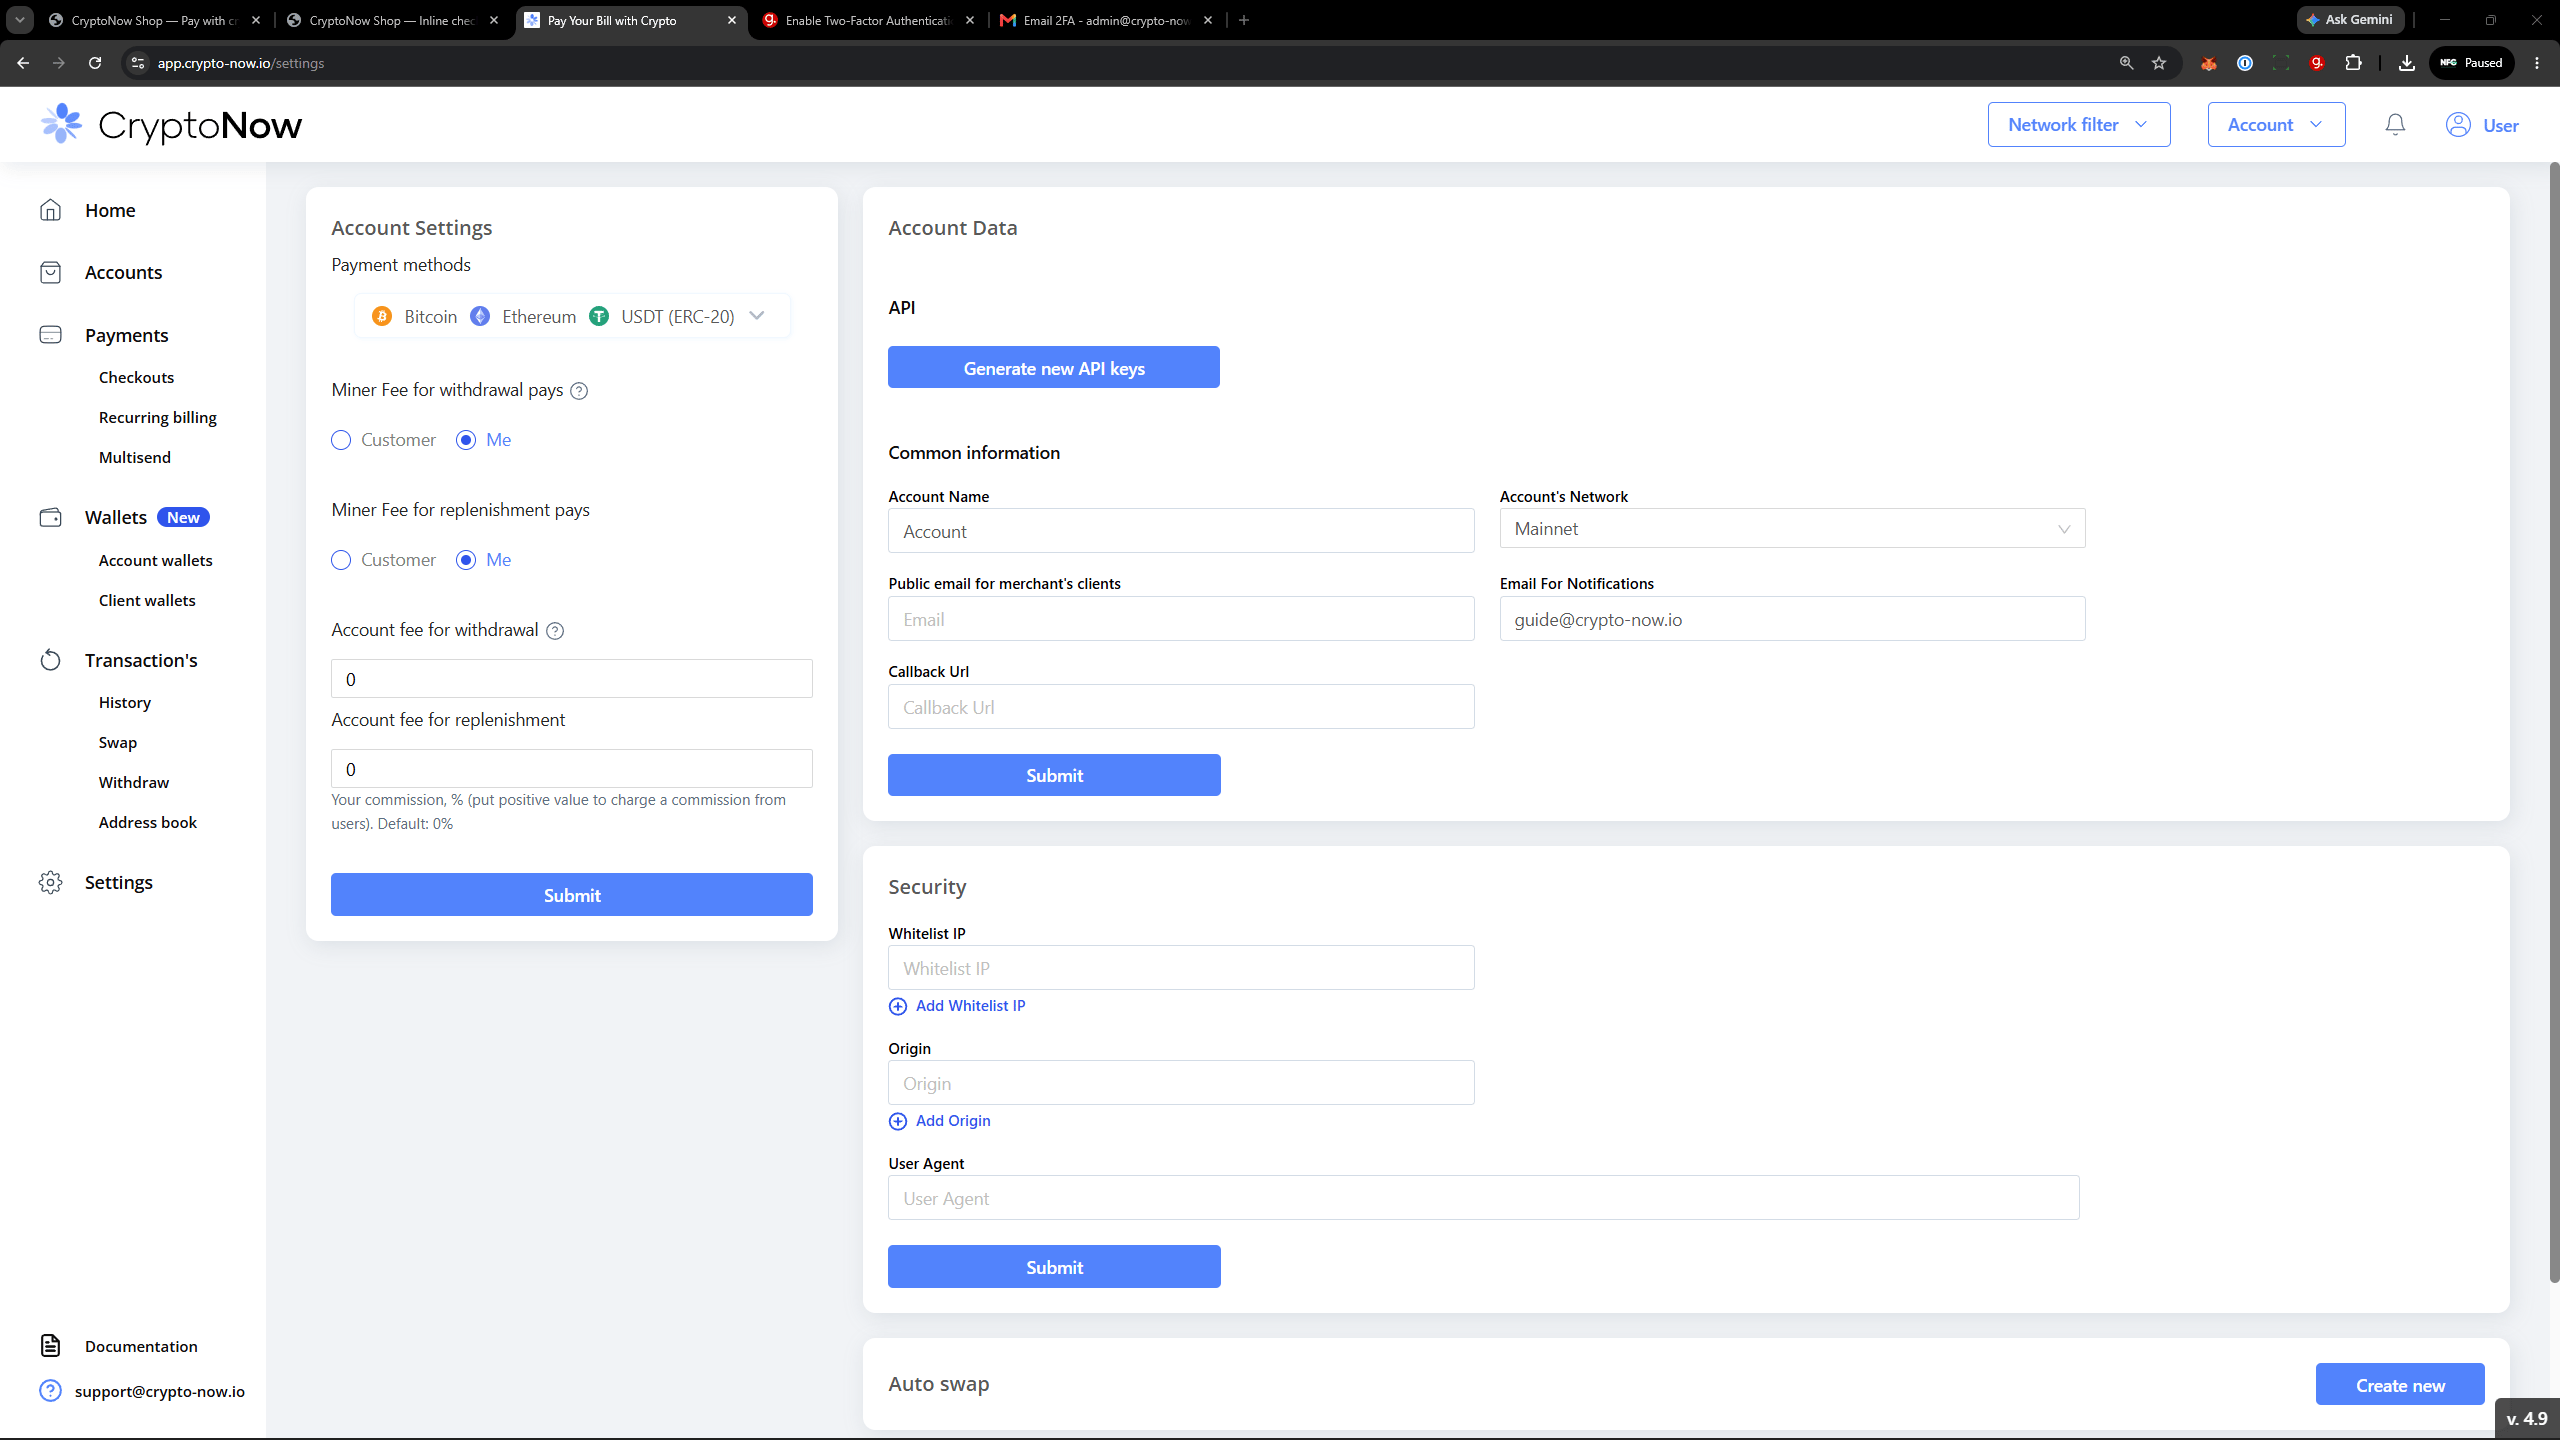
If you’ll use the API, lock it down under Settings → Security by allowlisting the IP, Origin, and User-Agent that may call it. Skip this if you’re not building an integration.
Allowlist the IP, origin, and user-agent that can use your API keys.
One thing not to touch: leave autosign on. It’s on by default and signs your checkouts, sweeps, and swaps automatically — turning it off breaks those flows.